Friday, June 18, 2021

Crumpet version 2 クランペット 第二弾

After we made blini using a newly rediscovered cast iron pan (supposedly called a "platar"), we challenged ourselves to use it to make crumpets. The last attempt at crumpets was less than successful; those crumpets did not develop the "hole-y" characteristic which makes a crumpet crumpet. This time with a new recipe and the newly rediscovered cast iron pan, we succeeded in making perfect crumpets. We served them with melted butter and a small amount of honey.


The batter is rather runny almost the consistency of pancake batter. In our previous version we used English muffin rings, as recommended in the recipe we were using, but the batter seeped out at the bottom of the ring. We had no such problem with our cast iron pan.


The new recipe had instructions as to how to control the heat to develop multiple holes as shown in the second and third pictures. You can see that while cooking, bubbles developed and then popped creating nice holes.


Ingredients:

1 times the recipe (about 14 crumpets)
300 g. (2 cups) AP flour
400 ml. (1 1/2 cups) warm water
1 tsp. Salt
1 tsp. Sugar
2 tsp. Baking powder (The recipe said baking soda doesn’t work as well)
2 tsp yeast
2 tbs. warm water

1 1/2 times the recipe (about 21 crumpets)
3 cups AP flour (2 cups AP and 1 Cup +2 Tbs. Cake flour) 
600 ml. warm water
1 1/2 tsp. Salt
2 tsp. Sugar
3 tsp. Baking powder (The recipe said baking soda doesn’t work as well) 
3 tsp yeast
3 tbs. warm water

2 times the recipe (this is the recipe I’ve been using) 
600 g. (4 cups) AP flour (or 2 cups AP and 2 cups + 1/4 cup  Cake flour) 
800 ml. (3 cups) warm water (or buttermilk or regular milk)
2 tsp. Salt
2 tsp. Sugar
4 tsp. Baking powder (The recipe said baking soda doesn’t work as well) 
4 tsp yeast
4 tbs. warm water (1/4 cup)

(Use second to largest scoop not completely filled)

Directions:
Bloom the yeast in the warm water. Put the flour, water and salt in the bowl of an electric mixer and beat on speed 5 for 1 minute until smooth paste forms. Add the yeast mixture, sugar and baking powder and mix on speed 5 for another 30 seconds. Cover with cling wrap and put in a warm place for 15 to 30 minutes. The surface should get foamy but it will only increase in volume by 10 to 15 %.

Pre-heat the platar and coat the cups with melted butter. Using a small ladle scoop the batter into the cups. Heat control is key to crumpet success. Stronger heat is needed to begin with to get the holes bubbling. Cook on the higher heat for about 1 1/2 minutes until bubbles start appearing. Then lower the heat so the crumpet cooks through without burning the base, but strong enough to make the bubbles pop. Cook on the lower heat for about 1 minute until the bubbles start popping. Bubbles will start to pop around the edges first then in the center. Finally, lower the heat further and continue cooking for 2 1/2 to 4 minutes until the surface is set and it is clear no more bubbles will be popping. (According to the recipe, at this stage the final bubbles could be popped with the help of a skewer.)  Some wisps of smoke from the butter around the rings may appear. If there is a lot of smoke it means the skillet is too hot. Flip them over to cook the other side for 20 to 30 seconds to give it a blush of color. Cool on a wire rack. 

These crumpets were much better than the first batch we made. They got even better after the second day. We tasted them just out of the pan and the outside was crunchy but the inside was kind of wet and doughy. We initially thought they may not have been cooked through. But by the next day the insides had firmed up and were nicely chewy. The flavor was nicely accented with the taste of browned butter. We toasted them in the toaster oven and served them with melted butter and some honey. Mighty fine! 

Tuesday, June 15, 2021

Sashimi from Japanese grocery store 日本食料店からのはまち刺身

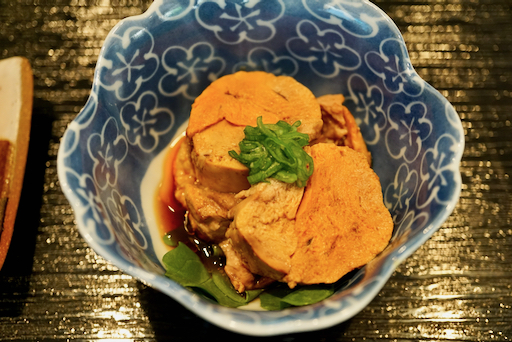
I have not physically gone to a grocery store including our Japanese grocery store for almost one year because of the COVID. We are mostly satisfied with our main grocery store delivery service but especially for Japanese or specialized  grocery items, nothing replaces shopping in person. So, now fully vaccinated for sometime, one weekend, I decided to visit our Japanese grocery store and really realized nothing replaces being there and selecting items you are buying. I got so many good Japanese food items (I got a bit carried away). After coming back from the store, we had a lunch of grilled mackerel and rice balls. They were made at the store and were still warm fresh out of their kitchen. I made a miso soup (tofu, shimeji mushroom and abra-age 豆腐、油揚げ、ぶなしめじ) to complete our lunch. This was a very satisfying meal. In the evening, we had "Hamachi" はまちの刺身 yellowtail sashimi which I have not seen  previously at our Japanese grocery store. Since we had a frozen "Ankimo" 鮟肝 which I bought at the Japanese grocery store last time I was there, over a year ago, I decide it was the time to serve it. So, we started the evening with Hamachi sashimi and ankimo with ponzu sauce. I also got a special "Sashimi" soy sauce 刺身醤油 for this.


The hamachi in the picture one serving which is half of the tray I bought. So it is a good amount.  I served cucumber in vinegar dressing and wasabi from the tube. This was quite descent yellowtail sashimi.


I usually serve Ankimo with soy sauce and orange marmalade but the jar of marmalade we had was unopened but expired several years ago. So I served it with Ponzu sauce and green part of scallion as a garnish.


We somehow feel really good that we can get Japanese food items from our Japanese grocery store again. It made us feel like there may be light at the end of this covid tunnel. We really like to start our evening with a little bit of sashimi.

Saturday, June 12, 2021

Eggplant stir fried with sweet miso 茄子の味噌炒め

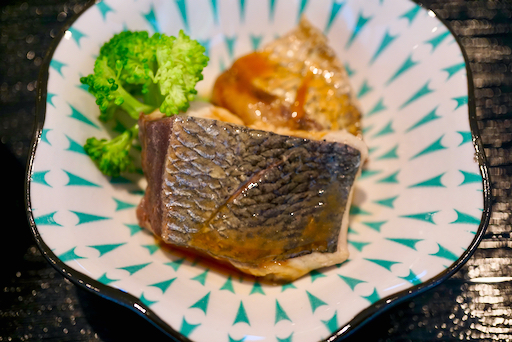
 This is the eggplant dish I made with the last remaining Japanese (Asian) eggplant we recently got from Hmart (left in the first picture). I served this with bluefish simmered in miso ブルーフィッシュの味噌煮 (right).


Since oil and eggplants go well together, first frying it  in oil and then simmering in sauce is the most usual way of preparing eggplants. That what I did with this dish; the eggplant was first fried and then simmered in the miso flavored sauce. I garnished it with roasted sesame seeds.


This was accompanied by another miso flavored dish; bluefish simmered in miso.


Ingredients for the eggplant (makes about 8 of the small servings in the first picture):
1 Japanese eggplant (this was a big one about 10 inch long), stem end removed, skin peeled in strips and cut into bite sized pieces ("Ran-giri" 乱切り) then soaked in salted water to 10-15 minutes.
2 tsp neutral oil (I used light olive oil) for frying
1 tsp grated ginger root

For miso seasoning (Dissolve the below in a small bowl)
2 tbs sake
2 tsp red miso
2 tsp mirin

Directions:
Sauté the eggplant in a frying pan with the oil on medium flame until the oil is absorbed and the eggplant is soft (few minutes).
Add the ginger and then the seasoning and stir for a few minutes.
I served with white sesame seeds as garnish.

Since oil and eggplant go together well, this is a nice dish but we like the eggplant in seasoned broth 茄子のお浸しbetter. It is easier to make to boot and probably, is healthier since  no oil was used. 

Wednesday, June 9, 2021

Bluefish "sanga" fish cake ブルーフィシュのサンガ

We are getting fresh whole fish from Hmart which has a wider selection at lower prices than other grocery stores in the area. We particularly like mackerel with bluefish as a very good mackerel substitute. Bluefish like mackerel is not considered a particularly prized fish because of its very strong flavor. There are various ways to cook it that turn its flavor into an asset which is why we like it. For that reason, bluefish or mackerel are often smoked in the US. I often simmer either fish in miso and ginger which reduces the fishiness. This time, we got a fairly large bluefish. Since this was a fairly big fish, I ended up with a good amount of fish meat scraped off the bone and tail. I was thinking about making “tsumire” ツミレfish balls cooked in broth but I came up with this dish called “Sanga” さんが which is a type of fisherman’s dish famous in Chiba prefecture 千葉県.  This is usually made from types of fish called “Hikari-mono” 光り物 including mackerel and sardine which have shiny blue skin and tend to get spoiled quickly and can have strong or “fishy” flavors especially when not fresh. Since bluefish to me is in the same ilk, I decided that this dish should  work. This dish is essentially a cooked version of  “namerou” なめろう. The main flavorings are miso and ginger. Here, I put perilla leaves on one side of the fish paddies and included a side of sugar snaps in salt broth スナップ豌豆の塩びたし.


This is the cross section. Some of the fish meat were not completely mashed. The yellow and white bits are chopped ginger and scallion.


Ingredients (made 6 small patties).
Blue fish meat scraped off the bone, tail and other parts, hand chopped using a heavy Chef’s knife, about 150grams (a guess)
Red miso 1 tbs
Ginger cut finely, 1 tsp plus ginger juice from grated ginger (about 1/2 tsp)
Scallion, 4 stalks, finely chopped
Potato starch (katakuri-ko) 2 tsp
Dark sesame oil 1/2 tsp
Perilla leaves (4-6 depending on the size)

Directions:
Mix all ingredients well except for the perilla leaves.
Divide the mixture into 6 equal portions.
Lightly oil hands and make the portions into flat discs and place the perilla leaves on one side (#1) in the third picture).
On a medium low flame with a small amount of neutral oil, first cook the side without perilla leaves until nicely browned (#2).
Flip it over and cook the other side for another 1 minute or so or until done (#3 and #4).


 This is a good way to use scrap fish meat from the bluefish. The double doses of ginger juice and finely chopped ginger add ginger flavor but not overwhelmingly so. The miso flavor and sesame oil are a good combination. I am not sure if I can taste the perilla leaves. It warmed up nicely by microwaving.

Sunday, June 6, 2021

Raised Buckwheat Blini cooked in a “platar”

After making the blueberry buttermilk pancakes, my wife was leafing through the pancake section of the newer (1997 version) “Joy of Cooking” (JOC) cookbook when she found a reference to something called a “platar”. It was accompanied by a drawing of the device and the description; “a platar is a cast iron flat pan with seven round indentations each about 3 inches wide and 1/2 inch deep especially for making blini or other small pancakes”. A bell went off in her head. She immediately recognized the platar as the cast iron pan that has been floating around with our other cast iron griddles and frying pans for years. (Shown in the picture below.) 


We have had it for so long we are not sure how we acquired it and had no idea how it should be used. We vaguely thought it could be used to make biscuits but after some experimentation years ago we discovered that didn’t work. So it resided, taking up room, at the bottom of the stack of various sized cast iron frying pans in a drawer under the stove. She was absolutely delighted to finally find the purpose of the pan as well as the blini recipe on the next page of the cookbook. So this was our project one weekend.


Digression alert: At one time, we were into caviar and we made blini many times. We already had our platar at that time but obviously we did not know its purpose so we made the blini in a frying pan. By-the-way, we looked up (=Googled) the word “platar” and the only reference we could find was a listing in a forum where somebody who, like us, had read the section about platar in JOC asked what it was. The answers appear to suggest nobody knew. Although we could not find anything with the word “platar”, we did find a cast iron skillet that lookedexactly like our platar at Amazon.It was called “SIMLAY CO. Cast Iron Baking Pan”. The advertisement said it could be used to make many things; muffins, biscuits, eggs. Spoiler alert: We tried that years ago...somewhat less than successful. 

We did not have caviar the weekend we used the platar, but we did have "Ikura" salmon roe so we used that to top the blini. (We do not stock caviar but we do try to keep a supply of "Ikura' in the freezer).  The second picture shows the final (blini, sourcream, egg, ikura) dish with a garnish of chopped chives and marinated strawberries that we served that day for lunch. 


We had this with our usual second cup of coffee for the day; "macchiato". (The first cup was cappcino or more like cafe latte). 


I am sure there must be many interpretations of macchiato but our interpretaion is a single shot of espresso topped with 1 tsp. of frothed cream.


As usual my wife made the batter for the pancake and I cooked it. Since I have never used a platar, it was a learning experience. The blini came out better in the later batches. I ask my wife to provide the recipe.


Ingredients:
For Blini (makes about 21 blini)
1 1/2 cup milk
4 Tbs. (1/2 stick) butter
2 tsp. yeast
2/3 cup AP flour
2/3 cup buckwheat flour
2 Tbs. sugar
1 tsp. salt
3 large eggs, lightly beaten

For Blini (recipe X2) (mix in the 6 cup pyrex mixing cup so the batter can be poured rather than scooped into the cooking cups.) 
3 cup milk
8 Tbs. (1 stick) butter
4 tsp. yeast
1 1/3 cup AP flour
1 1/3 cup buckwheat flour
4 Tbs. sugar
2 tsp. salt
6 large eggs, lightly beaten

For topping (everything is to taste and depends on the number of pancakes being served. Also anything can be used. This is just what we came up with.)
sour cream (to taste)
2 eggs, scrambled
1 Tbs. Ikura (salmon eggs) or caviar
Chives finely chopped

Note: Use smallest ladle, Don’t make them too thick.  (Or conversely make them thick enough that they can be cut in half horizontally. That will shorten the cooking time).


Directions:
For the Blini: Melt the butter in the milk. Let it cool to about 105 to 115 degrees. Mix the dry ingredients (yeast through salt) in another bowl. Pour the cooled milk mixture over the dry ingredients mixing until just combined. Cover the bowl with plastic wrap and let it rise in a warm place until doubled in volume (about 1 hour) (#1 in the 3rd group of pictures). Once it has risen either make the pancakes immediately or refridgerate covered for up to 24 hours. (We made the batter after dinner and refridgerated it over night). If refridgerated let it stand at room temperature for 20 minutes (#2). Then deflate the batter and whisk in the  eggs lightly beaten.

Now, I am providing the details of how I cooked blini in the platar. This is for our future reference because this requires some finesse. First, I took out the planar and washed it with hot water (no soap), dried it by heating it on the stove and coated each of the 7 wells with olive oil using a paper towel (#3). I preheated the pan on low flame for 5 minutes then used a small ladle (second smallest ice cream scoop) add the batter, half filling the wells (#4). I continued to cook until the surface of the pancake showed bubbles and looked dry (5-7 minutes). Then came the challenge of flipping them. According to my wife,  the directions in the JOC said flip the pancakes over using a skewer. But that proved entirely too simplistic. After some experimentation I came up with a method of loosening the blini by running the tip of a dinner knife around the perimeter of the well, then inserting the knife tip under the bottom of the blini to pry it loose. Then with the knife under the blini and a bamboo skewer inserted into the top I flipped it (#5). As I repeated the process I got better and could flip the pancake without damaging the side. But I noticed that the 6 wells surrounding the center well had uneven heat and only the outer half got browned (#5). So with the next batch, I released the blini before they were ready to flip and turned them180 degrees in the well then cooked them for a few more minutes before flipping them over. In the next batch, the first side was more evenly browned (#6).  In any case, when all was said and done, we had at least a few perfect blinis (#7= top and #8=bottom).


I topped one of the “perfect” blini (#1) in the 6th set of pictures, with sour cream (#2), scrambled eggs (#3), "Ikura" salmon roe and finely chopped chives harvested from our herb garden (#4). 
 

This is the height of decadence. The blini had a soft thick texture and a very pleasing robust rustic flavor from the combination of buckwheat flour and yeast. The sour cream, eggs and salmon caviar were an excellent combination with complementary creamy texture. The burst of saltiness from the ikura at the end of the bite was a perfect finale. This is how we will be making blini in the future. Next stop crumpets in the platar. 

Thursday, June 3, 2021

Mint and pea kakiage ミントと豌豆のかき揚げ

Sometime ago, I saw this recipe in the web version of a Japanese newspaper. I thought mint and pea kakiage (a type of tempura made with several small food items) かき揚げ was very interesting and unique but was dragging my feet in actually making it. The mint crop is flourishing in our herb garden and my wife harvested some to make mint tea recently. She reserved some mint leaves for me to use for this kakiage (so I found myself fresh out of any excuses for not making it.) Finally, I made this dish one weekend evening. I served it with wedges of lemon and green tea salt.


I did not remember the details of the original recipe (and I could not find it any longer) but I used cake flour and carbonated water to make rather thin tempura batter and it came out very light and airy.


Ingredients (I did not precisely measure anything but it made four kaiage tempura).
About 1 cup of fresh mint leaves, washed and dried.
About 1/2 cup of peas (I used frozen petit peas, thawed).
Cake flour for dusting.
Peanut oil for frying.

For Tempura batter
About 1/2 cup cake flour
Cold carbonated water.

Directions:
Lightly dust the mint leaves and peas with the cake flour (#1 in the third picture)
Mix the cake flour and the carbonated water to make thin tempura batter and add the peas and mint leaves (#2)
Using a slotted spoon, I scooped up the mint and peas and slid the clump into the hot oil (350F) (#3)
Turning once, I fried them until crispy and slightly golden then drained them (#4)


We couldn’t taste much of the peas but this was very light, airy and crunchy with refreshing mint flavor. Perilla leaves, which are a bit similar to mint leaves, are a standard tempura item which I have used in several variations but mint leaves are certainly unique. Since we have a good supply of fresh mint leaves during the summer, we might try this in different combination...asparagus and mint immediately comes to mind.


Addendum
I made this dish again a few days later. I also found the original recipe and only thing I missed was adding potato starch (should equal 1/2 the amount of cake flour used). I also added fresh corn. I lowered the hot oil temperature to avoid browning. All worked better.


Monday, May 31, 2021

Tarako from Korean grocery store Hmart 焼きたらこ

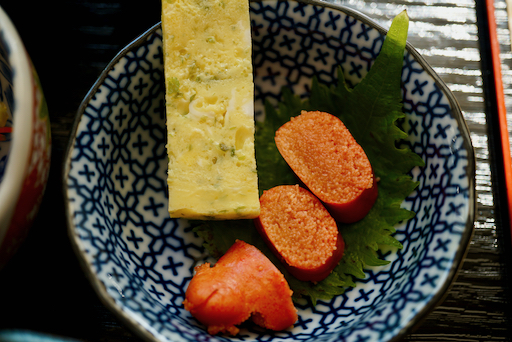
 Lightly grilled salted "tarako" たらこ cod roe is not really a new dish as I posted it many years ago,  but it is a very common dish in Izakaya and goes perfectly well with sake. I usually get tarako (frozen) from our Japanese grocery store, but this time I got it from Hmart, the Korean grocery store, through Instacart.  The groceries were delivered while I was not at home so my wife received them. During a subsequent phone call,  she mentioned that it was not a completely successful grocery run since the three types of fresh mushrooms and the mackerel we ordered were not available. The good news was that the "tarako" did arrive. She said something was wrong, however, because it was covered with a red goopy stuff and suggested that maybe the little egg sacks had somehow ruptured spilling their contents. (Not good!) So when I got back in the evening and inspected the tarako I found it was coated with a Korean hot sauce "gochujang". We were both relieved and had a good chuckle. Since we are not into very hot spicy food, I quickly rinsed off the hot sauce. I made "Tarako" pasta たらこスパゲッティwith it and it was just fine. I made the dish shown below from the last sac of tarako. I just cooked it in the toaster oven until the surface was cooked but the insides were still raw. I served it with a Dashimaki omelet だし巻き I had made.


This was a part of several appetizers I served that evening (second picture). From left to right; Eggplant in seasoned broth 茄子のお浸し、deviled egg from pickled eggs my wife made,  salmon in sweet vinegar 鮭の南蛮漬け. The bottom right are oven-baked potato chips which my wife is in the process of perfecting and which will be subject of another post. The dish on the bottom left is a dipping sauce my wife made to go with the potato chips.


In any case, we started the evening with these small appetizers.