Showing posts sorted by relevance for query garlic chive. Sort by date Show all posts

Thursday, July 11, 2024

Garlic Chive Dumpling ニラ頭饅 or 韮菜万頭

We used to grow garlic chives or “nira” ニラ in our herb garden but it failed in two ways: 1) the garlic chives were very fibrous except when we harvested them very young and 2) they grew like weeds taking over the entire herb garden. The plant had deep roots that were very hard to extract. It was quite a lot of work to get rid of it and we are not completely successful even now. (Digression alert: Some years ago we hired a gardener to do the spring clean up which included the herb garden. When he found out the herb garden contained garlic chives he specified the clean up would include everything EXCEPT the garlic chives.) Although we did make quite a few garlic chive dishes, we gave up growing our own. We have been shying away from even buying garlic chive for a while (besides it is not readily available). Since Weee almost always carries garlic chives, we tried them. They came in quite a large bundle (about 1 lb). We tried it in several dishes and, even though they were fully grown, the garlic chive were not fibrous at all.  We added garlic chives to our stir-fried dishes, soup and as a “ohitashi” ニラのお浸し. We still had some garlic chives left so I started looking for new recipes to use them. I came across a recipe by Koh Kentetsu on YouTube.  I was not familiar with this dish. I am not sure if this is based on a known Chinese dish or invented in Japan but it is apparently very popular. 

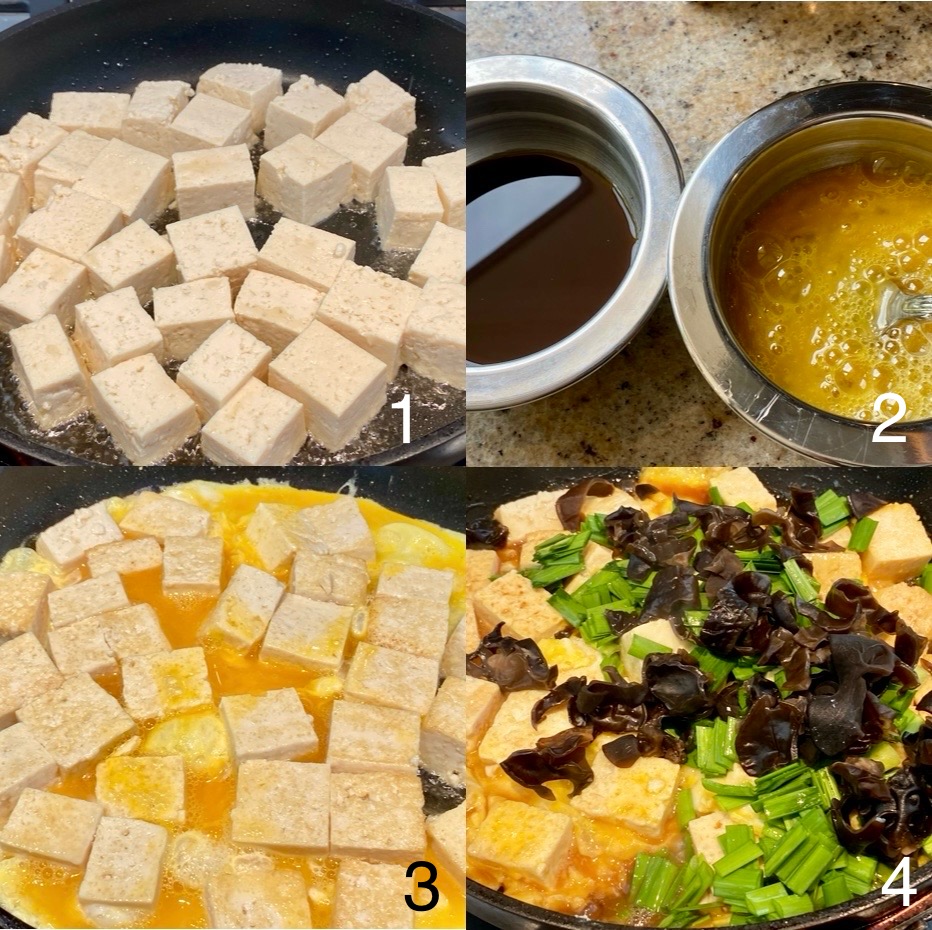
A quick internet search indicated that “nira-manju” or “garlic chive dumpling” was “invented” in a Chinese restaurant called “Niramanju Fussa” or “韮菜万頭福生” near the Yokota American military base 横田米軍基地. In any case, I have not tasted or seen the “original”. I made this based on the Koh Kentetsu recipe but I ended up making some changes (in the seasonings, not intentionally. Since I made this dish from memory after I saw the YouTube video). This is in the similar ilk as gyoza 餃子 and shumai  焼売 but maybe even better. We really like the garlic chive flavor and cripsy skin (picture #1). It re-heated nicely in the toaster oven. Since I seasoned the filling adequately, we did not use dipping sauce.


The innovations of his recipe is to use two sheets of store-bought wonton skin to encase the filling and the instructions of how to encase the filling very easily for a home cook. It was cooked exactly like gyoza producing a nice crispy skin on both sides (picture #2) and juicy inside.


Ingredients: (made 10 good-sized dumplings, see picture #2)
1/2 lb ground pork
1/4 lb garlic chive, finely chopped (about 1/5 in)
6-7 medium shrimp, thawed, and minced (optional)
1/2 tsp minced/graded ginger (original recipe used only ginger juice)
1/2 tsp minced/grated garlic (optional,  original recipe does not use this. My wife felt this added too much garlicky flavor)
1 large cap of fresh shiitake mushroom, finely chopped

Seasnings:
1 tsp Shao Xing wine
1 tsp oyster sauce
1 tsp soy sauce
1/2 tsp dark sesame oil

20 Wonton skins

Directions:
Add the meat, shrimp, garlic, ginger and seasonings in a bowl and mix well
Add the mushroom and garlic chives and further mix and cover. Let it stand in the refrigerator for a few hours
Using a medium sized ice cream scoop, make balls of the filling and place them on a rimmed baking sheet.
Place the wonton skin on top of the filling balls (I moistened all the edges to make sure it would stick)
Using all five fingers, press down on the edge and turn several times until the sides of the wonton skin adhere to the filling. Then flip it over (picture #3). (If you just steam this, you are making “garlic chive shumai” ニラシュウマイ).


Place the second set of wonton skin on top (I also moistened the outer edges). Using the same process, turn and totally encase the filling to make sure all sides are attached to the filling and each other
Press gently to make a disk (picture #4)


(I covered the dumplings with a plastic wrap and refrigerated 1-2 hours before cooking but this is not needed. I just wanted to have all the dumpling assembled before cooking them in the evening.)
Using a 12 inch non-stick frying pan, I added the vegetable oil with a splash of sesame oil on medium flame and browned one side (2-3 minutes) and turned it over to brown the other side for another 2-3 minutes (picture #2)
Add a small amount of water (about 1/4 cup). Cover with a tight fitting lid to steam for 2-3 minutes or until the steam stops coming out.
Remove the lid and let the moisture evaporate. Keep browning the bottom and the other side with the addition of a small amount of sesame oil toward the end of cooking.

This is a really nice dish and easier to make compared to gyoza (because you do not have to clip the edges). A good amount of garlic chive adds a nice flavor (my addition of garlic was a bit too much for my wife, I will omit it next time). This is a perfect small dish with drinks.

Friday, May 6, 2016

Braised chicken liver with garlic chive 鶏レバーとニラの炒め物

Weather in the DC area has been heavenly the past week and, for the first time this year, we had Yakitori 焼き鳥 outside. We did our usual chicken wings, pork with onion, and chicken livers. We also grilled fingerling potatoes and yaki onigiri 焼おにぎり (grilled rice balls). Since our usual grocery store did not have any fresh chicken livers, I went to another gourmet grocery store and got a container of frozen chicken livers. The livers were whole and less damaged or fragmented than the ones from our regular grocery store. In any case, we did not grill all the chicken livers for yakitori so I made this dish since we also had spring garlic chives in our herb garden.


Despite the very generous amount of fresh garlic chive I used, the garlic chive flavor was not as strong as I would have thought it should be.


I did not use any particular recipe, just "winged" it.

Ingredients:
Chicken liver, frozen thawed, washed and soaked in water, cut into bite sized pieces (1 container - about 1 lb minus the two skewers of liver I used for Yakitori).
Garlic, 3 small cloves, finely chopped 
Garlic chive, cut into 1 inch lengths (Picture below)
Sake
Mirin
Soy sauce
Black pepper, freshly ground


Directions:
The chicken livers were a bit bloody after thawing but all the livers were intact and in much better shape than the usual chicken livers we get. I cut the livers into bite sized pieces and soaked them in cold filtered water changing the water several times. I blotted off the moisture with sheets of paper towel and seasoned the livers with salt and black pepper. In a frying on medium flame, I put in vegetable oil. Once the oil heated, I placed the liver in the pan and turned it several times until all the sides changed color. Then I added the garlic. After several minutes of stirring, I added sake (1 tbs) and put on the lid to steam (below). After a minutes or so, I removed the lid and turned up the flame and let the liquid evaporate.  


I added the garlic chive and stirred for few minutes.


I added mirin and soy sauce and further reduced the liquid while shaking the pan.


Once the liquid reduced just coating the liver, I cut the heat and seasoned further with freshly ground black pepper. I tasted it and decided I did not need to adjust the seasoning.

For the libation, we chose Joseph Phelps Pino Noir,  Freestone Vineyard, 2013. Since we are a member of the wine club, we just received this Pinot from them. I thought this could go well with this dish. This pinot predominantly tasted of red fruits (cherry, raspberry and also a hint of strawberry) upfront and showed an almost effervescent acidity with some spice elements. This went well with slightly "iron-ny" liver with sweet /salty and peppery savory seasoning.

The only disappointment I had with this dish was that the garlic chive flavor did not come through much at all. Maybe, I have to add more garlic chive just before cutting the flame. For that matter, I did not taste garlic that much either. We thought this frozen liver was quite good and even better than the "fresh" liver we get from our regular grocery store which appears to be roughly handled resulting in many fragmented pieces. This dish is similar to one I posted before with onion and garlic. We like both.

Wednesday, July 31, 2024

Tofu, Egg and Garlic Chives Stir Fry 豆腐ニラ玉、木耳入り

This is one of the left-over control dishes. I had a package of “medium firm” tofu 豆腐 which just reached “BUB” (Best Used By) date, the last of garlic chive ニラand wood ear mushroom 木耳. So, I made this dish for lunch one day. I sort of got an idea from some of the recipes I saw on the Web and YouTube. Based on my memory and CCK (Common Culinary Knowledge) I  winged it. The seasonings could be improved but overall this was a quite good satisfying dish and fairly healthy and nearly vegetarian (I am not sure if oyster sauce really contains oysters or their derivatives). Depending on how much seasoning you add, this could be a side dish for rice but I seasoned it lightly and we had it as a main dish for lunch.


Ingredients:
One package of tofu (I used medium firm but firm would be good), drained and cut into cubes (#1 in the composite picture).
Two eggs, beaten and seasoned with a pinch of salt (#2)
Wood ear mushroom (optional, this was leftover, I blanched, washed it previously and cut into small trips, the amount is arbitrary) (#4)
Garlic chive, washed and cut into short segments, the amount arbitrary (#4)
2 tbs vegetable oil or peanut oil and a splash of dark sesame oil

Seasonings (#2): (premix, #2)
2 tbs oyster sauce
2 tbs soy sauce
2 tbs Shaoxing wine (or dry sherry or mirin, which makes it sweeter, or sake)

1 tsp Ponzu sauce


Directions:
Add the oil to the non-stick frying pan on medium high flame and cook turning once or twice until the surface is lightly browned (2-3 minutes) (#1 in the composite picture)
Reduce the flame to medium and pour in the egg mixture (#3) cook until the edges are set and gently turn and coat the tofu cubes
Add the seasonings and cook for 30 seconds mixing gently
Add the garlic chive and wood ear mushroom (#4)
Mix and toss to combine for 30 seconds to 1 minute
Splash the ponzu sauce and a small amount of sesame oil and mix to finish

I felt a bit self righteous finishing up the tofu, garlic chive and wood ear mushrooms by making this dish and nothing wasted. But better yet it was pretty good. The tofu went extremely well with the egg coating. The tofu and egg had similar texture but each brought a slightly different taste which was interesting in the same bite. The wood ear mushroom brought its own element to the dish in the form of a slight crunchiness that offset the tofu/egg texture. The garlic chive contributed a distinctly but mild garlic taste. Not a bad left-over control dish which can bear repeating. 

Wednesday, May 27, 2015

Savory egg custard with garlic chives ニラ入り茶碗蒸し

This is "chawan mushi" 茶碗蒸し with "nira" garlic chives. When I served garlic chive egg drop soup ニラのかき卵汁 and told my wife that eggs and garlic chives go well together, she suggested I make chawan-mushi with garlic chives. In the interim, I also served "Nira tama" ニラ玉, which is scrambled eggs with garlic chives (I did not take pictures) one weekday evening further reinforceing that this combination was indeed made in heaven. I finally made the garlic chive chawan mushi one weekend.


The garlic chives floated on the surface  but green and light yellow color contrast is nice.


The egg mixture was made the same as before. We tasted this hot first off the steamer. It was nicely creamy as you can see below.


I added shrimp (one cut into two pieces per serving).


I also added small pieces of chicken tenderloin.


Few days later, I served this cold with topping of ikura salmon roe and real wasabi.


Both cold and hot versions were good but I preferred the hot version. The distinct garlic chive flavor was much muted in the cold version. The silky egg custard and the garlic chives are indeed good combination. This time I first soaked the chicken pieces in sake and then coated with potato starch before putting in the chawan-mushi. This made the chicken moist and tender and better than just putting it in "naked".

The below makes 6 small bowls.

Egg mixture:
As before, I used 3 large eggs beaten and added 3 times the volume of seasoned dashi broth. If the eggs are 150ml then the seasoned broth should be 3 times the volume, i.e. 450ml. Dashi broth was made from a "Bonito and kelp" dashi pack. I seasoned it with mirin, light colored soy sauce and "shirodashi" 白だし. Seasoning is always tricky for chawan mushi. Too much will be "too much" especially when eating hot but when you serve it cold you need a bit more seasoning. I err on the side of under-seasoning.

Garlic chive:
The amount is arbitrary. I harvested young tender shoots from our herb garden and cut in 1/4 inch.

Shrimp:
I used 6 shell-on frozen shrimp, thawed in running water and then salted.  I cut in two pieces length wise.

Chicken tenderloin: I used two tenderloins. I first removed the tendon/sinew and sliced it on the bias. I salted lightly and soaked it in sake for 5-10 minutes. I blotted excess moisture and thinly coated it with potato starch or Katakuri-ko 片栗粉.

I first added the shrimp and chicken into the cups and poured in the egg mixture through a fine meshed strainer into 6 cups. I then added the chopped garlic chives.

I placed the 6 cups in a steamer (my electric wok) and steamed them on a constant low steam for 20-30 minutes (first picture).

My wife really liked this, either hot or cold. She thought the chicken was really moist and tender which I agree. This was a very successful dish.

Tuesday, April 21, 2015

Hanami 1st day, garlic chive egg drop soup 花見1日目、にらのかき卵汁

Nira 韮 or garlic chives are not popular in the U.S. and I rarely see them in our grocery stores. We have been growing garlic chives for many years in our herb garden but I keep forgetting to cut them back and they tend to become very tough. The secret is to keep harvesting them to encourage the growth of tender young shoots. The tender shoots are a very different animal (vegetable?) from the tough woody leaves they turn into if left alone. This year, garlic chives were the first plants pushing out new leaves in our herb garden. I quickly harvested some and made this Japanese classic of garlic chive egg drop soup.


The base of this soup is clear soup seasoned with light colored soy sauce or usukuchi shouyu 薄口醤油. I served this as the first dish on our first day of hanami 花見 with sake. You may think soup may not go with sake but it does.


As you can see below, just a little bit of green shoots were coming out, I harvested selectively from each plant so that I would not kill it. I washed and cut the leaves into one inch lengths.

Garlic chive soup

The broth was made from a "Bonito and Kelp" dashi pack. I added sake, mirin and light colored soy sauce. I put the garlic chives in the simmering soup and cooked it for 1-2 minutes and added blocks of silken tofu. After one more minute, I put in a beaten egg and gently mixed and cut the heat.

My wife was quite impressed with the distinctive flavor of garlic chive and how tender it was. The egg is a perfect match. Although my wife is usually not fond of Japanese soup especially as part of a dinner, this one was a big hit.

Wednesday, May 18, 2016

Blanched garlic chives and stewed chicken wings ニラのおひたしと手羽の煮物

This is continuation of our spring garlic chives series making use of the garlic chives growing in our herb garden. This time I blanched them and let cool then dressed them with soy sauce, Japanese mustard, and sugar. Since I had some left over chicken wings simmered in black vinegar sauce, I removed the meat from the bones and served that as well.


I served this as a starter dish one evening.


This is not really a recipe. I just washed and cut the garlic chives into one inch long pieces and blanched them for a few minutes then let them cool down before using. The dressing is a mixture of Japanese mustard (from a tube), sugar and soy sauce.

Although in the past few garlic chive dishes, I complained that there was not enough garlic chive flavor in this one there was perhaps a bit too much. The garlic chive was also a bit chewy as well and my wife gave up on eating it. Since I made the dish I persevered and finished it. This dish requires some improvement.

Tuesday, September 14, 2010

Garlic chive and grilled abura-age in sesame dressing ニラと焼き油揚げの胡麻和え

This is another type of Otoshi お通し small dish. I bought chives in a small plastic container, along with a few other items at our grocery. The cashier was being a bit careless and the container opened while she was ringing up. Chives spilled out all over everything. So, with restless people waiting in the line behind me, I had to rush back to the produce department and grab another package. It turns out I grabbed the wrong thing. I thought I had chives but when I got home I discovered I had "garlic chive" ニラ. We have garlic chives growing in our herb garden but it tends to be tough so, even though it is prolific, we don't use it much. These garlic chives were very tender and flavorful. Thus, this dish.

I blanched the garlic chives for 30 seconds, then shocked them in ice cold water ringing out the excess moisture. I cut them into 1 inch lengths. Meanwhile, I grilled or toasted the abura-age 油揚げ or deep fried tofu pouch (I used a toaster oven) for 3-4 minutes until it becomes very crispy and slightly browned. I cut it into thin strips. The dressing is made simply; sesame (1 tbs) dry roasted in a frying pan for 2-3 minutes then ground coarsely in a suribachi Japanese mortar すり鉢. I added a small amount of sugar (1/2 tsp) and soy sauce (2-3 tsp) and a dash of dark sesame oil. I dressed the abura-age and garlic chive mixture and served. You have to enjoy this dish while the abura-age is still hot and crispy. A perfect starter dish for sake.

Tuesday, May 3, 2016

Garlic chive-Gyouza ニラ餃子

Since new shoots of garlic chives are coming out in our herb garden, we have to enjoy them while they are still succulent and tender. Later in summer, they will get really tough so this is the best time to enjoy them. One evening I made garlic chive Gyoza and served it as a small drinking snack.


The meat can be chicken or pork but I used pork.

Ingredients (makes about 12 dumplings):
Ground pork, about 220 grams (8oz) (I used hand chopped pork loin).
Cabbage, 3 leaves, boiled, hard vein removed, and chopped finely, and moisture squeezed out
Garlic chives, finely chopped, as much as you like.
Salt, pepper, sesame oil
Wanton skin, I used square store-bought skins but I cut them into rounds using a round biscuit cutter just for aesthetic reasons.

Directions:
1. Mixed well in a bowl, seasoned with salt and pepper and a small amount of dark roasted sesame oil.


Place a small mound of filling in the center of the wanton skins.


Wet the periphery of the wanton skin fold and crimp the edge.


Using a non-stick frying pan with a small amount of vegetable oil (splash of sesame oil, optional), cook until skin is crispy and brown. We like crispy skin so I turned them over and browned the other side but this is optional (usually only one side gets browned).


I added about 4 tbs of hot water and immediately put a tight lid on the pan. When the steam stopped escaping, I removed the lid and let the moisture completely evaporate and let the bottom get crispy again.


I served these with an equal mixture of rice vinegar and soy sauce as a dipping sauce. I was a bit disappointed since the garlic chive flavor was not as strong as I expected. In the next batch, I may add more fresh garlic chives.


Tuesday, July 31, 2012

Vidalia onion salad with garlic chive and chicken skin 玉ねぎのサラダ、ニラ、雛皮入り

This is another quick dish I concocted. The main ingredient is Vidalia onion which is known for its sweetness (Vidalia onion is a particular cultivar growing in low sulfa soil in Vidalia, Georgia). I am not sure if there is something similar in Japan. In any case, raw onion salad is a regular izakaya affair, a variation of which I have posted before. This is another variation of raw onion salad using Vidalia onion with the addition of blanched garlic chives and chicken skin which is the by-product of the sake-steamed or “sakamushi” 酒蒸しchicken.

The amounts are for two good sized servings (good size for us, any way).

Onion: I first halved the onion and then sliced very thinly (my ceramic “nakiri” knife is the best for this) to make long strips (half of medium sized  Vidalia onion). Although Vidalia onion is sweet and less astringent than regular or red onion, I added some salt, kneaded, let it stand for few minutes and then soaked  in cold water for 5 minutes or so, I drained and then wrung out the excess moisture in a paper towel. If you like the strong flavor of onion, you can skip this step.

Garlic chive: These are our home grown garlic chives. The amount is arbitrary but I used a half inch diameter bundle. I blanched it in rapidly boiling salted water for 30 seconds to 1 minute, drained and spread out on a paper towel lined plate to cool down quickly. I squeezed out the excess moisture and cut it in 2 inch segment.

Chicken skin: I just used the skin of the sakamushi chicken breast (from 4 breasts) cut into thin julienne. This is optional or can be substituted with julienned cooked meat, ham, or even with grilled deep fried tofu pouch “abura-age” 油揚げ.

Dressing: I was still out of Ponzu sauce, so I made dressing from semi congealed liquid in the container in which I kept the sakamushi chicken or you can use dashi broth (3 tbs), soy sauce (3 tbs, reduced salt kind), and rice vinegar (1 tbs). For good measure, I added Yuzu koshou (1/2 tsp).
I dressed the ingredients and garnished it with slices of Campari tomato (skinned).

This is nothing spectacular but mild raw onion and blanched garlic chive are a good combination. This is a very refreshing salad or sunomono 酢の物 to start the evening.

Friday, May 11, 2012

Garlic chive omelet ニラ玉

Japanese really like garic chives or nira ニラ. I see garlic chives rarely in the regular grocery store but, fortunately, we have garlic chives growing in our herb garden and they just emerged for spring. When I told our Japanese landscaper that our garlic chives tend to be tough, he told me to cut them off frequently even if you do not eat what you cut. That way, new teder shoots will keep coming up. So, I am harvesting occasionally even if I do not use it.

Japanese think the combination of garlic chives and eggs is particularly good. This dish, "Nira-tama",  "nira" means garlic chives and "tama" is short for "tamago" meaning eggs, is one of these dishes and must have a root in a chinese dish.

As long as you have fresh garlic chives, this is an easy dish. There appears to be two basic styles; for one the eggs just get scrambled with the garlic chives and in the other is to mix the chives and eggs to make a round omelet. The difference may seem subtle but the end result is different in consistency--the round one is almost like a Spanish tortilla. I chose the latter and also made a sauce or "an" 餡.

Fresh garlic chives (one small bunch) chopped into small pieces. I mixed the pieces into the beaten eggs (2 large) and seasoned with salt and pepper (left). In a small no-stick frying pan, I added vegetable oil and sesame oil (1:1 total of about 3 tsp) and cooked it on medum low flame for a few minutes and flipped over (right)

For the sauce, I simply mixed dashi (1/4 cup), soy sauce (1 tbs) and mirin (1 tbs). When it came to a boil, I added a potato starch slurry made with sake (2 tsp) to thicken the sauce. You could add vinegar to make it a sweet and sour sauce or add hot sauce to make it spicy.

I served this as a drinkng snack. This late spring/early summer garlic chives were tender but did not have a strong flavor--it was a classic taste of the season. I served this with asazuke of cucumber, daikon and carrot, blanched broccolini with mustard soy sauce dressing or "Karashi souyu" 芥子醤油.

Sunday, July 1, 2012

Ground pork curry ひき肉カレー

I mentioned that pork gyouza stuffing is very versatile and can be used as the base for other dishes. This is another example of that kind of versatility. Of course you could make this curry dish with just simple ground meat. In any case, I had some leftover gyouza stuffing (about 9 oz or about 250 grams) and decide to use it up before it went bad.

This may have been inspired by keema curry but this version is not at all authentic. Japanese have created many Japanese variations of curry beside the classic Japanese curry which in itself is a variation based on British modification of the classic indian curry. These Japanese variations include "dry"curry and a rather modern invention in my home town, Sapporo 札幌, Hokkaido 北海道 called "soup" curry. This curry I made is sort of cross between these latter two.


I included chunky potato and served this a closing dish or "shime" 〆 or ending dish. I made this curry a day before I served it.

Meat: Leftover gyouza stuffing (9 oz or 250 grams) made of ground pork mixed garlic chive, ground ginger and ground garlic.

Vegetable: I used onion (one medium, finely chopped), celery (2 stalks, finely chopped), carrot (2 medium, peeled, finely chopped), yellow squash (half with seeds removed and finely diced, optional, I happened to have it), garlic (1 clove, finely chopped), and ginger root (1/2 tsp finely chopped). I also peeled some small white potatoes (6-7).

I added light olive oil (2 tbs) in a pot on medium flame. When the oil was hot, I first sautéed the garlic and ginger and then onion and celery. I added curry powder (2 tsp or more, this time I used S&B brand Japanese curry powder) and kept sautéing. After the curry powder became fragrant, I added flour (2 tbs) and kept stirring until well incorporated. I moved the vegetables on one side of the pot and added tomato paste (2 tbs) in the empty area of the pan. I sautéed the tomato paste until the color slightly darkened and mixed thoroughly into the remaining ingredients. I added the remaining vegetables except for the potatoes. I added chicken broth (1 cup, my usual Swanson low-salt no fat version). Using a silicon spatula, I mixed and scraped off any "fond" that developed on the bottom of the pot. I also added Garam masala (1 tsp, this particular one had a strong cumin flavor) and more chicken broth (2 cups). I put in the potatoes and let it simmer for 40 minutes. I tasted and adjusted the seasoning using salt and black pepper. It was moderately spicy. We did not eat this immediately. I heated it up few days later and served over rice with sautéed asparagus and Japanese curry condiments (rakkyou ラッキョウ and fukushinzuke 福神漬け).

The addition of tomato paste made this curry sauce a bit unique. The sauce mellowed and it was only mildly spicy but had lots of flavors. The use of all the finely cut vegetables also gave it an undertone reminiscent of a french mirapois.  As an impromptu, leftover control cuisine, this was not bad at all.

Saturday, April 9, 2016

Hanami 2016 Day 2 花見 2016 二日目

The cherry blossoms will be over very soon but we squeezed in one more day of hanami.


Still cold but nicely sunny with blue sky.


As I mentioned, previously we have three cherry trees. The newer tree, which we planted, is quite spectacular in its own right. When in full bloom the branches look like thick bottle brushes of pink cherry blossoms as shown in the picture above. The cherry blossoms on the older trees are more old-fashioned, light pink, delicately ethereal and very elegant as shown in the picture below. The two types of tree usually bloom at slightly different times. This year it was a treat that they bloomed together. 

At least, for this hanami I had a chance to go to our regular grocery store and bought a few items to make more hanami drinking snacks. I realized the garlic chives ニラ have emerged in our herb garden. So I made this dish. I did not follow any recipe but it is chicken tenderloin encased in omelet with garlic chives. I served this with green beans sautéed in butter (in the same frying pan I cooked the chicken). On the side, I put ketchup and Sriracha (small amount).  

I removed the small tendon/sinew from the top of the tenderloins, seasoned with salt and pepper. I chopped garlic chive I harvested from the herb garden.


I mixed in with a beaten egg.


I dipped the tenderloins in the egg mixture and started frying in butter. I added more egg mixture and I turned the tenderloins over so that the omelet encased the tenderloin. I repeated this process until all the egg mixture was used.


I also made my usual chawanmushi 茶碗蒸しwith crabmeat and garlic chives. I also put in some ginko nuts 銀杏 (from a can), chicken tenderloin thinly sliced against the grain of the meat.  We used our cherry blossom cut glass sake cups.


Before steaming the chawanmushi I added the smaller chunks of crabmeat to the egg mixture to be cooked into the custard. After 10 minutes of steaming, when the surface of the custard was cooked enough that the crabmeat would not sink into the custard I added the largest chunks of crabmeat.


While at the market I also got a salmon filet. As usual, I removed the belly portion and made it into a drinking snack. This time I simply seasoned with salt and pepper and pan fried it in butter. I made sure the skin was nicely crispy. I served it with asparagus which were cooked in the same pan.


So we managed to squeeze in one more day of hanami.


Monday, June 25, 2012

Mini gyouza with garlic chive ニラ入りミニ餃子

Gyouza or gyoza 餃子 is a classic Sino-Japanese dish with many variations for the stuffing, skin, size, and method of cooking (boiled, fried, and steam fried). In addition, localized (i.e. specific to the locale) variations of gyouza are popular allover Japan. Although, many eateries (including national chain stores) may specialize in serving gyouza (and ramen noodles or other Chinese dishes), it is also frequently served at an Izakaya.

Some years ago, I posted pork gyouza using square wonton skins which is the only kind of gyouza skin I can get in the regular grocery store in our area. Japanese gyouza skin is a bit smaller, thinner, and round which can be bought at a Japanese grocery store frozen but I usually do not bother getting it. Some people like a more authentic (similar to original Chinese dish) thicker chewy skin (which can be home made but we never tried).


When my wife made meatloaf, we had excess ground pork (hand chopped from the butt roast). I quickly made it to gyouza stuffing using our home grown garlic chives. This is very similar to the one I made for teba gyouza 手羽餃子 except I used onion rather than scallion and I did not add cabbage.I placed the gyouza stuffing in a sealed container and kept it in the refrigerator. This mixture is very handy to have and one could make dishes other than gyouza. Since this was available, I made this mini-gyouza one weekday evening.

Stuffing: I mixed ground pork (about 12oz), garlic chives (finely chopped about 1/4 cup but whatever amount is fine), onion (half, finely chopped, scallion also works), garlic (1/4 tsp, grated from the tube), ginger (1/2 tsp, grated from the tube), soy sauce (1 tsp), dark sesame oil (2 tbs), salt and pepper.

Gyouza skin: I happened to have a “spring roll skin” 春巻きの皮 which is readily available in any regular grocery store. I used a round dough cutter (about 2 1/2 inch diameter) and made it into a round gyouza skin (I could make three from one sheet of spring roll skin). Compared to the wonton skin, this one is thinner and more delicate, more closely resembling a Japanese gyouza skin.


Assembly
: I moistened the edge of the skin with water. I placed a small amount of meat mixture in the middle, folded the skin in half forming a half moon and pressed both ends while trying to remove any air pocket between the meat mixture and the skin. I then crimped the edges as you can see above on the left.

Cooking: I added vegetable oil and dark sesame oil (1 tsp each) in a non-stick frying pan on medium flame. Although the classic way is to brown on only one side, I like to brown both sides by flipping them after 1 minute or so (the above image on right). I added several tablespoonful of hot water into the pan. You must be careful, as it will boil and steam immediately. Make sure you have the lid ready, your face is out of the way and the exhaust fan is running. I then put on a tight fitting lid and let it steam for 1-2 minutes. I then removed the lid (only a thin layer of water remaining in the bottom of the pan). I let the water completely evaporate and made the bottom of the gyouza crispy again by letting them cook for 30 seconds or so after all the water evaporated. I added a splash of dark sesame oil at the end.

I served this mini gyouza with a classic dipping sauce (equal mixture of rice vinegar and soy sauce) and side of Japanese hot mustard (from the tube). As an accompaniment, I served cucumber, radish and carrot asazuke 浅漬け.

We switch to cold sake for this.

Tuesday, June 11, 2024

Shrimp Shumai 海老焼売

This is my third attempt at making “shumai” 焼売 dumplings.  In the previous 2 attempts the dumplings fell apart when I cooked them and I ended up with cooked ground meat and separated dumpling skins which served almost as pasta. This time, everything worked. The dumplings held together and I made some decent shumais. I made this for a lunch and served them with pickled daikon, cucumber, blanched sugar snaps, braised burdock root きんぴらゴボウ (kinpira), pumpkin salad (curry flavored) and braised eggplant in miso sauce. I served the shumais with Japanese hot mustard and a mixture of rice vinegar and soy sauce (picture #1). The wonton skin stayed with the filling. The filling was the combination of shrimp and chicken with minced onion and garlic chive which worked well.


The shumais are rather large and cutting them in half made it easier to eat (picture #2). I left some shrimp in large pieces (they can be seen in the cut surface toward the top.


Ingredients: (made 20 shumais)
Shrimp about 100g, thawed and hand chopped making a mixture of finely chopped and small chunks
Ground chicken 150g (this was breast meat)
1 Onion, small. finely chopped
4-5 stalks of garlic chives, finely chopped (optional)
20 Wonton skins

Seasonings:
2 tsp potato starch
2 tsp oyster sauce
2 tbs Shaoxing wine (optional)
2 tsp soy sauce
1 tsp sesame oil
1/4 tsp grated ginger

Directions:
Mix all the ingredients for filling (except the wonton skin) and the seasonings in a bowl, mix well.

I tried three different ways to assemble shumai:
1. Place the skin on your palm and spread the filling using a silicon spatula  leaving only the rims of the skin. Inverse it on the tip of the spatula and squeeze to foam shumai.
2. place the balls of filling on the cutting board and place the skin on the top. Using five fingers, squeeze the skin around the ball of the filling and pick it up and form shumai, and
3. Place the skin on your palm and spread water using a finger and then place the ball of filling. Squeeze to make shumai. 

For all three methods, make sure the bottom is flattened and the tip of the shumai is squeezed to make it narrower than the bottom (#1 and #2 in the composite picture). This time, all three methods worked and the skin did not separate from the filling. I am not sure why this was. In any case, place the shumai in the steamer basket and steam for 10 minutes (#3 and #4 in the composite picture).


This was a success! The addition of shrimp (combination of finely chopped and small chunks worked well adding taste, and texture).  I added garlic chives since I had some fresh ones from Weee. They did not add much flavor but added nice green specks (picture #2). I served this with Japanese hot mustard and a mixture of rice vinegar and soy sauce (picture #1).