Showing posts sorted by relevance for query tempura. Sort by date Show all posts

Monday, March 28, 2016

Egg and avocado tempura 卵とアボカドの天ぷら (1,000th post!)

In the Kansai 関西 area, udon noodles are often topped with or accompanied by interesting tempura such as soft boiled egg tempura 半熟卵の天ぷら or vinegary red ginger slices tempura 紅生姜の天ぷら or chicken tempura 鳥天. Some years ago, when we visited a Kyoto izakaya "Kurakura" 蔵倉, we also had avocado tempura アボカドの天ぷら.  So, I decided to make it an "unusual tempura" evening. I rounded things out by adding sweet potato tempura which is a very "usual" but never boring tempura item.


I only made half the avocado into tempura for two. I served this with green tea salt.


The soft boiled egg tempura had a very runny yolk as seen below. I served the egg with a small amount of rice to absorb the yolk. We also added a bit of soy sauce. 


Ingredients (for 2 small servings):
Soft cooked eggs, two (see below)*
Avocado, thin wedges from half avocado
Sweet potato, two rounds, 1/3 inch thick.


*Soft boiled eggs:
There are a few things to keep in mind about making soft boiled or "cooked" eggs with runny yolks.
1. Use pasteurized eggs, either home pasteurized or Davidson's commercial ones. Although salmonella contamination of eggs in the U.S. appears to be low, it is still a possibility.
2. The best way to make soft "cooked"  eggs is the method from America's test kitchen in which you use a small amount (1/2 inch deep) of boiling water on medium flame, with the eggs directly from the refrigerator placed in the water using tongs, then covered with a lid. For soft cooked eggs, I cooked them for 6 minutes and 30 seconds. I did not believe this method would work initially but it really does! The small amount of water recovers its temperature quickly and the eggs are cooked evenly by steam not by boiling water. The timing doesn't change even if you cook more eggs.
3. I placed the eggs in ice water immediately to stop the cooking and let them cool completely (about 10 minutes).
4. I peeled the eggs and placed them in a sealed container in the refrigerator until I was ready to make the tempura.

Tempura batter:
There are so many different versions I have tried. This time I went simple and used ice cold water and cake flour (without egg and without Vodka). I made it to the consistency of runny cake batter without over mixing.

Frying Oil: 
I used fresh peanut oil heated to 350F.

For the sweet potato I cooked for 2 minutes total time turning once.  For the avocado, I cooked for 1 minute or less turning once. For the soft boiled eggs, I cooked only 20-30 seconds until a light crust was formed (below).


We really liked the tempura eggs. The yolk was warm but runny and surface had a light and crunchy thin crust. The egg tasted great on the rice with a splash of soy sauce. The avocado tempura was also good but the sweet potato could not go wrong.

P.S. We started our blog in September 2009. This post is the 1,000th post. We are not sure how much longer we can continue but we had fun coming up with the recipes and writing about them. It has also proved to be a useful personal diary of the various meals we made and the many special occasions on which we enjoyed them.


Wednesday, April 28, 2010

Soft shell crab tempura ソフトシェルクラブの天ぷら

When I posted the crab cake, I promised a soft shell crab tempura. It must be getting into summer since my wife found live soft shell crabs in the fish monger's case at our neighborhood gourmet grocery store for the first time this year. Regardless of what we already planned for dinner tonight, it is time for soft shell crab tempura! 

I never saw soft shell crabs until I came to Baltimore (which was the first city I lived in after I left Japan). Soft shell crab sandwiches are famous in Maryland and look very strange at first. It consists of two pieces of bread with a large flat arachnoid looking creature between them; spider legs sticking out all over. Despite its appearance, both my wife and I independently developed a liking for soft shell crabs. The most common way to cook soft shell crabs is either battered and deep fried or dredged in flour and sauteed in clarified butter. We first encountered tempura soft shell crabs at one of the sushi bars we used to visit. With just a light tempura crust, it is our favorite way to eat this specialty--with crispy outside and juicy sweet meat inside. Actually, many sushi bars even make a "soft shell crab roll" which is not bad but we like to just eat the crab as is.

First, you have to clean the critters. If you are not up for this task, especially if they are still moving and alive, it is best to ask the fish monger to clean them for you. You need to take off the eyes/head portion, bottom apron, and gills. I sandwich the cleaned crabs between paper towels and press lightly to remove any excess moisture.

Tempura batter: I used to use whole eggs or egg yolks in my tempura batter but, more recently, I just use cake flour and potato starch mixture without eggs. I do not use any leavening agents such as baking powder. Using egg yolks makes a richer batter but I like the simple light texture of a crust made from the batter of just flour and water. Here, I used about a half cup of cake flour (the reason for the cake flour is that you do not need gluten which will make a tough crust) with 2 tbs of potato starch or corn starch and add ice cold water and mix lightly until a desired consistency is reached. Depending on what you are frying, the thickness of the batter should be adjusted. For soft shell crabs, I like a very light crust so I use a bit runny or thin batter.  


Oil: For tempura, you need to use fresh oil. I use peanut oil since we like the peanutty flavor it imparts and its high smoking point. The temperature should be around 170C (340F) but, as usual, I use the dropping-bit-of-tempura-batter method of judging the temperature. I use the shallow frying method with about half an inch deep oil. Since it splatters a lot, I took some precautions (see picture). I turned over the crabs once the bubbles around them get smaller (after 5 minutes) and fried another 5 minutes until the surface is lightly brown and crispy and bubbles around the crabs get smaller and "quieter" for the second time. I also made fresh Shiitake and asparagus tempura as accompaniments.

Green tea salt: Tempura dipping sauce and grated daikon will go well with this but we decided to eat simply with lemon wedges and green tea salt for our season's first catch. To make green tea salt, I add 3 tbs of Kosher salt and 1/3 tsp of "maccha" 抹茶 green tea powder in a small plastic sealable container and shake well to mix. It will keep for a long time in a freezer.

I cut the crab into 4 pieces for easy handling and serve. What a treat! I assume it will go very well with cold beer but I seldom drink beer nowadays. Cold sake is called for.

Tuesday, May 17, 2011

Soft shell crab tempura redux ソフトシェルクラブの天ぷら 再登場

posted this about year ago but it is the season for a soft shell crab again and when I saw live soft shell crabs at the market, I had to get them. I was amazed at how my presentation of this dish is so similar to last year's presentation. In any case, the only difference is that I tried a new tempura batter formula after seeing the America's Test Kitchen episode on tempura.

They take a somewhat scientific approach to making tempura batter light and crispy. The idea here is not to let the gluten develop too much. The most common Japanese way of making tempura batter is to use cake flour or weak flour "hakurikiko" 薄力粉 in combination with potato starch or "katakuriko" 片栗粉, whole egg or egg yolk, ice cold water and do not over mix it. The America's test kitchen's method is to add "alcohol" in this mix to further prevent gluten formation and to use seltzer water (which many Western chefs have done for tempura batter). So I wanted to try this to see if it made any difference.

Liquid component: Selzer water (non-sweetened, of course, 1 cup), Vodka (1 cup) and whole egg (one) mixed together.

Dry component: Cake flour (1 cup) and potato starch (1/4 cup). The original recipe calls for AP (all purpose) flour instead of cake flour.

Actually, my dry ingredients were proportionally much less for two crabs and 4 asparaguses. In addition I used only a portion of the liquid mixture to attain the desired consistency of the batter. 

The result was a good nice light crust but we were not sure this was any better than my regular batter with or without eggs. Soft shell crab may not be ideal to test the tempura crust because the shell gets crispy even if you don't use tempura batter. We will try again with a more appropriate food medium to assess the crust. In any case, we love soft shell crab tempura and we have to make it at least once in the season.

Talking about the season, the iris were in full bloom in our garden. We were surprised when this pure white one appeared among all its purple cousins. My wife arranged it using a Japanese-style base with "kenzan" 剣山. 

Thursday, June 30, 2011

"Kakiage" tempura, two kinds かきあげ 2種類

When I posted soft shell crab tempura, I used a new recipe for the tempura batter which included Vodka. Soft shell crab tempura, however, was not the best way to assess the tempura crust. As promised, I did another test with "kakiage" tempura. Kakiage is tempura made of small pieces of ingredients bound by batter/crust. I made two kinds of kakiage.   

Sakura-ebi and onion kakiage: I used boiled and dried Sakura-ebi 桜 海老 which I kept in the freezer and thinly sliced red onion. To extract moisture from the onion, I mixed the onion slices with cake flour and a small pinch of salt. After 10 minutes, moisture came out and the flour sticks to the onion. I lifted the onion and shook it slightly to remove excess flour and mixed it with the sakura-ebi (whatever amount you like) before adding it to the tempura batter.

Fresh corn kakiage: This is the same as the one I posted before. We had fresh corn (not locally grown for sure). I removed the kernels by slicing them off the cob with a knife.

Tempura batter: This is the same as I posted before and based on the recipe from America's test kitchen. To briefly reiterate, I made the wet component by mixing water (or seltzer water, but I do not think this makes any difference) and Vodka in 1:1 radio. For two cups total, I added one whole egg, beaten. (The amount of egg should be proportional to the amount of water and vodka so reduce or increase the egg accordingly. For example, is the amount of water and vodka is reduced by half then use half and egg. The dry component is a mixture of cake flour and potato starch in 4-5:1 ratio.

First put the dry ingredient in a bowl and add the wet component to mix. The consistency I was looking for is like a runny pancake batter. For the fresh corn kakiage, I added corn and mixed in the batter. The amount of the batter is just enough to coat all the corn kernels and a bit more. Using a spoon, I put the mixture into hot oil (as usual peanut oil, 370F or so), turned over once during the frying. For the red onion and Sakura-ebi, I mixed them into the batter and just using cooking chop sticks, I put the mixture into the hot oil. I tried to make both kakiage into a sort of flat disk. Again, I turned it over once during the frying.

The results? Well, this new batter does create a lighter and crispier crust, although the difference is not gigantic. Both the traditional and Vodka batters produced good kakiage. As you can see we were in portion control mode here.

A few days later, I made a small "Kakiage donburi" かき揚げ丼 as a "shime" 〆 or ending dish from the leftover. I baked the kakiage in a 400F preheated toaster oven for 7-8 minutes placing the kakiage on a perforated metal tray over another deeper metal tray so that any excess oil which exuded from kakiage dripped down into the lower tray. The baking made the edges a bit dark but made the kakiage crispy and hot again.

I made a sauce with dashi, mirin, and soy sauce. I made it rather strong in taste but small in amount. I heated the mixture in a sauce pan and poured it over the kakiage and rice. I garnished it with blanched broccolini. For leftover kakiage, this was pretty good.


Thursday, September 29, 2022

Tempura 天麩羅

I have posted quite a few tempura dishes. But I have  not made tempura for a long time. My wife wanted to have chicken kara-age 唐揚げ and I had marinated chicken thigh for “Kara-age” but I needed  to use new oil since I discarded the old reused peanut oil the last time I made a deep fried dish. Since fresh clean oil is best for making tempura, as my wife’s suggested, I made a few tempura items before frying the kara-age. I made, shrimp, shiitake and green beans tempura.


I am a bit out of practice making tempura and I made the batter a bit too thin but it came out OK. (Although not great especially for the shrimp.) I also re-fried the shrimp heads we got as part of take-out from Tako Grill. They came out very nice and crispy (better than heating them up in the toaster oven).


I served this small assortment of tempura with green tea salt and a wedge of lemon. After this, I cooked up the chicken kara-age. For dredging, I used half-and-half mixture of rice flour (“mochi-ko” 餅粉) and potato starch (“Katakuri-ko” 片栗粉) which was really good and produced more crunchy crust as compared to my usual potato starch.

Saturday, September 12, 2009

Deep Fried Items 揚げ物

Squid Tempura イカの天ぷら


Like any bar food in United States, deep fried items 揚げ物 are very popular in Izakaya. Mark's book contains quite a few deep fried goodies. Deep fried chicken nuggets ("tori no kara-age" 鶏の唐揚げ and "Tatsuta-age" 竜田揚げ, recipe in Mark's book p84) are definitely Izakaya teiban 定番 (regular or classic) items.  On our last trip to Japan, we were in Kanazawa in June. It was the season for small white shrimp called "Shiraebi" 白エビ.  The Izakayas we ate at in Kanazawa offered this seasonal treasure in either "kara-age' (simply fried) or as "Kakiage" かき揚げ (more about this later). We loved the kara-age version of it. In addition, it was also the season for tiny, fluorescent squid called "Hotaru-ika" 蛍イカ or "firefly squid" (firefly for obvious reason). We had this squid in a very simple preparation called "Okizuke" 沖漬. What a treat!

The picture  above shows a fried squid dish I happened to make the other night since relatively fresh squid was available at the near-by Barducci's gourmet market. Talking about squid in U.S., nothing comes even close in terms of quality, variety, and freshness to the squid available in Japan. An extreme example of which was the "live" squid sashimi (生き造り) we had at the port city of Hakodate in Hokkaido. (I am sure we will have a chance to share our experience with that regional delicacy with you another time). You could use legs げそ as tempura especially in a form of "kakiage" but I used only the body parts this time. The problem with squid is that it contains lots of water which makes it splatter in the hot oil while cooking and makes it difficult to achieve a crispy crust. Also, cooked squid meat could be very chewy. A few preparation steps required to prevent this.


1) After cleaning the squid (if it is not already cleaned), cut open the tube, and make sallow criss-cross cuts. These are called "kanoko-giri" かのこ切りor "matsukasa-giri" 松かさ切り (see the diagram on left). Then, cut into small bite sized pieces. This will make the squid meat less chewy and easy to bite off.
2) Dry the squid by sandwiching it in a paper towel.  If you have time, you could refrigerate the squid in the paper towel "sandwich" for 10 minutes.
3) Before dipping into tempura batter, coat the squid with flour (I use potato starch).
4) There are many version of tempura batter but I use a whole egg (classical recipes use egg yolk only), 1 cup of cake flour and ice cold water mixed to the desired consistency. But do not over mix. You want a light flour so you do not want to develop the gluten in the flour. For vegetables, I prefer a thin watery batter--for shrimp and squid a slightly thicker batter.
5) I use peanuts oil since it imparts a nice peanut flavor to the squid and has a high smoke point. To test if the oil is hot enough I drip a very small amount of the batter into it. If the batter sinks into the oil half way and then immediately floats back to the surface, the oil is ready. (another method I use to check if the oil is ready, that was taught to me by my mother, is to put the tip of a bamboo cooking chopstick into the oil and if bubbles come out of the chopstick, the oil is ready). Depending on how things go, you may want to "double" fry the squid. Be careful to take out any stray pieces of tempura batter left in the oil ("tenkasu 天かす which can be used as a topping for needle in a soup dish and has other use) after the squid is cooked through and removed, otherwise they will burn making an unpleasant taste. Increase the heat and crisp up the crust for the second time (just 15 -20 seconds). You may need to try this several times before you will get it right.


6) Traditionally, tempura is eaten using a warm dipping sauce "tentsuyu" 天つゆ (dashi, mirin, sugar, soy sauce or buy in a bottle) with grated daikon and ginger root. But we usually eat it with "green tea salt" 抹茶塩 (a mixture of Kosher salt and powered green tea) and lemon. The  night I made this tempura, we went more traditional .

Thursday, June 3, 2021

Mint and pea kakiage ミントと豌豆のかき揚げ

Sometime ago, I saw this recipe in the web version of a Japanese newspaper. I thought mint and pea kakiage (a type of tempura made with several small food items) かき揚げ was very interesting and unique but was dragging my feet in actually making it. The mint crop is flourishing in our herb garden and my wife harvested some to make mint tea recently. She reserved some mint leaves for me to use for this kakiage (so I found myself fresh out of any excuses for not making it.) Finally, I made this dish one weekend evening. I served it with wedges of lemon and green tea salt.


I did not remember the details of the original recipe (and I could not find it any longer) but I used cake flour and carbonated water to make rather thin tempura batter and it came out very light and airy.


Ingredients (I did not precisely measure anything but it made four kaiage tempura).
About 1 cup of fresh mint leaves, washed and dried.
About 1/2 cup of peas (I used frozen petit peas, thawed).
Cake flour for dusting.
Peanut oil for frying.

For Tempura batter
About 1/2 cup cake flour
Cold carbonated water.

Directions:
Lightly dust the mint leaves and peas with the cake flour (#1 in the third picture)
Mix the cake flour and the carbonated water to make thin tempura batter and add the peas and mint leaves (#2)
Using a slotted spoon, I scooped up the mint and peas and slid the clump into the hot oil (350F) (#3)
Turning once, I fried them until crispy and slightly golden then drained them (#4)


We couldn’t taste much of the peas but this was very light, airy and crunchy with refreshing mint flavor. Perilla leaves, which are a bit similar to mint leaves, are a standard tempura item which I have used in several variations but mint leaves are certainly unique. Since we have a good supply of fresh mint leaves during the summer, we might try this in different combination...asparagus and mint immediately comes to mind.


Addendum
I made this dish again a few days later. I also found the original recipe and only thing I missed was adding potato starch (should equal 1/2 the amount of cake flour used). I also added fresh corn. I lowered the hot oil temperature to avoid browning. All worked better.


Friday, August 23, 2013

Nattou tempura  納豆の天ぷら

Mr. Segawa 瀬川 of our Izakaya substitute "Tako Grill" has had a special "Izakaya menu" for some time. We have been enjoying items from this special menu. Occasionally, he adds more items to this menu or offers one-time only special items. One evening, he offered us "nattou tempura". We really liked it and I reproduced it here. I have seen other recipes for "nattou tempura" but this one is a very good one indeed.

Close up showing delicate and crunchy crust.

Nattou: I used one package of "hikiwari nattou" 挽き割り納豆 which was previously frozen. As usual, I added chopped scallion with mustard, and seasoning liquid came with the package of nattou. I mixed it well with my nattou stirrer (Left upper on the image below)
Perilla: Now we have our own perilla ("aojizo" 青じそ or "ooba" 大葉) growing in our herb garden, it is easy to get six good sized leaves. I washed and patted dry with a paper towel. I placed one teaspoonful of nattou in the middle (Upper right in the image below). I folded it in half. Since nattou is sticky it will remain folded (lower left in the image below).
Tempura batter: I simply used cake flour and cold Seltzer water to make rather thin tempura batter.
I coated the folded perilla leaves containing the nattou in the tempura batter and deep fried it in 170F vegetable oil for 3-4 minutes turning once (lower right in the picture below).

This was very good. My wife (she who in general does not like nattou)  liked it as well. The smell of nattou and the slimy/sticky texture were much reduced. I served this with a wedge of lemon and green tea salt. For this, definitely cold sake is called for.

Thursday, July 19, 2012

"Saki ika" dried and seasoned squid tempura さきイカの天ぷら

As I mentioned in previous posts, Japanese have many pre-packaged drinking snacks. The variety of which far exceeds American counterparts of mixed nuts, gold fish– cracker not the real fish, beef jerky and mini-pretzels. One rather common snack is thin strands of semi-dried and seasoned squid called "Saki ika" さきイカ meaning "torn squid". This is a modern commercial product derived from an old fashioned dried squid or "Surume" スルメ.
surumeWhen I was growing up, "surume"  was a rather common snack, not necessarily just a drinking snack. This was a dried whole flattened squid. To eat, you have to first grill it lightly and then tear it along the grain into thin strips (it can easily be torn into strands by hand with an occasional application of teeth). It is very chewy like old leather and you have to work on it for a while in your mouth before it’s soft enough. As you chew, more flavors will come out. In fact a Japanese saying, "The more you chew, the more flavor you get" 噛めば噛むほど味が出る equates the effort you need to extract full flavor from dried squid to the effort you need to extract meaning and joy out of life; or subtle but real goodness can only be appreciated with substantial effort. But even in Japan, vigorous use of the masseter muscle is not an exercise people like to do. So much-easier-to-eat pre-cooked, seasoned, and pre-torn dried squid in a package is more common, replacing the old-fashioned "surume".  You could just eat "saki ika" as is (there are many variations but, in general, it has a somewhat sweet seasoning). Or you could used it in a dish. This tempura or fritter version is supposedly a classic Izakaya affair.  I have not seen or eaten it before so I decided to try it.
I checked a few recipes but, in the the end, as usual, I used my common sense and altered or combined several recipes.
The picture to the left is the "saki ika" I bought from the near-by Japanese grocery store. It said "a letter from shore" and "directly sent from where it was caught" but, who knows, this may have been made from squid caught off African shores and previously frozen. In any case, this is how I made this dish.

Dried and seasoned "saki ika" squid: I am not sure how much is in one package but I used the whole thing for two good sized servings. I first soaked the squid in an equal mixture of sake and water (2Tbs each) in a bowl and let it soften for 30 minutes. I then wrung out the excess moisture and wrapped it in a paper towel.

Tempura batter: I have experimented in the past what made the best tempura batter including the use of Vodka in a mix. This time I used cake flour, club soda (carbonated water) and dried "aonori" 青海苔 seaweed. I first mixed the flour and aonori in a bowl (the amount is arbitrary, the proper consistency is what you are after, you have to adjust the amount of flour and the water, accordingly). Just before frying, I mixed in the cold club soda and quickly mixed to make a runny pancake batter consistency. I added more flour and water as I needed to make the amount of batter I needed. But do not over mix otherwise the gluten will develop.

Oil: I used peanut oil for deep frying. I heated the oil to about 170C (335F). I placed the softened squid strips in the batter to make a small bite size portion. As I placed it in the hot oil, I tried to spread it into a flat disk-shape so that the strands of squid didn’t bunch up too much. I fried for few minutes turning once. The oil may have been too hot. The edges got a bit too dark (the seasoning of the squid apparently contains sugar) but it was not burnt and did not affect the taste too much.

As you can see in the first picture, I served this with a wedge of lemon and mayo mixed with soy sauce and Japanese 7 flavor red pepper flakes 七味唐辛子.

This is an excellent drinking snack. The "saki ika" squid has just right consistency, not chewy but not too soft, with very light crispy tempura crust. I was afraid the squid may became too fishy but that was not the case. Using carbonated water in the tempura batter really worked. Among other methods I tried, this is the simplest and most effective. As much as we liked this dish very much, it is not particularly "healthy". To compensate, I served a simple refreshing "sunomono" 酢の物 salad dish following this.
This is just cucumber, wakame (did not show up well in the picture) and tomato dressed in seasoned sushi vinegar and topped with crumbled soft semi-dried scallop from Hokkaido 北海道.

Friday, November 6, 2009

Soba noodle in hot broth かけそば


This is again is a dish with which to finish your home Izakaya feast. This is a very simple soba noodle dish. We had this when I made "age-dashi tofu". This was a perfect dish to make since I wanted to finish the broth I made for the tofu dish. I simply dilute it further to the strength appropriate for this soba dish. Soba そば 蕎麦 is very popular even here in the U.S. and it is easy to get high-quality dried noodles. Of course you can make the noodles yourself. We have a soba cook book which describes how to make soba from buckwheat flour. I tried it once but, it is too difficult to make for an amateur like me and the dried variety is just fine. 

There are two major ways to serve Soba; cold soba with a dipping sauce or "mori soba" もりそば and warm soba in broth or "kake soba" かけそば. There are many variations of both types of soba preparation depending on the condiments or toppings. For example, if you add tempura (usually shrimp), it is "tempura soba", if you add an egg  it is "Tsukimi soba" 月見そば meaning moon-gazing soba since the egg yolk looks like a full moon. If you add seasoned fried tofu pouch (abura-age), then it is called "fox" soba きつねそば. You may ask why this is called "fox" soba. "Inari" shrine 稲荷神社, one of the many Japanese shrines, considers the white fox as a messenger of the deity or god it enshrines. Later, probably through misunderstanding, people started believing that the fox was the deity itself. It is also believed that the fox deity loves "abura-age" or deep fried tofu pouch. Thus, any dish which includes "abura-age" has "kitusne (fox)" or "inari" somewhere in it's name. Another common soba topping is "tenkasu" 天かす or small bits of cooked tempura batter that you scoop up while you are making tempura (this can be stored frozen for later use), then, it is called "tanuki" soba たぬきそば. There is a play on words here. "Tanuki" is a Japanese badger or more like a raccoon which is always compared to "kitsune" or fox since both animals are believed to use "magic" (mostly transmogrification) to mislead humans in Japanese folklore. It is said that "kitsune" is always very cunning and successful in her magic but "tanuki" is always comical and failing in his magic. For the name of the noodle dish, "ta-nuki" also means just temprura batter without other ingredients of tempura  - "ta" means "other" and "nuki" means "missing" or "without".

We occasionally go to a small but elegant Japanese restaurant called "Makoto"  in Washington DC, where they serves an excellent course menu おまかせ in the "kaiseki" style 懐石 or 会席. After 7-8 small exquisite dishes, the last dish they offer is soba in warm broth. There are some choices of toppings and we always go for "sansai" 山菜 or mountain vegetables. The soba dish I made here is a simplified version of this. I just put sliced fresh shiitake mushrooms in the broth and cooked it for a few minutes. I poured the hot broth over cooked soba noodles in a bowl and finished with chopped scallion and nori. If you like, sprinkle on the Japanese 7 flavored red pepper "sichimi tougarashi"  七味唐辛子.

Tuesday, March 28, 2017

Nagaimo and salmon sausage Isobe fry 長芋とサーモンソーセージの磯辺揚げ

This was inspired by the vegan cooking by a Buddhist monk in Kyoto. He briefly cooked the nagaimo 長芋 rounds in broth, soy sauce and mirin to season it before making a type of tempura called "Isobe-age" 磯辺揚げ with the batter containing dried "aonori" 青海苔. I also made salmon sausages we got from my mother for new year into a similar tempura. I served it as a drinking snack with green tea salt, wedges of lemon and skinned Campari tomato.


I cooked the nagaimo a bit too much but I just used the leftover nagaimo dish and converted to the current dish.


Ingredients (for two small servings):
Nagaimo, peeled and cut into half inch thick rounds (four)
Dashi broth, soy sauce, mirin and sake
Salmon sausages, sliced diagonally in half inch thick (four)

For the tempura batter
Cake flour and potato starch
Cold water
Dried "Aonori"

Directions:
1. Cook the nagaimo in seasoned broth (Japanese broth seasoned with soy sauce, mirin and sake) for few minutes and let it cool in the broth (see below, this one is cooked longer than called for in this dish).


2. Make the tempura batter by mixing the flours and "aonori" with cold water until desired consistency (I made this rather runny). Coat the nagaimo and sausages.
3. Heat vegetable oil (I used peanut oil) to 350F and deep fry for few minutes.
4. Drain and serve immediately.

Since this was converted from "simmered Nagaimo" dish, the nagaimo was cooked more than needed before it was deep fried. Still, it had nice crunchy texture. It has nice crust with aonori flavor. The salmon sausages also tasted much better than when we tasted as is. This was  unusual but quite good tempura items.

Tuesday, July 27, 2010

Myouga, chicken and duck tenderloin tempura 茗荷、鶏と鴨の笹身の天ぷら

We do not particulary like to make tempura of myouga because the myouga seems to lose its flavor when cooked, but this one came out ok. Again, the myouga was used as a part of the tempura assortment rather than the main item.

The chicken tenderloin was stuffed with minced pickled plum or "umeboshi" 梅干し which is called "bainiku" 梅肉, then wrapped in perilla leaves. This is exactly the way I usually make this dish (Left in the back in the above picture). Since I separated the tenderloin from the duck breast when I made a duck breast dish, I wrapped it with a small rectangular sheet of nori 海苔. Whenever nori or aonori is used in this fashion or mixed into the tempura batter, it is called "Isobe age" 磯辺揚げ meaning "Rocky seashore fries" (Right in the back ). The tempura batter is my usual; a mixture of ice cold water and cake flour (I did not add potato starch this time because I was a bit lazy). I also fried this using the shallow frying method rather than deep frying.

I fried the myouga last, briefly and at a higher temperature than other items, which helped retain the flavor. When you cook myouga (such as in a miso or clear soup) the unique flavor of myouga diminishes quickly. I served this with an wedge of lemon and green tea salt.

Saturday, October 31, 2009

Chicken tender tempura with perilla and pickled plum 笹身の梅肉とシソ入り天ぷら

I mentioned this dish in the previous post of Ume-Shiso Rolled Chiken 梅しそ巻きFinally, I had a chance to make it. This is a classic flavor combination of chicken, pickled plum "umeboshi"  and perilla or "shiso" 青じそ. This is such a perfect combination of the flavors. You need a cold sake for this dish.
I use chicken tenders. Remove the sinew which runs on one end in the center from the tender. From the side, cut a slit which encompasses 60-70% of the length of the tender (make sure not to cut through). Remove the meat (or fruit) from "umeboshi" and chop it finely to make a kind of paste ("bainiku" 梅肉). Spread the the paste inside the slit your made in the chicken tender. Cover the open side with one or two perilla leaves (depending on it's size). Dip it into tempura batter and deep fry until done (2-3 minutes). For tempura batter, I just used cake flour with cold water. I also made Perilla tempura by dipping only one side of the perilla leaf in the tempura batter (it just looks better this way) for garnish. You do not need any sauce with this dish since it has the strong flavor of the pickle plum but I served this with a lemon wedge and a powdered green tea/salt  mixture 抹茶塩 (green stuff on the right in the above picture).

Saturday, March 7, 2015

Tako Yaki たこ焼き

Growing up in Sapporo 札幌, Hokkaido, takoyaki たこ焼き was not an item I encountered often. So-called "Konamon" こなもん food cultures are an Oosaka 大阪 (Kansai 関西) tradition which may include takoyaki,  okonomiyaki お好み焼き as well as noodles (especially udon). "Kona" 粉 means flour and anything made from flour may qualify as "konamon" but the exact definition escapes me.

One of the  reasons I made takoyaki was because this gave me another post but also because of my sister-in-law gave me an electric ebelskiver cooker as a Christmas present. After several of the cookers were delivered by Federal Express Ground to random locations other than our house it finally arrived last week—only 2 months late for the Christmas holiday. When I saw the cooker all I could think was Takoyaki. The size of the cooking wells and resulting product were larger than traditional Takoyaki but my wife said, “just call it American style takoyaki.

I made a takoyaki sauce and garnished with bonito flake powder and "aonori" 青海苔. For the first try, this was good with a crunchy outside and molten soft inside centered with a piece of boiled octopus leg.


Since this is not a type of food I grew up with, I looked for an authentic recipe for takoyaki. After looking through various recipes, I settled for the recipe which was written in Osaka dialect (a true sign of its authenticity).

Ingredients:

Takoyaki sauce:  A mixture of Lee and Perrin worcestershire sauce, ketchup, and honey. The ratio of the Worcestershire sauce and ketchup is about 1:2 and honey to your liking of sweetness. The authentic sauce is supposedly rather sweet. Among the pre-made commercial sauce, Otafuku brand takoyaki sauce おたふくたこ焼きソース is most popular. (left, upper).
Boiled octopus leg: I just cut into 1/2 inch or 1cm chunks (I made 12) (right lower).
Scallion: Finely chopped about 4 stalks (left lower) (1 tsp per ball).
Tenkasu*:  See picture and write up below. (1/2 to 1 tsp per ball).

In terms of the garnish,  I prepared dried "aonori" (upper right) and dried bonito powder (middle right, I made bonito powder by grinding the bonito flakes in a Japanese mortar and pestol (suribachi すり鉢) but this is not necessary (use as is).

I did not use additional items such as red pickled ginger (紅生姜) or small dried shrimp (桜エビ). According to this recipe, adding shredded cabbage is totally not authentic. If used, it should be called "Okonomiyaki" ball rather than takoyaki.


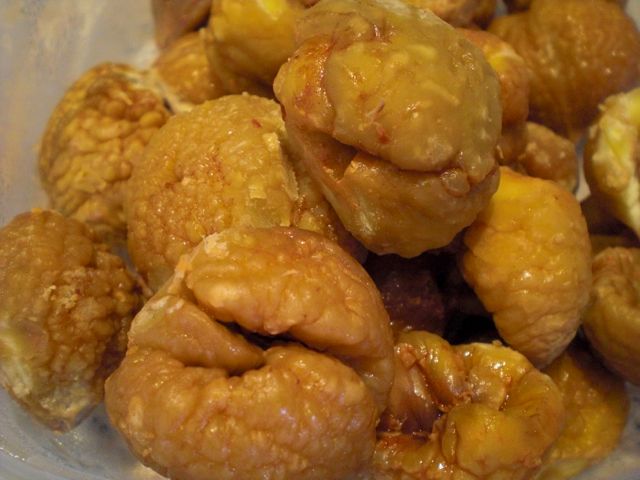
*Tenkasu: One more ingredient I needed was "tenkasu" 天かす or "agedama" 揚げ玉 a by-product of making tempura. They are the small fried tempura bits of batter that come off the main tempura while it is being cooked. They are quickly removed from the oil before they burn. Besides being used in making takoyaki and okonomi-yaki, they can be used as a topping for noodles (such as in "Tanuki" udon or soba), miso soup and other dishes.
Interestingly, in Hokkaido they are more commonly called "agedama" or "fried balls".  This is a term I prefer to Tenkatsu which literally means "wastage or scum" of tempura and does not sound particularly appetizing to me. They used to be discarded or given away free at tempura or soba restaurants but more recently, packaged commercial products can be had (some even flavored by ground up dried shrimp). I could have made this myself but for takoyaki, I bought pre-made one, as seen on the left, at my Japanese grocery store.

The advert on the package boasts of supposed health aspects of this otherwise unhealthy product. The package indicated it was healthy because it was fried in Canola oil and 0% cholesterol (same in any other vegetable oil). Maybe this is better than if they were fried in tallow but the distinction seems slim to me. I see similar amusing claims on potato chip packages touting how healthy they are. In any case, surprisingly they were not oily and had no smell or taste of oxidized oil but, by the same token, they had no flavor whatsoever, only texture. We were not sure this added anything special to our takoyaki (I added about 1 tsp per ball).

Batter: The batter is most important. I like this recipe since it was proportional based on the numbers of eggs used. The important things seem to be; 1. Use a good quality cake flour,  2. Liquid and flour ratio is 1:4 to 1:4.5 (some recipes call for 1:5 ratio), 3. Use of powdered skim milk and baking powder (They are recent additions and improve the quality of takoyaki according to this author. He referred to these additions as "progress").  I really liked this approach so I translated his chart below.
Numbers of
takoyaki
Cake flour Powdered
milk
Baking powder Sugar Salt Soy sauce Dashi
broth
Eggs
20 (12*) 70g 1 tbs 1/2 tsp 1 tsp 1/4 tsp 1 tsp 300cc
40 140g 2tbs 1 tsp 2 tsp 1/2 tsp 2 tsp 600cc 2
60 210g 3tbs 1.5 tsp 3tsp 3/4tsp 3 tsp 900cc 3
*12 using my ebleskiver maker.

I made the smallest amount (i.e. using one egg). This amount should make 20 takoyaki but with my American style takoyaki/ebleskiver cooker, I could make only 12 since the diameter of the wells are 5.5cm as opposed to either 3.5 or 4.2 cm of authentic takoyaki grills. I think the size difference is not a problem, at least for us. I used about 10cc of 1% milk since I did not have powdered skim milk and reduced the dashi by that amount. The dashi was made with kelp and bonito flakes as usual. I did not sift the flour (which is recommended) but added the cold liquid into the dry ingredients gradually as I whisked. It made a rather thin batter. I let it refrigerate for several hours before using.

Assembly: This is where the fun starts. I preheated my ebleskiver maker on "High" setting for several minutes. Using vegetable oil and paper towel, I oiled the wells and the top surface (this has Teflon coating). I poured the batter (after mixing it again) to 90% of the well (se below)


After few minutes the edges started bubbling and I added the octopus leg (below).


I then added the scallion (about 1 tsp) and the tenkatsu (1 tsp) and topped it off with more batter (see below).


Using the bamboo skewer and the special sticks came with the ebleskiver maker,  I tested if the bottom was set and started turning them over (below).


I turned them over few more times to make all the surface equally brown (see below).


The center should be still molten (as I was told) so I declared these  done.


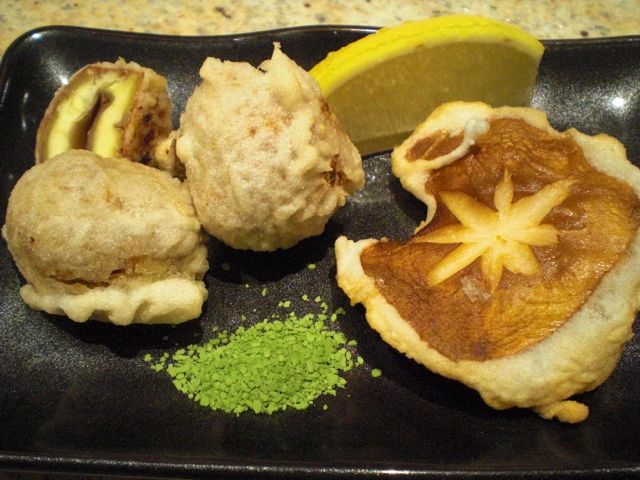
I brushed a small amount of my takoyaki sauce (mine is not as sweet as real Osaka style but I thought it was good. My wife said the sauce made the dish.) I then sprinkled on a pinch of the bonito powder and aonori powder (the first picture).

The center was very hot and molten. My wife thought that, instead of octopus leg, we could use shrimp (which I agree but then it will not be called takoyaki—maybe ebiyaki?). Another natural variation would be the addition of cheeses. Since I made "authentic" takoyaki, I may experiment with more variations (of course, I may consider making ebleskiver as well). We made total of 12 (9 in the first batch and three more). Between two of us, we finished all 12 in no time.

Tuesday, May 11, 2010

Fresh corn Kakiage tempura トウモロコシのかき揚げ (Mark's book P47)


I found corn in the husk for the first time this year in our grocery store. I asked the woman, stocking the shelf, where the corn came from (thinking it must have come from a foreign country like Mexico). She showed me the mark on the crates they came in. It was clearly stamped "U.S.A." but she did not know where in the U.S. It appears that seasonal items become available earlier and earlier every year.  So I bought 8 ears (less than $2). They were white corn and rather small but the kernels were full and sweet when I tasted them raw. So I decided to make kakiage tempera かきあげ. Kakiage is a version of tempera where small items (sliced onions, julienned Burdock roots, small shrimp or fish etc are fried with a batter as a binder).


The "corn kakiage" appears on Mark's book p47, but it is a rather standard recipe except the use of corn is a bit uique. I made my tempura batter with cake flour (1/2 cup), potato starch or "katakuriko" (1 tbs) and egg yolk (1/2) and mixed in ice cold water (about 1/2 cup) to a desired cosistnecy. For Kakiage, I made it to the consistency of a loose pancake batter. I removed the kernels from the cob (one ear of corn yielded about 1/2 cup) using a knife and placed them in a bowl. I added enough tempura batter to coat every kernel and a bit more. Using a soup spoon, I slipped the batter and corn mixture into hot oil (170C or 340F) and fried until crispy and lightly browned, turning once (about 2-3 minutes on each side). I drained and served while hot and crispy. I also made my usual green beans and shiitake mushroom tempura. I served this with green tea salt and wedges of lime. The corn was very sweet with a nice light tempura crust. The lime juice added a nice citrus acidity and made the salt stick better. We had a bit of red wine left but switched to cold sake for this dish.

Saturday, August 17, 2019

Perilla-wrapped marinated tuna tempura 漬けマグロの青紫蘇包天ぷら

This is the last of three dishes I made from the frozen block of yellowfin tuna. Actually, I was planning to make all three dishes one evening to finish up the tuna block. We, however, bogged down with the first two dishes (we had other small dishes as well) so I made this dish a day later. As a result, the tuna was marinated for 20 hours or so but it did not adversely affect the taste.


The perilla is from our herb garden. This year, our perilla went crazy and is almost 5 feed tall and the leaves are rather large. Although this is based on a recipe on line, I made some changes and used thin tempura batter instead of just potato starch. I also used toothpicks to secure the perilla. This perilla-wrapped tempura is similar to natto tempura I posted before.


I just cut thickly sliced tuna which was marinated into two bite size and wrapped it with half of the perilla leaves (depending on the size of the perilla, you may have to use a full leaf). I put a toothpick through to secure the perilla on the tuna.


I made thin tempura batter from cake flour and cold water. I coated the tuna package with the batter and fried it in 350F peanut oil for 30 seconds (I wanted the center still rare). Since the tuna was marinated, I did not have any dipping sauce or my usual green tea salt for this. This was quite good. The tuna almost tasted like beef with a crunchy curst nice perilla flavor. This will go with any kind of drink.

Monday, December 19, 2011

Chestnut tempura 栗の天ぷら

We got North American chestnuts from Girolami farm this year and were very much impressed with how good they were and I ordered another 3 lbs. One of the difficulties in dealing with chestnuts especially the North American variety is removing the inner brown skin or "shibukawa" 渋皮. It appears that the shibukawa does not just cover the surface of the chestnuts but goes deep into the cleavage of the nuts making it extremely difficult to remove, and making the nuts taste bitter if it is not removed. I do not remember this characteristic in Japanese chestnuts. In any case, I solved this problem after few tries (see below).
After I found the way to remove the shibukawa fairly easily and completely, I saw the description of chestnut tempura. Although I have never had or made this, I decided to try it. The above is the result. It is excellent and the chestnut's sweetness and nice texture came through very well.
I also made shiitake mushroom tempura and served them with my usual green tea salt as seen above.
Now my method of removing the shibukawa inner skin: I first soaked the chestnuts in cold water for a few hours. I put the pot with chestnut in it on high flame until it started boiling, I turned it down to simmer. I cooked for 15-20 minutes and shut off the flame. I let it sit in the pot for 20 or so minutes. I scooped up several chestnuts at a time using a large slotted spoon and started removing the outer and inner skins. It was still rather hot but just cool enough that I could handle them. When I pulled on the shibukawa using a paring knife, to my surprise it came off very easily and with a little care, the shibukawa even came out from the cleavages as seen above. When the chestnuts got cold or dry and were too long out of the cooking water, it became more difficult to remove the shibukawa and the nuts tended to break when I tried. So, I worked 4-5 chestnuts at a time. In any case, I got really good at it and removed both outer and inner skins breaking only few chestnuts. I produced a good numbers of intact chestnuts with both skins completely removed this way.

The tempura batter is my usual; a mixture of potato starch and cake flour mixed with cold water. I  made a somehwat thick batter for this. I deep fried it in fresh peanut oil at 340F for 3-4 minutes.

This is surprisingly good.  The natural sweetness of chestnuts is really enhanced and nice combined with nice "hokuhoku*" ホクホク texture. 

*It is difficult to translate to English. This is to express the texture of starchy root vegetables such as boiled or grilled potato especially roasted sweet potato called "Ishi-yaki Imo".