Saturday, June 16, 2012

Chicken skin with grated daikon and ponzu 雛皮と大根おろしのポン酢あえ

This is another nothing dish but a perfect drinking snack.

CIMG5015


I often make microwaved sakamushi (酒蒸しsake steamed) chicken breast. This is very handy to have around. You can make all kinds of small dishes and even sandwiches with it. I usually cook it with the skin on because it keeps the breast meat from getting dry while cooking. When I use the meat, I usually remove the skin before slicing the chicken but I do not discard the skin. Instead I leave it in the container with the remaining meat and chicken juice. I use the same technique with raw chicken. When I remove the skin, I sometimes discard it but other times I prepare small dishes from the skin. If I am preparing the chicken skin from scratch, I prepare it by first boiling in water with sake, scallion and ginger added. But when I am using the skin of sakamush chicken, I need not to do these preparations.

Unfortunately, chicken skin has a layers of fat attached to it. I removed the fat with a knife as much as I could before slicing it into thin strips. I also sliced the scallions, which were cooked with the chicken breast, on the bias about the same size and length of the skin. I mixed and dressed them with ponzu shouuyu (pozu wih soy sauce). I also grated some daikon 大根 and squeesed out the excess moisture.

To assemble, I sliced some cucumber (American minicucumber) and fanned out the pieces putting them on one side of the plate (in this case, I used a lacquered square ichi-go masu sake measuring cup 一合升) .  I placed a small mound of grated daikon next to the slices. Then place the dressed chicken skin and scallion next to the daikon and cucumber. For slight heat, I sprinkled on 7 flavored Japanese red pepper flakes or shichimi tougrashi 七味唐辛子.

Tuesday, June 12, 2012

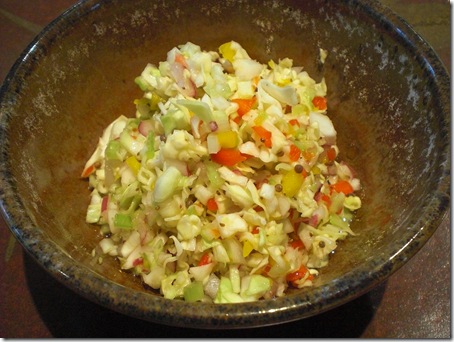
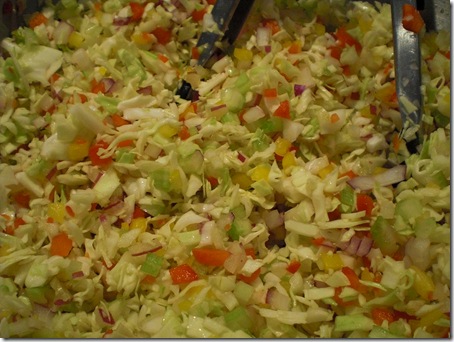
Pennsylvania Dutch Pepper Slaw ペンシルバニアダッチペッパースロー

This is a taste from my wife’s childhood. So, she is writing this blog.

CIMG5013
CIMG5008

After we made the traditional mayonnaise based American coleslaw several days ago, I remembered there was another type of coleslaw that was always present at picnics in my childhood. I remembered it was called pepper slaw. My husband had never heard of it, so I decided to make it for him.

All the vegetables are cut into a fine dice so the pieces are all about the same size. They include: 1 head of cabbage, 7 stalks of celery, one red and one yellow bell pepper with the skin removed, one purple or sweet onion. Mix the cut vegetables together in a large bowl. As usual, my husband sliced and diced so efficiently and quickly, this is the easiest part of the preparation for me. He referred to himself as the human “cuisinart”, but the mileage may differ depending of what you have.

Dressing: 1/2 cup sugar, 1 cup sushi vinegar, 2 tsp. salt, 2 tsp mustard seed bloomed (to bloom the mustard seed put into a dry frying pan and heat until the seed pops open. When they start popping they will look like popcorn hopping out of the pan. Take them off the heat immediately. Blooming the seeds gives them a much richer flavor). The other ingredients include  3/4 to 1 tsp. black pepper, 1/2 tsp Dijon mustard and 1 tsp celery seed.

Pour the dressing over the vegetables and stir completely. Let the slaw rest in the refrigerator for several hours for the flavors to marry. This will get better over the next few days. The dressing I use includes much less sugar than the traditional recipes. The inclusion of sushi vinegar is not traditional either, but It is much milder than the usual cider vinegar. In addition, I added more cracked black pepper than the usual recipes call for. (With these traditional dishes there must be regional differences. The pepper slaw I grew up with was really quite peppery. I thought it was called pepper slaw because of the sharp spicy black pepper taste. This is what I grew up with and this is what I expect from the dish. You may want to vary the amount of pepper to your own taste). It wasn’t until we were making this batch that my husband pointed out that the inclusion of the red (green, yellow, orange etc) peppers contributed to the name pepper slaw as well.  

I have not eaten this dish in years. As a child it was my least favorite slaw but it was ubiquitous--no picnic was complete without mayo based coleslaw and pepper slaw. I thought it was basically coleslaw with a lot of black pepper added. Again I am amazed how a taste can transport you to a different time and place. When I initially tasted the mixture I made, I thought it was close but didn’t really ring a bell. It wasn’t until I started dialing up the amount of black pepper that I reached a point when suddenly the taste was exactly what I remembered. Also, I have to say I appreciate this dish much more as an adult than I did as a kid. It is sweet and sour, with a spiciness that is very refreshing.

P.S. I find I keep adding cracked black pepper to this dish...it still has not reached the level pepperiness I remember.

Saturday, June 9, 2012

Blanched Mizuna 水菜のおひたし

Mizuna 水菜 is a Japanese green, sometimes called Japanese mustard green, which is often used in a Japanese hot pot dish or “Nabe” 鍋. It has a very subtle piquant flavor. The other day, we were in the near-by Japanese grocery store and, somehow, I thought, I picked up a package of edible chrysanthemum or shungiku 春菊 but when I opened it several days later, I discovered it was Mizuna. My wife, who likes edible chrysanthemum, was disappointed. Since I was not planning on making a nabe dish, I made this simple but a classic “ohitashi” dish.

CIMG5005

“Ohitashi” means “soaked”. Originally, vegetables (mostly leafy greens) were boiled and then “soaked” in a broth or dashi 出汁. The excess liquid was then squeezed out and it was seasoned with soy sauce. More commonly, however, the soaking step was omitted and the boiled leafy vegetable with soy sauce on top is called “Ohitashi”.


Mizuna: One package of mizuna was composed of about 6 individual plants measuring about 12 inches long. As with any leafy vegetable, it looked like a lot but after cooking the volume decreased quite a bit. I washed the stalks and lined them up so that all the leafy parts were on one side and the root ends on the other. I cut off the root end and cut the remainins stalks in half so that one bunch was mostly leafy and the other was mostly stalks.
I first cooked the stalks in salted boiling watr for 30-40 seconds and then added and cooked the leafy part for another 30 seconds. I drained the cooked greens in the colander. Spread the cooked mizuna flat and cooled it down by fanning. You could shock it in ice cold water but this is easier and the mizuna will not get too watery.


Dressing: Instead of “broth” which may have been used in the original form of “ohitashi”, I made mustard/soy sauce mixture or “karashi shouuyu” 芥子醤油. I put about 1/2 tsp of Japanese hot mustard (from a tube), sugar (1/4 tsp) and soy sauce (2 tsp) in a Japanese mortar or “suribachi” すり鉢 and mixed all together using a pestle or “surikogi”  すりこ木.

I squeezed out any excess moisture from the cooked mizuna and then cut into pieces about 2 inch long. I dressed with the above karashi shouuyu. I placed it in a small dish as seen above. I garnished with dried bonito flakes “Katsuobushi” 鰹節 (pre-shaven and came in a small plastic pouch). Just before eating, you may want to moisten the bonito flakes with a bit of additional soy sauce (which we did).
This is more for the texture than the taste of the green itself but, nevertheless, very refreshing small dish which can go well with your Japanese style dinner/breakfast or drinking snack. “Ohitashi” can be made any vegetables but the most common is using spinach. When using spinach, especially the Japanese variety, you should soak the spinach in cold water after boiling to remove oxalic acid.

Thursday, June 7, 2012

Coleslaw コールスロー

On Memorial day weekend, my wife wanted to have coleslaw to usher in the start of summer. In Japanese-Western dishes or "Yoshoku" 洋食 such as tonkatsu トンカツ, shredded raw cabbage is the most favorite accompaniment but my wife in general is not a fan of cabbage particularly shredded raw cabbage. I usually end up disguising the cabbage with some type of dressing. This time, she wanted classic unadulterated American style coleslaw—we’re talking the start of the summer season after all.

CIMG5004

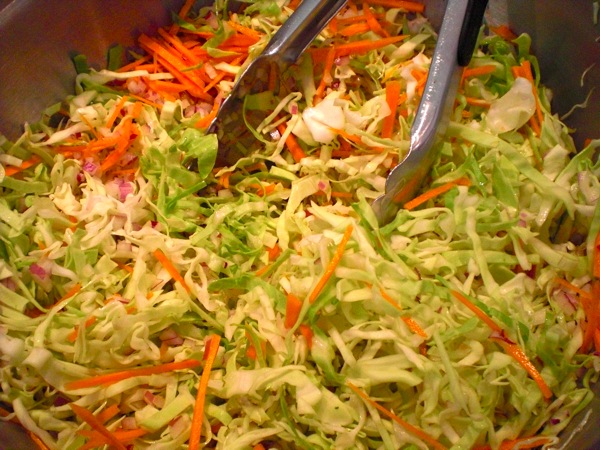
By her direction, I played the role of a human cuisine art and sliced cabbage, carrot in thin strips and finely diced red onion for her. The amount is arbitrary but we used 7-8 leaves of cabbage, with thick veins removed and thinly sliced, and two medium carrots, thinly sliced on the bias and then finely julienned. She also added 1/2 cup of raisins in a large bowl as you see below.

CIMG4999
Dressing: There are many variations  but below is what she used.
Mayonnaise 1/2 cup
Plain yogurt 1/2 cup
Red onion 1 small, finely chopped
Sushi vinegar 1 Tbs.
Worcestershire sauce 1 tsp
Sugar 1/4 tsp
Kosher salt 1/2 tsp
Ground black pepper to taste

She dressed the coleslaw and let it sit in the refrigerator for, at least, several hours, before serving. The slaw will get better next day. This is near-classic American coleslaw and it was ridiculously good. I have to admit, even for me, I would rather eat this than just shredded raw cabbage. The finely chopped sweet red onion is what made the dish. Also, even though this type of coleslaw is usually made with a dressing of mayonnaise, the addition of the yogurt makes the dressing more healthy but oddly enough none of the mayo flavor is lost.

Tuesday, June 5, 2012

Beef back rib BBQ on Memorial day 牛バックリブのバーベキュー

On Memorial day, we like to barbecue particularly if the weather allows. We tend to be in a rut and cook whole chickens served with sides of potato and macaroni salads. We have done roast pork, beef, lamb etc and wanted to do something different this year. So we cooked beef back rib this year.
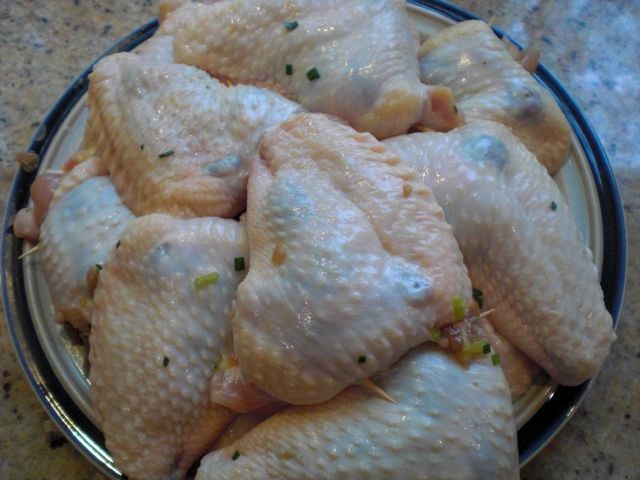
We fired up two Weber kettles. One was used for baking pizzas and the other was used to cook the ribs. Oh, we also made teba gyoza. The answer to my wife’s question how many wings can I prepare and cook one time; twelve! (see below).


I removed the wingtips to save space on the grill. I ended up cooking the teba gyoza in two batches but if we were not cooking the ribs, I could have cooked all 12 at once.  I did not take a picture of the final and cooked teba gyoza but it is the same as before but lacking the handle (i.e. wingtips) to hold onto.

The recipe for the ribs is based on ones listed in the  Weber webpage.

Ribs: I got center back ribs (with 6 ribs). I removed excess fat and rubbed the dry rub below I placed the ribs in the Ziploc bag and refrigerated for 8 hours.

Dry rub: Dried oregano (2 tsp), smoked paprika (2 tsp), dried granulated onion  (2 tsp), brown sugar (1 tsp), kosher salt (1 tsp), and ground black pepper (1 tsp).

Barbecue sauce: Initially I was to use store bought Mango BBQ sauce (which had been given to us sometime ago) but, upon tasting, I decided it was too sweet and my wife decided to make her own BBQ sauce. Here is the recipe my wife made which is a “classic” ketchup based sauce. Her recipe is based on one in “Joy of Cooking” but with her own variations. It is also very similar to the one used in pork spare rib.
For the sauce; Two medium onions were coarsely diced and sauteed in a small amount of olive oil until soft and caramerized (15-20 minutes). One cup of ketchup was added to the pan and cooked, scraping the bits left behind from cooking the onions, until the sugar in the ketchup was caramelized (the color will change from red to more dull brownish color). Combine, the onion and the ketchup in a sauce pan with a mixture of rice vinegar (2 tbs), water (1/2 cup), lemon (1/4 cup), paprika powder (1/2 tsp), Worcestershire sauce ( 1 tbs), salt (1 tsp), brown sugar (1 tbs) and mustard (1 tbs.) and simmer for about 15 minutes. I added about ½ cup of red wine (since we did not have wine which did not pass our Wednesday wine drinkability criteria - lowest-, we used one we will be drinking in the near future) to the sauce and simmered it for 5-6 minutes and kept it warm.

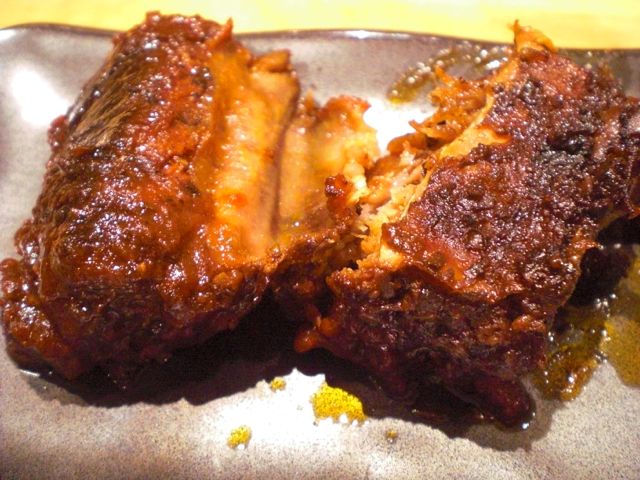
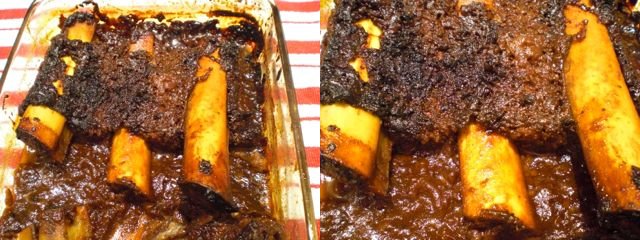
I took the ribs from the refrigerator 30 minutes before cooking to come to room temperature. I prepared the grill for indirect heat and added soaked apple wood chips for smoking. Using the direct heat part of the grill, I seared both side 5-6 minutes each. I then transfer the ribs (I had to cut it in half) to a Pyrex baking dish and poured the wine/BBQ sauce mixture over the ribs and covered it tightly with aluminium foil. I placed it in the indirect heart area and further cooked it for 1 more hour (see picture below).

As you can see the sauce reduced and the meat was almost coming off the bones. It is usual to serve it with the bone on, but the meat just came of the bone as I was serving. So I just served the meat sans (without) bone (the first picture).

We are not connoisseurs of BBQ as they are in the South and Texas, but we thought these were mighty good ribs with BBQ sauce. The sauce; caramelized with the juice from the meat was just the right consistency--ooey-gooey, mildly smokey sweet and sour. The meat had a nice crust and melted in your mouth. We had our usual macaroni salad (Memorial day would not be Memorial day without that) with the addition of black bean corn salad. But this combined with the pizza, and the chicken wings--which had to be tasted as they came off the grill, of course, was way too much food.


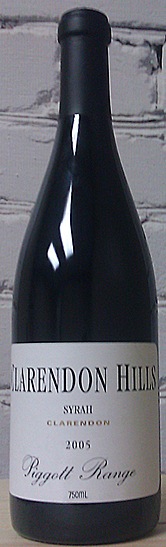
As and antidote/libation, we chose shiraz from Maclaren valley, Australia called Clarendon Hills McLaren Valley Piggott Range Vineyard, Syrah 2005. This is a very nice heavy duty shiraz. It stood up against the strong flavorof the BBQed ribs. This one got 97 from Wine Advocate.
97 Points - Wine Advocate
Deep crimson in color with mineral notes, violets, spice box, black pepper, espresso, smoked game, and blueberry aromatics. Deceivingly opulent, it has enough structure to merit 8-10 years of cellaring and should make old bones. Drink it through 2035."