Wednesday, July 17, 2024

Dassai 45 and Dassai blue comparison 獺祭45とDassai Blue 50 の飲み比べ

“Dassai” 獺祭 is a well known and popular sake in Japan and US. We like it for its very clean, fruity flavors. We used to get  “Dassai 50” daiginjo 獺祭50大吟醸. But the Dassai 50 is not sold any more. It was replaced by “Dassai 45” in 2019 (In Dassai 50, the sake rice is polished to 50% of the original volume, in Dassai 45, it is polished to 45%).  We learned that Dassai (brewed by Asahi Sake Brewery 朝日酒造 in Yamaguchi 山口県) established a sake brewery in Hyde Park, NY some years ago. However, this is the first time we obtained several bottles of  the NY-brewed sake “Dassai Blue 50”.  Interestingly, Dassai Blue is labeled as “Type 50”. I assume that indicates 50% polish like the old Dassai 50. My understanding based on an article I read,  was that they used imported Japanese “Yamada Nishiki” 山田錦 sake rice. But another source of information (again, not their website) indicated the rice is grown in Arkansas. (Further more, I would have to wonder what water source* they are using in the brewing; NY tap water, Hudson river water, or Hyde Park artesian well water???) In any case, one evening we compared Dassai blue and Dassai 45 (picture #1).

*One on-line store website indicates the sauce of the water is a “local well”. But again, this is unofficial information.


The Dassai Blue, when first tasted, has a definitive tingling/prickly sensation on the tip of the tongue. It is like very lightly effervescent. Then comes a very subtly sweet and Dassai signature fruity taste.  As it sits in the glass, the tingling character diminishes indicating indeed this might be the effervescence. The “Dassai Blue” label indicated “keep refrigerated”. I wonder if the label “keep refrigerated” means, “Blue”may be  “Nama” sake 生酒** or not heat-treated and slight fermentation happened in the bottle producing the effervescence. (Again no details are available from the brewery and these are all our conjuncture).

**Another unofficial information indicated “Blue” only had one “hi-ire” 火入れ heat-treatment instead of  usual  two (after pressing and bottling).

The Dassai 45 is a classic Dassai, clean, fruity and smooth in the mouth—no effervescence or tingly sensation.

Which one do we like better? It is hard to say. Dassai Blue’s tingling sensation is not unpleasant (we had similar effervescence in other “non-sparkling” sake). According to the label (picture #2), they are aiming to surpass Dassai brewed in Japan but not just to reproduce it. We can certainly enjoy either Dassai.


To enjoy sake, we need some “otsumami” おつまみ appetizers. For Dassai tasting, I served warm chawam-mushi with ginko nuts, shrimp, shiiitake mushroom and the garnish was our home grown fresh “mitsuba” 三つ葉 which added a nice unique flavor (left in picture #3). The center is eggplant, shiitake and wood ear mushroom brased in oyster sauce and ginger 茄子と椎茸のオイスターソース炒め. The right is garlic chive “ohitashi” ニラのお浸し topped with golded thread omelet.


In the past we tried a few US brewed sake and Dassai Blue in definitely one of the best. Only one which is in the same class is “Sho-Chiku-Bai” daiginjou 松竹梅大吟醸 brewed from California-grown “Yamada Nishiki” sake rice. But these two cannot be compared in the same way. Sho-Chiku-Bai was produced in very limited quantity, is not readily available and has a much higher price point. On the other hand, the Dassai Blue 50 is very reasonably priced and relatively widely available.


Sunday, July 14, 2024

Mitsuba ミツバ

Mitsuba 三つ葉 is a sort of Japanese parsley mainly used as a garnish or topping for certain dishes such as soup, katsu-don カツ丼 and chawan-mushi 茶碗蒸し. “Mitsuba” in Japanese means three leaves since it has three leaves. It has a very distinctive and unique flavor. In the past, I rarely got fresh ones at our Japanese grocery store and I could get dried ones which do not have much flavor. I tried to grow it a few times from the seeds (from Kitazawa seeds) which was not a great success for some reason. This time the mitsuba we planted in a pot on the window sill grew quite nicely (picture #1). 


I added this home-grown fresh mitsuba to the usual chawanmushi I make (picture #2). I mixed the stalks which were cut into small pieces into the egg mixture but I added the leaves just 30 seconds before serving. This time I served chawanmush hot just out of the steamer.


Althouhg mitsuba is not a major component of the any dishes incuding the chawanmushi, I really like the unique flavor.

Thursday, July 11, 2024

Garlic Chive Dumpling ニラ頭饅 or 韮菜万頭

We used to grow garlic chives or “nira” ニラ in our herb garden but it failed in two ways: 1) the garlic chives were very fibrous except when we harvested them very young and 2) they grew like weeds taking over the entire herb garden. The plant had deep roots that were very hard to extract. It was quite a lot of work to get rid of it and we are not completely successful even now. (Digression alert: Some years ago we hired a gardener to do the spring clean up which included the herb garden. When he found out the herb garden contained garlic chives he specified the clean up would include everything EXCEPT the garlic chives.) Although we did make quite a few garlic chive dishes, we gave up growing our own. We have been shying away from even buying garlic chive for a while (besides it is not readily available). Since Weee almost always carries garlic chives, we tried them. They came in quite a large bundle (about 1 lb). We tried it in several dishes and, even though they were fully grown, the garlic chive were not fibrous at all.  We added garlic chives to our stir-fried dishes, soup and as a “ohitashi” ニラのお浸し. We still had some garlic chives left so I started looking for new recipes to use them. I came across a recipe by Koh Kentetsu on YouTube.  I was not familiar with this dish. I am not sure if this is based on a known Chinese dish or invented in Japan but it is apparently very popular. 

A quick internet search indicated that “nira-manju” or “garlic chive dumpling” was “invented” in a Chinese restaurant called “Niramanju Fussa” or “韮菜万頭福生” near the Yokota American military base 横田米軍基地. In any case, I have not tasted or seen the “original”. I made this based on the Koh Kentetsu recipe but I ended up making some changes (in the seasonings, not intentionally. Since I made this dish from memory after I saw the YouTube video). This is in the similar ilk as gyoza 餃子 and shumai  焼売 but maybe even better. We really like the garlic chive flavor and cripsy skin (picture #1). It re-heated nicely in the toaster oven. Since I seasoned the filling adequately, we did not use dipping sauce.


The innovations of his recipe is to use two sheets of store-bought wonton skin to encase the filling and the instructions of how to encase the filling very easily for a home cook. It was cooked exactly like gyoza producing a nice crispy skin on both sides (picture #2) and juicy inside.


Ingredients: (made 10 good-sized dumplings, see picture #2)
1/2 lb ground pork
1/4 lb garlic chive, finely chopped (about 1/5 in)
6-7 medium shrimp, thawed, and minced (optional)
1/2 tsp minced/graded ginger (original recipe used only ginger juice)
1/2 tsp minced/grated garlic (optional,  original recipe does not use this. My wife felt this added too much garlicky flavor)
1 large cap of fresh shiitake mushroom, finely chopped

Seasnings:
1 tsp Shao Xing wine
1 tsp oyster sauce
1 tsp soy sauce
1/2 tsp dark sesame oil

20 Wonton skins

Directions:
Add the meat, shrimp, garlic, ginger and seasonings in a bowl and mix well
Add the mushroom and garlic chives and further mix and cover. Let it stand in the refrigerator for a few hours
Using a medium sized ice cream scoop, make balls of the filling and place them on a rimmed baking sheet.
Place the wonton skin on top of the filling balls (I moistened all the edges to make sure it would stick)
Using all five fingers, press down on the edge and turn several times until the sides of the wonton skin adhere to the filling. Then flip it over (picture #3). (If you just steam this, you are making “garlic chive shumai” ニラシュウマイ).


Place the second set of wonton skin on top (I also moistened the outer edges). Using the same process, turn and totally encase the filling to make sure all sides are attached to the filling and each other
Press gently to make a disk (picture #4)


(I covered the dumplings with a plastic wrap and refrigerated 1-2 hours before cooking but this is not needed. I just wanted to have all the dumpling assembled before cooking them in the evening.)
Using a 12 inch non-stick frying pan, I added the vegetable oil with a splash of sesame oil on medium flame and browned one side (2-3 minutes) and turned it over to brown the other side for another 2-3 minutes (picture #2)
Add a small amount of water (about 1/4 cup). Cover with a tight fitting lid to steam for 2-3 minutes or until the steam stops coming out.
Remove the lid and let the moisture evaporate. Keep browning the bottom and the other side with the addition of a small amount of sesame oil toward the end of cooking.

This is a really nice dish and easier to make compared to gyoza (because you do not have to clip the edges). A good amount of garlic chive adds a nice flavor (my addition of garlic was a bit too much for my wife, I will omit it next time). This is a perfect small dish with drinks.

Monday, July 8, 2024

Pizza Made in Indoor Electric “Pizzaiolo” Pizza Oven

After my wife gave me this indoor electric pizza oven for my birthday (at the end of March), I have made quite a few pizzas (4-5 times, total of 10-12 pizzas) in the past 2 and half months. The  pizzas I made were quite good (better than the ones I made using our regular oven) but they can be improved and I kept changing the settings and dough recipes. I also got a pizza steel made for the Pizzaiolo and tried that too. 

Compared to the pizza stone, the steel retains and conducts heat better. When making multiple pizzas, the pizza stone requires a few minutes to recover and reach the correct heat settings after making each pizza. The pizza steel appears to stay hot.  The bottom of the crust gets carbonized a bit too much, though. I only used the pizza steel once.  I have to try a few more time before I can evaluate properly.  I am sticking to the pizza stone for now. 


In any case, picture #1A is my most recent pizza (using “00” flour, half Margherita and half pepperoni). To me, the crust charr marks are just right (“Darkness” setting at 11 o’clock) as compared to #3 which was too charred with the “Darkness” setting at one o’clock.


The next pizza (picture #1B) is our first attempt using pesto (from the basil on home-grown on the window sill) and red pepper sauce. The cheeses are low moisture Mozzarella and fresh goat cheese.


The picture #2 is another Margherita I made earlier. It looks “charred” but the taste was not bad, it did not taste like you are eating pure carbon but it was too much charr. This was the “darkness” setting at one o’clock.


Picture #3 is one of our most popular pizza; artichoke hearts (from a jar) with olives. Cheeses are mozzarella, Irish cheddar, smoked gouda and fresh goat cheese. This was baked immediately after the #3 pizza (I prepared this pizza in a wooden pizza paddle while the first one was being cooked). This made this pizza crust bottom not as crispy and charred since the pizza stone was not completely recovered heat.


Although this is still on-going process, the below are my current set-ups for the oven and dough.

Dough: I tried both “00” and bread flours with and without addition of olive oil. “00” dough without olive oil is a bit too chewy for us but addition of a small amount of olive oil appears to make it better (may not be authentic for Neapolitan or New York pizza). For us, the bread flour or “00” flour does not make a big difference but  we may even prefer “bread-y” consistency of crust using the bread flour.

Ingredients:
3 and 1/2 of flour (either bread or “00”)
2 tbs olive oil
1 (or a bit more) cup of water
2 tsp Kosher salt
2 tsp instant yeast

Directions: (I use the food processor fitted with a kneading blade in low-speed up to 4 cups  of flour).
After running the blade to mix all the dry ingredients, I drizzle the water in a thin steady stream as it is running until the dough forms above the blade (the surface is a bit sticky). Let it sit for 5 minutes for better hydration and run another 1-2 minutes. Take it out on a floured board and hand knead until elastic. Placed the dough in a lightly oiled bowl, turn it over to coat all the surface, cover it with a plastic wrap and place it in a proofing box at 85F for 1 hour or until doubles.

Deflate gently, fold several times and divide it up into 4 equal dough balls (I weigh making 4 balls of a bit over  200grams each). After the first rise, I divide the dough and form 4 balls with a smooth surface. Place it in a small Ziploc bag coated with olive oil inside and let it sit in the refrigerator at least overnight or up to  several days. I take out the dough balls one hour before baking and let it come to the room temperature. If I do not use it within several days, I freeze them. (to use the frozen dough, I transfer it to the refrigerator one day before to completely thaw).

I hand stretch the dough to make 10 inch pizza, coat it with olive oil with crushed garlic. I place the slices of  low moisture Mozzarella first and then tomato sauce.

Oven settings: “Wood fired” and the darkness setting to “11 o’clock”. Preheat for 30 minutes. I use the modified the wooden paddles which fit the oven perfectly. I use corn meal on the paddle so that the dough slides better. I cook for 2 minutes (as it is the automatically setting). Steam and some smoke come out during cooking so I use the oven under the hood with the exhaust fan running. For the next pizza, I wait until the stone temperature completely recovers (a few minutes until the “at temp” indicator light stops blinking).

Is it worth it?? Although pizza I made using the regular oven and pizza stone was quite good, pizza cooked in the Pizzaiola is definitely much better. They cook so quickly (instead of 6-7 minutes in the conventional oven they’re done in just 2 minutes). So if you have a pizza party, you could turn out a few pizzas in a jiffy. I am trying to keep this oven clean but it is a bit of a chore. Other use of this oven may be to bake focaccia (which we tried with a good result) or naan (which we have not tried yet).

Friday, July 5, 2024

Red and Green Udon “Pasta” with Prosciutto 生ハムのせ緑と赤のうどんパスタ

I came up with this for lunch one day. This is a left-over control dish. A few days ago since it is getting hot, we had cold “udon” pasta with tomatosトマトの冷製パスタ for lunch.  We usually make this dish with thin udon 糸うどん rather than fettuccine. I also cook up more than what we can use for this dish since cooked udon noodles can be used for other dishes and are handy to have. We also had left-over roasted red pepper sauce and pesto which I made a few days ago and used to make a white pizza with those sauces on top. We still had a bit more of the red pepper sauce and pesto left, so I came up with this dish (picture #1). The topping is prosciutto. It was also left over from the cold tomato pasta. I also added grated Parmesan cheese and a drizzle of our favorite Spanish olive oil. 


I thought of making cold pasta but ended up with warm pasta. I just sautéed the pasta in two separate small frying pans with small amount of olive oil. I added the red pepper sauce and pesto to each pan and warmed them up.


I topped this with prosciutto, grated parmesan and drizzle of olive oil. This was a quite good pasta dish. In addition, we managed to finish a few left-overs.

Tuesday, July 2, 2024

Egg roll 春巻き

Although I posted a few egg rolls 春巻, none are traditional/classic. So, I tried to make something close to “classic”. After consulting several recipes, I came up with this one. The filling is mostly vegetables (cabbage, carrot, bamboo shoot, rice noodle, shiitake mushroom, and a small amount of pork that I had roasted (in Weber with some smoke). It came out ok but we decided we are more used to and probably prefer gyoza 餃子 and shumai 焼売. We had fried shrimp heads from when we took out sashimi and sushi from Tako Grill. We re-fried and served them with the egg rolls. Sweet and sour sauce must be the most common dipping sauce but I did not make any sauce and instead, served this with green tea salt. 


Since I did not measure the ingredients, this is not recipe but note to myself. The filling made a total of 14 egg rolls.

Ingredients:
3-4 leaves of cabbage, thick ribs removed and cut into small rectangles
1 small carrot, peeled, sliced and Julienned
Half of a package of boiled  bamboo shoot, sliced and julienned
Ginger, skinned and thinly julienned
2 caps of fresh shiitake mushroom (dried could be better but I did not have time to rehydrate them )
1/4 package of dried rice “harusame” 春雨 noodle, soaked in boiling water for 5 minutes, cut into bite sized pieces
1 tbs vegetable oil plus a splash of sesame oil
4-5 slices of roasted pork julienned (or uncooked julien or ground pork and shrimp)

Egg roll wrappers
Mixture of water and flour to make a slurry/glue (to fasten the ends of the egg roll wrapper)

Seasonings:
2 tsp oyster sauce
2 tbs Xiaoshing wine
2 tbs Soy sauce
2 tsp potato starch + water to make slurry
Salt and pepper
1 tsp sesame oil

Directions:
In a wok on medium-high flame, add the oil and sauté the ginger, vegetables and the pork. Season with the salt and pepper. When, the vegetables are cooked add the seasonings and mix. Add the starch slurry and splash in the sesame oil and mix.
Spread the filling on a metal cookie sheet to cool to room temperature and then refrigerate covered.
(I made the egg rolls several days after I made the filling)

Assembly:
Place the wrapper diagonally and place the filling near center but more toward the bottom, fold the bottom corner over the filling and then both sides and roll. Paint the flour/water mixture on the far conner of the wrapper and complete the roll (see picture below). (I made the rolls 1-2 hours prior to cooking. I covered  them and placed them in the refrigerator).


Instead of my regular “tempura” set up, I used a 10 inch frying pan for to  “fry” them.  Place the rolls with the end seam side down first and turn it over after the bottom is brown and continue cooking until the wrapper is all brown and crispy.


These were pretty good. The filling was adequately seasoned and the wrapper was crispy. Initially we thought there is too much wrapper as compared to the filling since we were more used to the proportions of gyoza. But over time the flavors melded together and actually tasted better. We discovered one egg roll made a nice lunch. Also they crisped up very nicely in the toaster oven.

Saturday, June 29, 2024

Nine “Otoshi” Appetizers お通し九種類

This is another installment of 9 “otoshi” appetizers. I managed to fill all 9 spots with small dishes I made. Three fish dishes and 6 vegetable dishes but no meat.


A1: Wood ear mushroom dressed in Japanese hot mustard soy sauce 木耳の芥子醤油和え.  Blanched fresh wood ear cut into strips and dressed in a mixture of Japanese hot mustard, sugar and soy sauce. I also added small amount of roasted sesame oil and garnished with white sesame seeds..
A2: Cucumber and sweet onion salad 胡瓜と玉ねぎのサラダ
A3: Pickled daikon and cucumber. 大根と胡瓜の漬物 with Campari tomato.
B1: Salmon kelp roll 鮭の昆布巻き. I started making this not just for New Year. This one was particularly good because of the good quality kelp.
B2: Pickled herring (from a jar in wine sauce) in sour cream dill sauce, ニシンのサワークリームソース, which makes it much better.
B3: Marinated “ Russian ” Salmon “ 鮭のロシア漬け.
C1: Blanched asparagus dressed in sesame mayonnaise アスパラのスリゴママヨあえ. The dressing is a mixture of roasted and  ground white sesame, mayonnaise and soy sauce.
C2: Garlic chive in broth (“Ohitashi” お浸し) topped with golden thread egg (“Kinshi-ran” 錦糸卵), ニラのお浸し金糸卵のせ. The broth is half and half mixture of Japanese “dashi” broth and x4 Japanese noodle sauce. The golden thread egg is thin omelet julienned.
C3: Braised daikon, carrot, daikon green, fried tofu pouch or “abura-age” 油揚げ. 大根, 大根葉と油揚げの炒め煮. This is my impromptu dish since we got daikon with some green top attached.

Although each dish is small after having 9 of those filled us up considerably. It takes some efforts but we like many small dishes with many different textures and tastes rather than one or two large dishes.

Wednesday, June 26, 2024

Wood Ear Mushroom and Wakame Salad 木耳とわかめの和物

I made this dish mostly for left-overs control. I can now get fresh wood ear mushrooms from Weee. Previously the only wood ear mushrooms I could get were dried. Although we like fresh wood ear, we get a lot for one order. To make it last longer, as soon as we receive it, I wash it in cold running water and then blanch it. After blanching I wash it again and let it dry a bit on a towel so that there is no obvious surface water. I then place it in a sealable container with layers of paper towels on the bottom. Since the wood ear does not soften by cooking I can repeat this treatment (at least one more time). Besides making it last longer, if you use wood ear for salad, it is better to blanch it before hand. In any case, in addition to the wood ear, I had extra hydrated wakame so I came up with this Japanese style salad or “ae-mono” 和物. The contribution of sea plant and wood ear mushroom to the dish is mostly through their distinctive textures. Nonetheless this is a very refreshing small dish.


Again, this is not a recipe but just a note to myself.

Ingredients:
Blanched and chilled wood ear mushroom, cut into strips
Hydrated wakame sea weed
Sesame seed

Dressing:
Ponzu, sesame oil and olive oil (this is what I used this time)
or
Japanese hot mustard, soy sauce and sugar

These two items went very well together. They were similar in texture but just different enough to make an interesting combination. 

Sunday, June 23, 2024

Miso-marinated Firefly Squid ホタルイカの味噌焼き

Firefly squid or “hotaru-ika” ホタルイカ is one of our favorites. Spring (April-June) is the season for it and we realized we have some from last year vacuum packed and frozen (the squid we received was pre-boiled). Since the new season started for some time ago I decided it was time to eat the batch we had been storing. I quickly checked and defrosted the batch. Although enjoying with sumiso 酢味噌 is the classic way, to eat the squid we like it re-cooked. We had some sautéd in butter and soy sauce with asparagus and really enjoyed it. I am always on the look out for other ways to serve it and came up with this miso marinated grilled hotaru-ika (I “grilled” them using a dry frying pan). I served this with cucumber and wakame わかめ in sumiso dressing (picture #1).


The reheating process plumps up the squid (picture #2) and miso marinade added nice flavor and some saltiness. This was a very good starter indeed.


I got a hint from “saikyo-miso marinated grilled hotaru-ika recipe I saw on line. Since I did not have “saikyo-miso” 西京味噌, I made with white miso, mirin and sugar. Again, this is not a recipe but a note for myself.

Ingredients:
Firefly squid, eyes and beak removed, if previously frozen, thaw and remove the excess moisture using paper towel.

Marinade
2 tbs miso
1 tbs (or more ro make the miso soft enough) mirin
1tsp sugar

Directions:
Marinade the firefly squid for 1-2 hours
Remove the miso as much as possible using a spatula
“Grill” using dry non-stick (or parchment lined) frying pan on low flame until the squid plumps up and fragrant but burned.

Cooking makes the squid plump and the marinade adds nutty and salty and slightly sweet flavor. I added 
cucumber and wakame with sumiso  dressing which went well.


Thursday, June 20, 2024

Carrot Panna Cotta 搾りたて人参ジュースのパナコタ

When we get groceries delivered, carrots come in a 5 lb. bag. That is a quite a lot of carrots and before we could use them up, carrot tops sprouted and fine roots started growing. We ended up having to throw all of them out. So, in order to prevent that from happening with the next batch we got, we wheeled out our often forgotten juicer and made fresh carrot juice . Using the about 10 carrots, we made just over 2 cups of carrot juice. (We used the pulp to make a very nice carrot salad. So nothing was wasted).  The juice tasted very fresh and sweet. My wife wanted to use it to make panna cotta. She served it topped it with cream. This is a very refreshing dessert. (And don’t tell anyone but because it is basically vegetable juice we would like to think it is also fairly healthy.)


Ingredients:
2 cups carrot juice
1/2 cup milk 
1 1/4 tsp unflavored gelatin. (General rule-of-thumb is the ratio of  gelatin to liquid. I found 1/2 tsp of gelatin for every cup of liquid works pretty well. The ratio used for this panna cotta resulted in a vert soft jel. For a firmer jel use 1 1/2 tsp gelatin for  the 2 1/2 cups liquid. 
cream to top off the dish

Directions:
Put the milk in a side dish. Spread the gelatin on top to hydrate it. Put the hydrated gelatin/ milk mixture in the top of a double boiler.  Heat until all the gelatin has dissolved. Remove from the heat. Add the carrot juice.and stir until everything has been incorporated. Distribute the gelatin/carrot juice in the little jars or dishes in which it will be served. Put in the fridge until the liquid firms up. Top it with some cream before serving. 

This is a very simple but light fresh tasting dessert. It was a very soft get so it dissolved into a sweet carroty flavor in the mouth. (It is amazing how sweet it is given that no additional sugar was added.) This is a great way to take care of those extra carrots.

Monday, June 17, 2024

Ice Breaker “Summer” Sake 玉川アイスブレイカー酒

Some days ago when we did our usual take-out sashimi and sushi from Tako Grill, I spotted a sake called “Ice Breaker”. I immediately recognized the distinct blue label with the penguins on it. This is the sake we had at Kyoto Izakaya “Kura-Kura” 蔵倉 in 2015. At that time, this is what we posted:

Although I never tasted this sake, I remember reading about it on the Internet. I remember reading that it was brewed by the first and only foreigner (British) sake master Philp Harper at Kinoshita Shuzou 玉川木下酒造 in Kyoto. Seeing the distinctive blue label with the Penguin on it, I had to taste this one as the next sake. The sommelier/wife (?) commented "Oh, you like summer sake". This is junmai ginjou genshu, non-filtered 純米吟醸無濾過生原酒 made from Nihonbare 日本晴 sake rice. I think this was a new sake just released. We tried it first like regular cold sake. It was OK but not great. Then I remembered that the idea behind this sake is that it can be drunk on the rocks which would be particularly refreshing in the hot Kyoto summer. Since it is genshu (not diluted and of high alcohol content), it would withstand the ice. (And how could anyone be hot after seeing that label?) My wife provided some ice cubes from her oolong tea to test my theory. We thought it actually tasted much better so we requested more ice and drank it frosty cold. This was a rather clean sake and we did not notice the high alcohol.
Since the weather was getting a bit warmer I decided the time had come to open the bottle. Out of curiosity I went to the Japanese Tamagawa brewery web site which interestingly is in English (which makes sense given the brew master is British). I noticed several differences between the description on the web site and the bottle I had in the refridgerator. According to the website the sake is available in both the 500 ML and the usual 1.6L size (1 shou-bin 一升瓶) bottles in Japan. As far as I know, only the 500ml size is available in the U.S. which is a rather unusual size (usual size is 720ml). In addition, while the sake in the fridge and described on the web site were both summer sakes; available between May and August, the brew years were different. The brew year for the sake sold in Japan was advertised as 2023 which means it was brewed from the winter of 2023 to spring 2024 making it a newly released sake. In contrast, the brew year for the bottle we had was listed as 2022 meaning it was brewed from winter 2022 to spring 2023 making it one year older than the ones advertised on the Japanese web site (see addendum below).  I do not know how this sake was aged; whether cold aged like “Hiyaoroshi” ひやおろし or room temperature aged. However it was aged, when we opened the year old bottle, the sake was clear and very fresh tasting (Not like “ko-shu” 古酒 which can be darker colored and funky tasting). We had it first chilled and then on-the-rocks. Chilled it tasted dry but not bone dry. It had nice assertive flavors but was not yeasty or too fruity. On-the-rocks, many of the assertive forward flavors became muted but interestingly more flavors appeared to emerge making the overall flavor much more complex. This characteristic moved this sake straight to the top of our list of favorite sakes. This is the sake we will serve for those “special occasions” which require something extra. Ice cold sake is perfect for hot humid summer (we have our share of those kind of days in Washington DC area but nothing comparable to a Kyoto summer.) In any case, we really enjoyed this sake.


The night we tasted the sake we had a small amount of toro トロ and tai 鯛 (sea bream) sashimi. I also served Russian marinate salmon ロシア漬け and salmon kelp roll 鮭の昆布巻き along with pickled daikon, cucumber and blanched sugar snap.

The next time, I went to Tako Grill, this sake was not available any longer. It was available from our trusty “Tippsy sake” so we ordered a few bottles for coming summer.

Addendum: While I was looking at Japanese food blogs, I came across the description and picture of “Ice Breaker” sake. The picture clearly shows “2022BY” in the label (the blog post is dated as “5/18/2024). So, it is likely that all Ice Breaker sake, either in Japan and US, available this year is “2022BY”. One year aging may be attributable for the flavors of this sake.

Friday, June 14, 2024

Pumpernickel Boule ドイツ黒パン

Although, most of the time, we eat home-baked bread, we buy some breads to use especially when we make sandwiches. Pumpernickel bread/boule is one of them. We used to get it at the bakery in Whole Foods. Sometime ago, for some reason, they stopped baking pumpernickel and Russian black bread.  We also discovered the local Giant grocery store stopped selling pumpernickel bread. So our usual commercial sources are not available. If we want pumpernickel we have to make it ourselves. I have baked a traditional pumpernickel bread which is very dense and good as a cocktail bread but not good for making sandwiches. So, I was tasked by “she-who-tasks” (i.e. my wife) to make pumpernickel bread suited for sandwiches. So I baked this pumpernickel bread using a recipe from King Arthur. It came out rather nicely ( picture #1). It has a nice crust but not too thick.


The cut surface shows nice uniform air holes and just right texture (picture #2). It has nice flavors as well, We had it as a part of breakfast with butter and honey. 


I made some common sense modifications especially in the directions.

Ingredients: (I weighed except for the yeast)
4 cups (480g) Unbleached All-Purpose Flour
1 cup (116g) Pumpernickel Flour*
2 tablespoons (11g) black cocoa, for dark pumpernickel color
2 1/4 teaspoons (14g) table salt
2 teaspoons instant yeast
1 3/4 cup + 2 tablespoons (425g) water, lukewarm

* The original recipe listed  1 cup as 96g. We keep pumpernickel bread in the freezer and my wife got me 1cup which happed to be 116 grams. The original recipe calls for  “rye bread improver” and “deli rye flavor” from King Arthur but we did not have and did not use them.

Directions:
1. Combine all of the ingredients and mix and knead  using a standing mixer fitted with a kneading hook for 7-10 minutes or until the dough is elastic and slightly sticky.
2. Let the dough rise in a lightly greased, covered bowl for 1 to 2 hours in a 85F proofing box; it should become puffy.
3. Transfer the dough to a lightly floured surface. Gently deflate it, and shape it into a ball.
4. Place the shaped loaf onto a “round silicon round loaf  lifter” with tabs (or parchment paper) and place in the bowl, covered with a plastic wrap and placed it back in the proofing box for 1 hour (or until the volume doubled)
5. Preheat the oven to 425°F.
6. Slash the loaf making a cross on the op  and place the dough in a preheated Dutch oven and place the lid
7. Bake the loaf for 35 minutes with the lid on and 5 more minutes with the lid off
(digital thermometer inserted into the center reads 190°F to 200°F) 
8. Remove the Dutch oven from the oven, and transfer the bread to a rack to cool completely. (I used “silicon round loaf lifter” which made this transfer easy and safe)

This bread had a light crispy crust and a nice, moist, dense interior texture. It also had a gentle savory pumpernickel flavor. The quality of the bread was perfect and far superceded the commercial variety. The sandwiches have “stepped it up a notch”. 

Tuesday, June 11, 2024

Shrimp Shumai 海老焼売

This is my third attempt at making “shumai” 焼売 dumplings.  In the previous 2 attempts the dumplings fell apart when I cooked them and I ended up with cooked ground meat and separated dumpling skins which served almost as pasta. This time, everything worked. The dumplings held together and I made some decent shumais. I made this for a lunch and served them with pickled daikon, cucumber, blanched sugar snaps, braised burdock root きんぴらゴボウ (kinpira), pumpkin salad (curry flavored) and braised eggplant in miso sauce. I served the shumais with Japanese hot mustard and a mixture of rice vinegar and soy sauce (picture #1). The wonton skin stayed with the filling. The filling was the combination of shrimp and chicken with minced onion and garlic chive which worked well.


The shumais are rather large and cutting them in half made it easier to eat (picture #2). I left some shrimp in large pieces (they can be seen in the cut surface toward the top.


Ingredients: (made 20 shumais)
Shrimp about 100g, thawed and hand chopped making a mixture of finely chopped and small chunks
Ground chicken 150g (this was breast meat)
1 Onion, small. finely chopped
4-5 stalks of garlic chives, finely chopped (optional)
20 Wonton skins

Seasonings:
2 tsp potato starch
2 tsp oyster sauce
2 tbs Shaoxing wine (optional)
2 tsp soy sauce
1 tsp sesame oil
1/4 tsp grated ginger

Directions:
Mix all the ingredients for filling (except the wonton skin) and the seasonings in a bowl, mix well.

I tried three different ways to assemble shumai:
1. Place the skin on your palm and spread the filling using a silicon spatula  leaving only the rims of the skin. Inverse it on the tip of the spatula and squeeze to foam shumai.
2. place the balls of filling on the cutting board and place the skin on the top. Using five fingers, squeeze the skin around the ball of the filling and pick it up and form shumai, and
3. Place the skin on your palm and spread water using a finger and then place the ball of filling. Squeeze to make shumai. 

For all three methods, make sure the bottom is flattened and the tip of the shumai is squeezed to make it narrower than the bottom (#1 and #2 in the composite picture). This time, all three methods worked and the skin did not separate from the filling. I am not sure why this was. In any case, place the shumai in the steamer basket and steam for 10 minutes (#3 and #4 in the composite picture).


This was a success! The addition of shrimp (combination of finely chopped and small chunks worked well adding taste, and texture).  I added garlic chives since I had some fresh ones from Weee. They did not add much flavor but added nice green specks (picture #2). I served this with Japanese hot mustard and a mixture of rice vinegar and soy sauce (picture #1).

Saturday, June 8, 2024

Filled Wool Bread 毛糸のパン

This appears to be a variation of “Frangipane rolls”. The original recipe came from the King Arthur web site. My wife decided to make this. The recipe calls for the dough to be formed into a ring shape in the pan.  Although she used the suggest sized pan the dough didn’t fit as just a ring around the edge so she made a ring with three segments and the 4th segment went in the center (picture #1). The texture and flavor of the bread were excellent.


The filling distributed through out the bread but not very evenly (picture #2) Nonetheless the filling taste complimented this soft milk bread.


Ingredients: ( X 1)
Tangzhong (starter)
3 tablespoons (43g) water
3 tablespoons (43g) milk, whole preferred
2 tablespoons (14g) King Arthur Unbleached Bread Flour

Dough
1/2 cup (113g) milk, whole preferred; cold
2 1/2 cups (300g) King Arthur Unbleached Bread Flour
1 large egg
4 tablespoons (57g) unsalted butter, softened
1 tablespoon (9g) instant yeast
1/4 cup (50g) granulated sugar
1 teaspoon (6g) table salt

Filling
half an 8-ounce package (113g) cream cheese, softened*
2 tablespoons (25g) granulated sugar
zest (grated rind) of 2 medium lemons
pinch of table salt
2 tablespoons (4g) freeze- dried raspberries, lightly crushed
2 tablespoons (15g) King Arthur Unbleached Bread Flour
*The cream cheese should be at warm room temperature, at least 68°F.

Topping
2 tablespoons (28g) milk, whole preferred

Ingredients: ( X 2)
Tangzhong (starter)
6 tablespoons (86g) water
6 tablespoons (86g) milk, whole preferred
4 tablespoons (28g) King Arthur Unbleached Bread Flour

Dough
1 cup (226g) milk, whole preferred; cold
5 cups (600g) King Arthur Unbleached Bread Flour
2 large egg
8 tablespoons (114g) unsalted butter, softened
2 tablespoon (18g) instant yeast
1/2 cup (100g) granulated sugar
2 teaspoon (12g) table salt

Filling
8-ounce package (226g) cream cheese, softened*
4 tablespoons (50g) granulated sugar
zest (grated rind) of 2 medium lemons
pinch of table salt
4 tablespoons (4g) freeze- dried raspberries, lightly crushed (I didn’t have the raspberries so I used candied ginger.)
4 tablespoons (30g) King Arthur Unbleached Bread Flour
*The cream cheese should be at warm room temperature, at least 68°F.

Directions:
1. To make the tangzhong: Combine all the ingredients in a small saucepan, and whisk until no lumps remain.
2. Place the saucepan over medium heat and cook the mixture, stirring regularly, until thickened, paste-like, and the spoon or spatula leaves lines on the bottom of the pan. This should take 2 to 4 minutes, depending on the strength of the burner.
3. Remove the tangzhong from the heat and transfer it to a large mixing bowl, the bowl of a stand mixer, or the bucket of a bread machine (whatever you plan to knead the dough in).

4. To make the dough: Add the milk on top of the hot tangzhong; it will help cool the dough to lukewarm. Add the flour and remaining dough ingredients. Mix to combine, then knead until a soft, smooth dough forms, about 8 to 10 minutes on medium-low speed of a mixer. (The dough may be tacky and stick to the sides of the bowl slightly; that's OK.)
5. Shape the dough into a ball and let it rest in a lightly greased bowl, covered, for 1 to 1 1/2 hours, until puffy but not necessarily doubled in bulk.

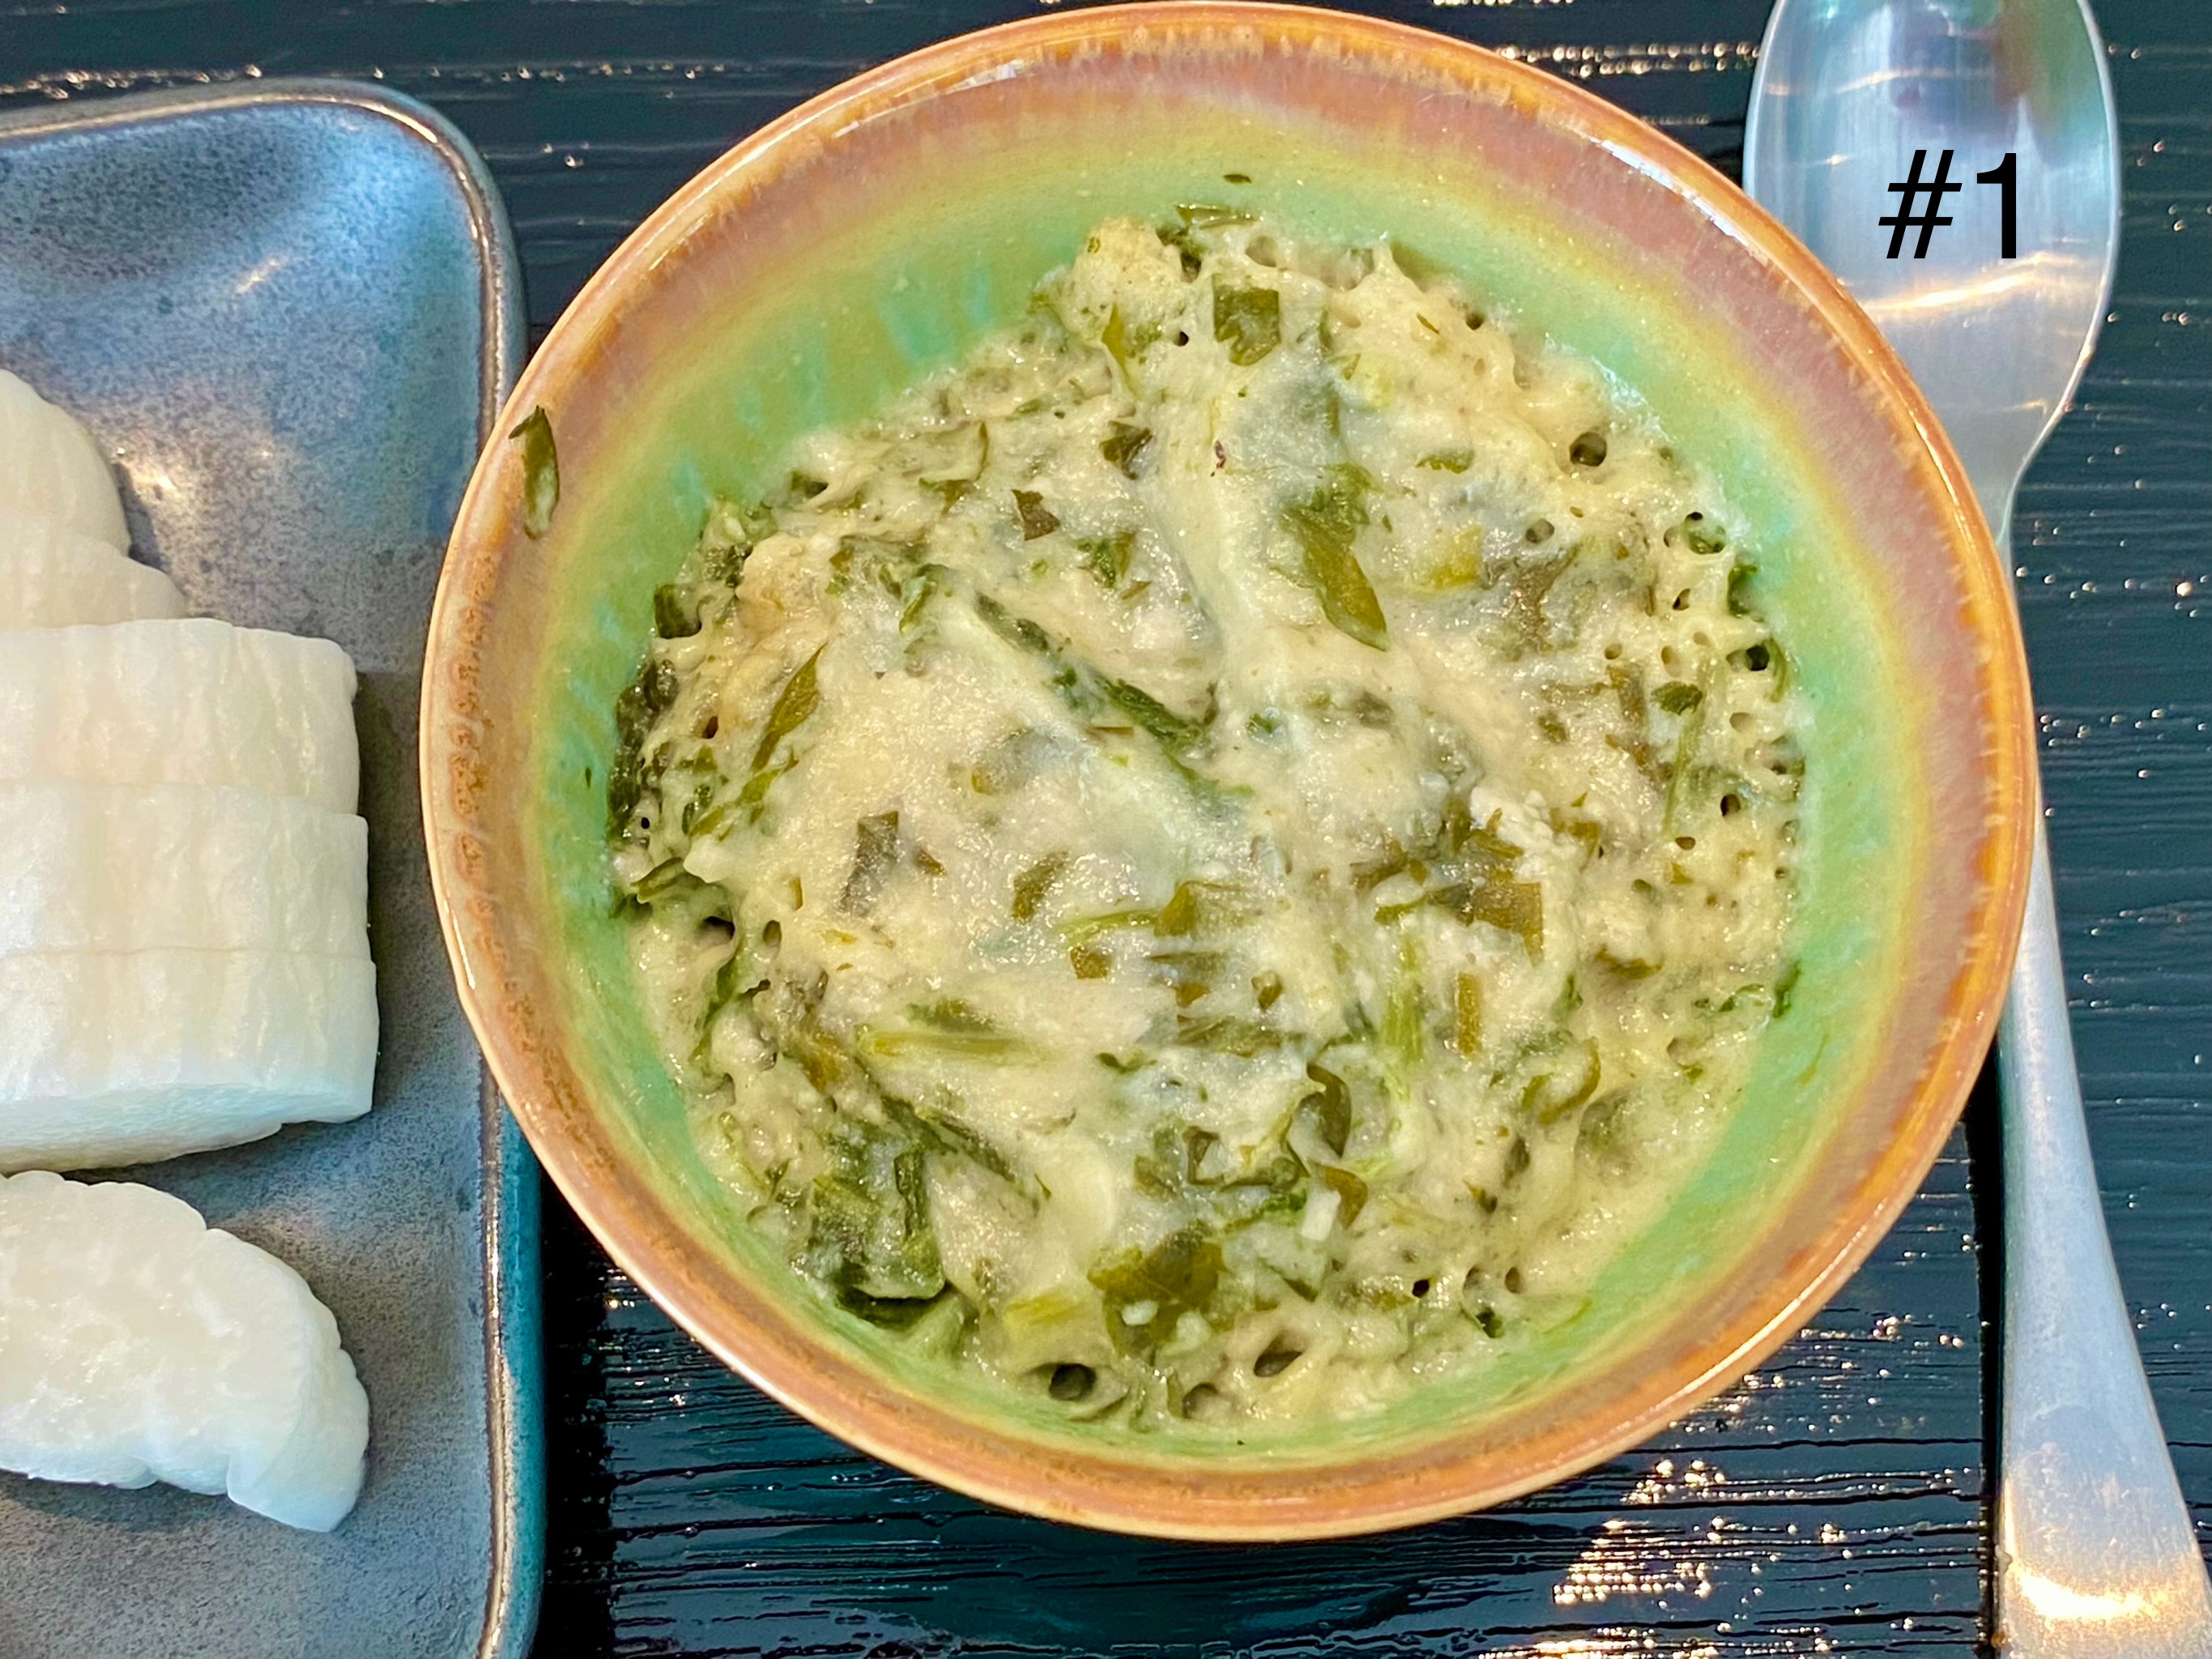
6. To make the filling: Combine the cream cheese, sugar, lemon zest, and salt, mixing until smooth.
7. Add the freeze-dried raspberries (or candied ginger) and flour, mixing until everything is evenly distributed.

8. To assemble: On a lightly floured surface, gently deflate the dough, divide it into four pieces (or eight if doubling the recipe), and shape each piece into a ball.
9. Cover the dough and let rest for 10 minutes.
10. Line a 9" springform or a 9" round cake pan (at least 2" deep) with parchment and lightly grease the parchment.
11. Working with one piece of dough at a time, roll it into a 6" x 12" rectangle. If the dough begins to snap back during rolling, set it aside and begin rolling out the second piece. Return to the first piece to continue rolling it to the full size after a couple of minutes, giving the gluten a chance to relax.
12. Portion a quarter (or eighth of the filling for doubled recipe) onto the top half of the rectangle. A tablespoon cookie scoop works well here.
13. Position the rectangle so its 12" sides are vertical. Starting at the top, spread the filling across the entire width of the rectangle (leaving about 1/4" bare on each side) and down about 6" or 7", leaving the bottom 5" to 6" bare (#1). If the filling is difficult to spread, warm it in the microwave for 15 seconds and stir; check the consistency. Repeat, if necessary, until it's an easily spreadable consistency.
14. Using a bench or chef’s knife, cut the uncovered dough at the bottom into very thin strips (anywhere from 1/8" to 1/4" wide) (#2).
15.  Fold the long edges of the rectangle in to prevent any filling from seeping out and pat them gently to flatten.
16. Starting from the filling-covered top and rolling toward the uncovered strips, roll the dough into a log about 6" long (#3).
17. Lightly press the strips into the rolled log to secure. Place the log, seam-side down, into the bottom of the pan so it's snuggled up against the pan’s outside edge (#4).
18. Repeat with the remaining pieces of dough, placing them into the pan to form a complete circle around the pan’s outside edge. (Or until all the pieces are in the pan) (#5)
19. Preheat the oven to 350°F.
20. Cover the wool roll and let it rise for 60 to 75 minutes, until
puffy.
21. To finish and bake the roll: Brush the roll with milk, being careful not to deflate the delicate dough.
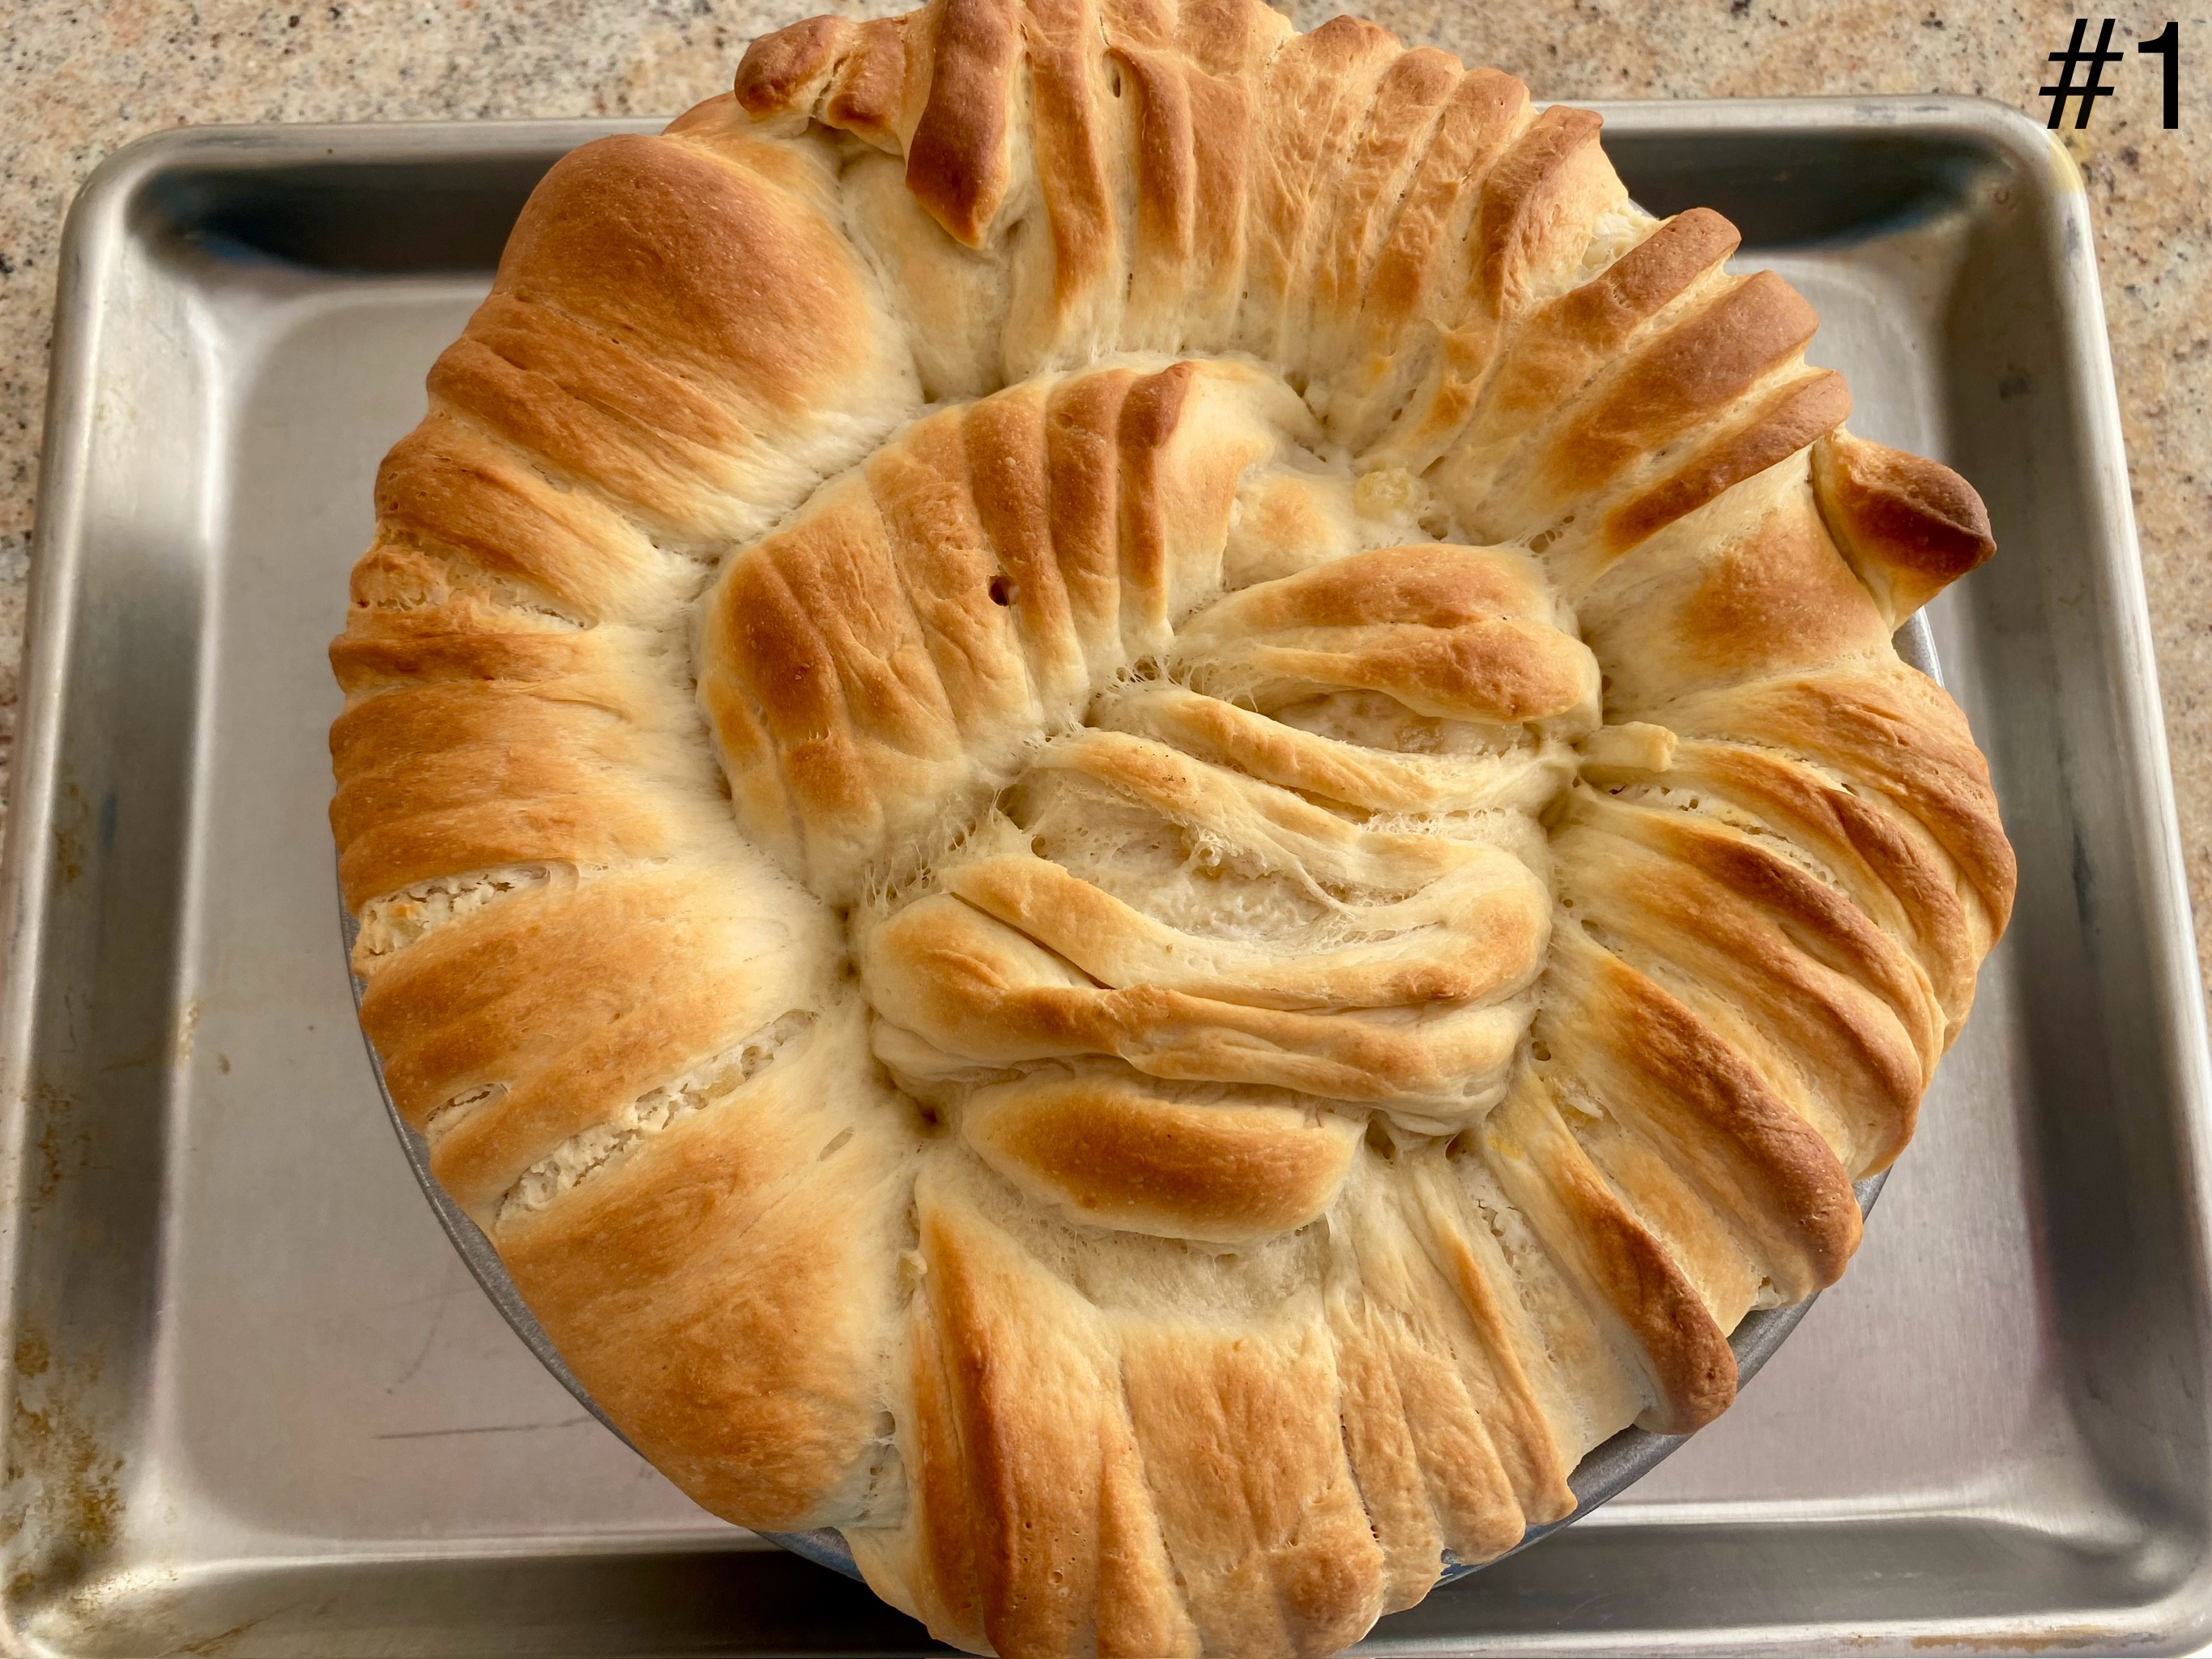
22. Bake it for 28 to 32 minutes, until it’s golden brown on top; a digital thermometer inserted into the center of the loaf should read at least 190°F. (#6)
23. Remove the roll from the oven and cool it in the pan until you can transfer it safely to a rack to cool completely.
24. Storage information: Store leftover wool roll bread, well wrapped, at room temperature for several days.

Tips from our Bakers
The tangzhong starter can be made ahead of time. Simply cook it up (making a double, triple, or quadruple batch if you like, for future use) as instructed in steps 1 – 3. Remove from the heat and transfer to a small bowl, pressing a layer of plastic wrap over the top of the mixture to prevent a skin from forming. Cool to room temperature then store, covered, in the refrigerator for up to five days. When you're ready to bake your Wool Roll Bread, add the tanzghong to the dough. (If you've made a big batch of tangzhong, use a heaping 1/3 cup (95g) for a single batch of dough.) Use warm milk when mixing the remaining dough ingredients; proceed with the recipe from step 4.
Let your culinary imagination run wild with this recipe, since the sky is the limit for filling combinations. Cinnamon sugar? Chocolate? Butter and garlic? Pesto and cheese? Whether you go sweet or savory, don’t overload your bread with filling.


This is wonderfully elegant. The bread is a very light slightly sweet milk bread. The filling is very subtle but goes perfectly with the milk bread. It forms a pudding-like filling which is distributed through out the bread. (No need for butter or jelly here). The filling has a slightly sweet taste and a hint of the cream cheese flavor peeks through. The candied ginger contributes a random burst of gingered sweetness which is a nice contrast with the rest of the flavor of the filling. This is a bit of effort to make but it is worth it and although this bread seems to be a version of frangipane rolls they are two different breads with two different personalities. The difference makes it worth while to make both. 

Wednesday, June 5, 2024

Gyoza made with New Round Gyoza Skin 日本風の餃子の皮で作った餃子

When I make gyoza, I use “wonton skin” which is readily available at a regular grocery store. The wonton skin is square and a bit thicker than a classic Japanese-style gyoza skin. Japanese-style gyoza skin (picture #2) is available (most are frozen) but I did not bother to get it until now. Since we were getting groceries from Weee anyway and they had Myojo brand 明星食品 frozen Japanese-style gyoza skin, I ordered this with frozen ground pork for making gyoza.  The result is definitely worth it (for us). Since it is round, the gyoza looks nicer and the thin skin makes a nice crispy outside without being too heavy or filling (#1). I served the gyoza with pickled daikon, cucumber and marinated quail egg. 


The filling is my usual. Finely chopped cabbage which I blanch and squeeze out moisture, finely chopped scallion, ground pork, grated garlic and ginger. I added soy sauce and small amount of sesame oil. 

Cooking is also as usual. First, brown all sides of the gyoza (the standard method is brown only one side but we like brown and crispy on all sides) with vegetable oil with a splash of dark sesame oil. Once all sides are brown, add a small amount of water and place on the lid. Steam for 1-2 minutes or until no more steam is coming out. Remove the lid and crisp up the skin again.


I made quite a few gyoza. We keep them in a sealable container in the fridge and warm them up in the toaster oven. It works well and the gyoza tastes almost exactly like they were just cooked.


Sunday, June 2, 2024

Steak and 2004 Insignia ステーキディナーと2004 Joseph Phelps Insignia

This was a sort of cerebration. We did not plan anything ahead of time. So we made a dinner with what we had. We had frozen filet mignon (last two packages from Omaha Steak), gnocchi my wife made some time ago which were cooked and then frozen. I also made a sauce from the pan juice, reduced port wine, butter, and sautéed shiitake mushroom stems and shallot *. My wife’s frozen gnocchi were pan fried without thawing to warm up and came out nicely hot and crispy. For a quick unplanned celebratory dinner, this was not too bad.

*When I get fresh shiitake mushrooms, I remove the stems, tear them into strands and cut into small pieces. I sauté them with finely chopped shallots in olive oil. This is a handy thing to have since it can be used in many ways. The separated caps are then placed in a ziploc bag with paper towel which makes fresh shiitake last longer.  I took the picture before I put on the sauce.


For wine, we decided to open one of the older vintage of Joseph Phelps Insignia that we had. This was 2004 vintage (picture #2). I decanted it about one  hour before serving. It had some sediments which were left in the bottle. The wine had a slight tinge of brown at the edge indicating some age but tasted quite good with a well-controlled classic California cabernet profile upfront dark fruits, a bit of vanilla. and chocolate ending with a firm but mellowed out tannin. Perfect!!


With the steak and reduced port wine sauce, this 2004 vintage  Insignia went so well.


Thursday, May 30, 2024

Focaccia Bread Baked in Breville Pizzaiolo Indoor Pizza Oven

I have made focaccia bread and its variations baked in a convection oven. We liked a thicker and breadier version which was cooked in a baking pan in lower temperature (350F) for longer time (30 minutes). 

Recently, my wife gave me an indoor-electric pizza oven, Breville Pizzaiolo as a birthday gift. I am making pizza several times using different flours, dough recipes and temperatures. Generally, I am quite impressed with the quality of pizza that can be made in this oven but I am still making pizzas to find the best combination for me. Once I have enough information, that will be the subject of a separate post. This post is just to note a few things I can do to improve the focaccia. The focaccia was great albeit one side of the top was a little too high done (#1). The result of  using the top heating unit is a bit uneven for heating.


I used the carbon iron pan that came with the oven for baking the focaccia. I pre-seasoned the pan as per the instructions and it worked great. With a 30 minutes secondary rise, the bread has nice texture and flavors (#2). We really like the crusty surface and nice soft interior.


The recipe is just for my notes so that I can improve it next time.

Ingredients:
3 and 1/2 cup bread flour
2 tsp Kosher salt
2 tbs olive oil
2 tsp instant yeast
1 cup and a bit more  lukewarm water

Olives, black and green, sliced
Fresh rosemary, leaves removed and roughly chopped
4 or more tbs olive oil

Directions:
Add the flour, salt and yeast to a food processor fitted with a kneading blade. Mix briefly and pour in the olive oil in a thin stream. While the blade is turning in low-speed, add the water in a thin stream. Look carefully until a dough ball forms above the blade (the dough ball is slightly sticky). Let is stand for 5 minutes for even hydration. Turn the processor on low speed for 1-2 minutes. Turn the dough ball out on well floured board and knead for 3-5 minutes making a smooth elastic dough. Shape the dough into a  smooth round and place it in lightly oiled bowl, turning to coat. Let it rise for about 1 hour (I use a proofing box at 87F).

Deflate the dough and fold several times on well floured kneading board making a disk of dough. Cover with plastic wrap and let it rest for 10 minutes (so that the gluten relaxes and it becomes easier to stretch). Meanwhile lightly oil the carbon iron pan. Add the disk of dough in the pan and using your finger tips spread the dough to fill the pan. Add the rosemary to the olive oil and spread over the dough and scatter the olive slices. Using your finger tips, press and embed the olive (picture #3). Cover and let it rise for 30 minutes (or skip this and immediately proceed to baking*). 

*I like the fluffy texture and usually let it rise second time but baking in the pizza oven, it may better without the second rising since the top heating element is very close to the surface.

Using  the pan pizza setting (475F for 18 minutes) and the top heat in the middle (I may reduce the top heat to prevent the surface scorching too much, see picture #1).

Remove the bread from the pan using spatula and let it cool on the cooling rack.


We really like this version of focaccia bread. Compared to my usual focaccia, it has nice crust and the texture is much better. With a good flavorful olive oil with salt and a glass of good cab, we made the dinner from this bread.

Monday, May 27, 2024

Daikon Steak and Two Appetizers 大根ステーキ

This was the second set of appetizers we had one evening. From right to left are “daikon steak” 大根ステーキ, “charred broccoli” 焦がしブロッコリー and “braised spicy tofu” ピリ辛豆腐.  These appetizers are vegetarian and none of them is completely new but these versions included some changes. 


This is just notes to myself.

The daikon steak (left) was first precooked in simmering water with some raw rice grains for 30 minutes and then cooked in melted butter on both sides until the edges turned brown. I added a small (off heat) amount of soy sauce to finish.

The broccoli was parboiled (I freeze parboiled broccoli in small batches). I cooked the broccoli with the daikon steak until the sides became blackened and then seasoned it with salt and pepper.

The spicy tofu was marinated (Sriracha, soy sauce, sesame oil, rice vinegar, sake, grated ginger and garlic) overnight and then drained. This time I dredged it in flour (mixture of AP flour and potato starch) and cooked until nicely brown on four sides. The dredging process made a nice crust.

So, this was nice second set of appetizers of the evening.

Friday, May 24, 2024

Anchovy Salad アンチョビサラダ

Anchovies are not a regular item in our pantry. The canned ones are usually very salty and when I use it as a part of a seasoning I only use one or two fillets and often end up wasting the remaining canned anchovies. More recently, I use anchovy paste in a tube for this purpose. While we were at Whole Foods, my wife found a package of anchovy fillets packed in oil (not canned but in the refrigerator section picture 3#). She was curious of how this would be different from canned varieties so we got a package. Getting an idea from the picture on the package, I made a sort of salad (right in the picture #1 and #2). To keep the seafood theme, I served this anchovy salad with salmon kelp rolls (left) and marinated herring (center, the herrings came from a jar and are marinated in wine sauce. I made sour cream sauce with dill to go with the herring).


For the anchovy salad I sliced skinned Campari tomatoes and topped them with the anchovy filets and fresh basil. I dressed the salad with our favorite Spanish olive oil. I did not add salt thinking the anchovies would be salty.


The anchovies are much better than we expected. They were not too salty or fishy. All nicely filleted and no discernible small bones. We really like these anchovies.

Tuesday, May 21, 2024

Creamed Spinach with Cauliflower Puree カリフラワーピュレのクリームほうれん草

I make cauliflower puree occasionally. I modified how I make cauliflower puree mostly for my convenience. I steam the cauliflower florets for 10-15 minutes until very soft. Then I place the cauliflower in the container used for the emersion blender, add warm (in the microwave oven) milk (1/2-2/3) cup and puree first on medium speed and then on high speed until very smooth. This takes a few minutes on high speed. Then add several pats of unsalted butter and salt to taste and puree to incorporate the butter . The resulting puree can be used as is or many other ways which I have posted.  We found it is particularly good as an accompaniment to white fish. This time, we bought “baby arugula and spinach salad mix” and found out the vast majority was spinach. So instead of salad, we decide to make this into“creamed spinach using the cauliflower puree. It was quite good. This blog entry is for us to remember how we made this.

To make creamed spinach: Cook a bag of spinach in a wok without adding water with a tight fitting lid on low flame. Occasionally turn the spinach over until all wilted and cooked. Squeeze out excess moisture (I use a potato ricer to do this). Chop the spinach finely. Mix the spinach into the cauliflower puree. We also added cheeses (Gruyere and parmesan). Place the creamed spinach in a ramekin and bake in the toaster oven 350F for 20-30 minutes.


We had this as a side for “Tsukune with lotus root” 蓮根つくね, pickled daikon and cucumber 大根, キュウリの漬物.


This is a very acceptable substitution for bechamel based creamed spinach. It had a very rich flavor and creaminess.

Saturday, May 18, 2024

Braised Eggplant with Oyster Sauce 茄子と椎茸のオイスターソース炒め

This is an impromptu dish I put together to use the last eggplant we got recently from Weee. I also had a high-quality fresh shiitake mushroom also from Weee. This turned out to be quite good and my wife really liked it. I cut the eggplant a bit larger than I usually do, which made the eggplant tender but not too soft.  The thick shiitake mushroom I added, tasted almost like meat. This is not a recipe but a note to myself so that I can reproduce it.


Ingredients:
One Asian eggplant, stem end removed, cut into bite size chunks (“rangiri” 乱切り cut on bias, turn 90 degree and cut again)
3-4 fresh shiitake mushrooms, stems removed, cut into 4-6 large chunks
1 tbs juliennes of fresh ginger
1 tbs vegetable oil with a splash of dark roasted sesame oil

Seasonings
1 tbs oyster sauce
1 tsp sugar
1 tsp soy sauce
1-2 tbs sake or water

Garnish (optional)
Sesame seeds for garnish
Scallions, finely chopped

Directions:
Add the oil in the drying pan on medium heat wait until the oil simmers.
Add the eggplant and stir until browned (3-4minutes)
Add the shiitake and the ginger. Stir for another minute or two.
Add the seasonings. Stir until the sauce forms and clings to the vegetable.
Top it with the scallion and sesame seeds (optional)

Other version of seasoning
1 tbs miso
1 tbs oyster sauce
2 tsp sugar
1tbs sake
1tbs mirin
grated garlic and ginger

Topping (optional)
Scallion
Sesame seeds
Bonito flakes

This was a very good eggplant dish. It was a great combination of flavors and textures. The slightly larger cut eggplant was very similar in size to the thick mushroom and the textures of the two perfectly complimented each other.