Showing posts sorted by date for query blini. Sort by relevance Show all posts

Sunday, July 27, 2025

Pea, Avocado and Mint Blini グリーンピー、アボカド、ミント ガスパッチョ

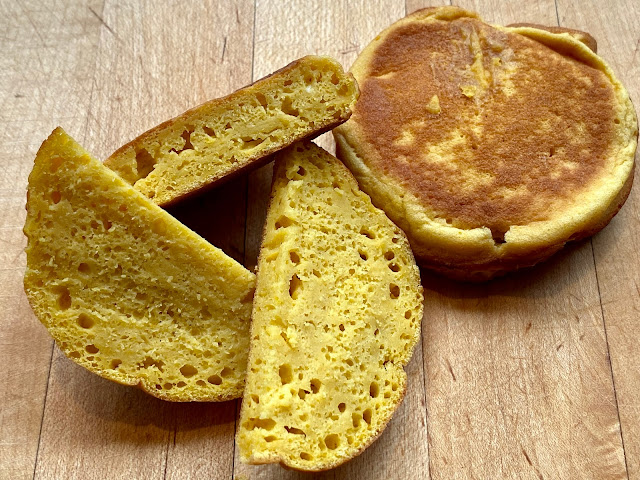
When we made “Pea, Avocado and Mint Gazpacho”, we were not particularly wild about the “grassy” taste from the peas. The original recipe called for fresh uncooked peas which we thought must have tasted starchy and even more grassy. In any case we used frozen peas, so they were not “uncooked” but the grassy taste was pronounced. We thought, maybe cooking it would reduce the “grassy” taste. In addition we had a lot of the gazpacho left. My wife suggested she could use the extra to make gazpacho blini since she had many successes using additional ingredients/flavors in previous versions of blini. The pea blini seemed to cook up nicely but, although we did not take pictures of the cut surfaces, the center did not show the many uniform  bubbles/holes we would expected in a blini. It had a nice crunchy crust but the center was soft and mushy even though the blini were thoroughly cooked. In addition the “grassy” taste was still as strong as ever (if not even more pronounced). We tried eating some for breakfast, but decided the bottom line was we did not like either the taste or the texture. So we designated them a “failure” and tossed them out. But wait. My wife, who has had multiple “failures” in her cooking career (remember the tart crust made of nuts that even the squirrels would not eat) does not let them discourage her cooking experiments. She does this by maintaining the philosophy that it is not a “failure” if you have at least learned something from it. So what did we learn from this experience? If you do not like the flavor of the initial ingredient using it to make something else such as a blini will not necessarily result in an improvement. Also, pea, avocado and mint gazpacho does not work for us in any form. So we decided to blog this “failure” to remind ourselves of this cooking philosophy and not let a lack of success discourage us (or our readers). 


Ingredients  (made 15 blini):
2 cups of  “Pea, Avocado, and Mint gazpacho
6 tbs melted butter
3/4 cup sour cream
6 large eggs, beaten
1 cup all-purpose flour
1 cup + 2 tbs. cake flour
1 Tbs + 1 1/2 tsp. Baking powder
1 1/2 tsp salt
enough additional cream or buttermilk to make it the texture of pancake batter

Directions:
Put the gazpacho in a bowl. Add the egg, the melted butter and sour cream, then add the flour, baking powder and salt and whisk until well blended. (You may need to add more cream so the batter is the consistency of pancake batter.)

In a cast iron platar, melt 1 tablespoon of butter. Use the melted butter to grease each of the platar cups before adding the batter. Pour the batter into the cups until they are mostly full (#1). Cook over moderately low heat, turning once, until set, about 5 minutes per side (#2 and 3). Repeat with the remaining butter and batter.


We thought this would be a great way to use the left over gazpacho as we did using mashed potatoes. The outside was crispy but the inside was mushy and lacked uniform bubbles which characterize a good blini. Despite cooking, the grassy flavor of the pea came through. Although certainly edible, we did not enjoy it. But we learned something so we will not be discouraged from experimenting with other ingredient variations to make more /other blini.

Sunday, October 13, 2024

Strawberry Blini いちごビリニ

This is another variation of blini/crumpet my wife made. This time it was strawberry blini. This happened because of the strawberry we bought sometime ago were not really sweet and as a result we weren’t quick to eat them. I “processed” the fresh strawberries the usual way by washing them, removing the hull, cutting into half or quarters, then placing them in a sealable container with enough triple sec to coat all the pieces. With this treatment, the fruit lasts quite a long time in the refrigerator. After a few days, the surface red color leaches out and the entire strawberry pieces turn red but the taste is the same. We often add this to our breakfast yogurt. This time, the strawberries were not really sweet and they stayed in the fridge without being used. So, finally we decide to either use them or throw them out.  Since my wife has been on a roll making different favored blinis (roasted pepper, pesto, corn, and mashed potato), she suggested making strawberry blini. They came out surprisingly really nice. Slightly pink colored inside with nice tender texture, crunchy crust and subtle but definitive slightly sweet strawberry flavor. We had this as a part of breakfast.


Ingredients: makes 16 blini
2 cups strawberry puree
6 tbs melted butter
3/4 cup cream
6 large eggs, beaten
1 cup all-purpose flour
1 + 4 Tbs. cake flour 
1/2 cup sugar 
1 Tbs + 1 1/2 tsp. Baking powder
2 tsp. vanilla 
1 1/2 tsp salt
enough strawberry juice to bring the batter to the consistency of pancake batter.  

Directions:
Heat the strawberry Triple Sec mixture in a sauce pan just until it starts to boil. Cool and drain the liquid but reserve it for future use. In a food processor, puree the strawberries until smooth; scrape into a medium bowl. Add the egg, the melted butter and cream, then add the flours, sugar baking powder, vanilla and salt and whisk until well blended. (You may need to add some of the reserved strawberry juice so the batter is the consistency of pancake batter.)

Melt 1 Tbs. butter. In a cast iron platar, use the melted butter to grease each of the platar cups before adding the batter . Pour the batter into the cups until they are full using the largest ice cream scoop. Cook over moderately low heat, turning once, until set, about 5 minutes or more per side. Repeat with the remaining butter and batter.

These were remarkably good. They had a tender texture, were slightly sweet and had a loverly subtle strawberry flavor was very distinctive and pervasive. Another small element of surprise was when we pureed the strawberries we noticed there were a lot of very small seeds. We discussed whether we should try to remove them and if so how. We decided that would be too difficult so we just left them in. Turns out the seeds provided a very nice and very small popping crunch in each bite—not so much as to be bothersome, just a pleasant addition to the texture.  The possibilities for blinis are limitless.

P.S. We found out that this tastes really good with strawberry whipped cream cheese. The strawberry on strawberry flavor is very nice. 

Monday, September 30, 2024

Mashed Potato Blini マシュポテトのビリニ

Since my wife was on a roll coming up with roasted pepper blini, pesto blini and corn blini, she looked at the bowl of mashed potatoes in the fridge and was hit with a brilliant flash—potato blini. These were mashed potatoes she prepared when we cooked a whole chicken in the Weber grill. Usually, we place two aluminum wrapped Russet potatoes in the Weber with the chicken. She removes the skin of the potatoes. mashes them and adds butter, cream cheese with onions and chives (sold in a tub), seasoning it with salt. Then she pours in the juice accumulated while the chicken was resting. These potatoes are very nice and flavorful. We like them but we generally cannot finish them. From the leftover potatoes, my wife makes gnocchi (of which we have a backlog in the freezer). I often make “potato croquettes” (but again we have a backlog in our freezer). “Mashed potato blini” seemed like a perfect use of the left over potatoes particularly since there was no backlog in the freezer—yet. This turned out very well. The crust is crunchy but the inside is quite tender with mashed potato flavor and a hint of barbecue chicken. With this dish we found another way to use up leftover mashed potatoes.


Ingredients(X3): makes 14 blini
2 cups of mashed potatoes
6 tbs melted butter
3/4 cup sour cream
6 large eggs, beaten
1 cup all-purpose flour
1 cup + 2 tbs. cake flour 
1 Tbs + 1 1/2 tsp. Baking powder
1 1/2 tsp salt
enough additional cream or buttermilk to make it the texture of pancake batter 

Directions:
Run the mashed potatoes through a ricer to work out any lumps. Put the riced potatoes in a bowl.  Add the egg, the melted butter and sour cream, then add the flour, baking powder and salt and whisk until well blended. (You may need to add more cream so the batter is the consistency of pancake batter.)

In a cast iron platar, melt 1 tablespoon of butter. Use the melted butter to grease each of the platar cups before adding the batter. Pour the batter into the cups until they are mostly full. Cook over moderately low heat, turning once, until set, about 5 minutes per side. Repeat with the remaining butter and batter.

This is a great way to use the left over mashed potatoes. The outside is crispy and the inside has a nice smooth moist texture. The overall flavor of the potatoes really comes through. These would be really good slathered in the butter for breakfast or as a side for lunch or dinner. 

Tuesday, September 24, 2024

Fresh Corn Blini コーンビリニ

It is a local corn harvest season and my wife bought 12 ears of fresh corn. We rarely eat corn on the cob but often remove the kernels from the cob, then “milk” the cobs by scraping them with the back of a knife to extract all the goodness of the corn. Using a Vitamix blender, we then puree the fresh corn without adding any liquid. With this batch of corn my wife made, corn sage muffins, corn pudding/cake, and corn broth from the cobs. But there was still some corn puree left. We contemplated how to use it and my wife came up with the idea of corn blini. This was based on her previous experience with roasted red pepper blini and pesto blini. Turned out to be a pretty good addition to the crowd. 


Ingredients: makes 14 blini
2 cups corn puree
6 tbs melted butter
3/4 cup cream
6 large eggs, beaten
1 1/2 cups all-purpose flour
1/2 cup corn meal or corn flour 
1 Tbs + 1 1/2 tsp. Baking powder
1 1/2 tsp salt

Directions:
In a food processor, puree the corn until smooth; scrape into a medium bowl. (If you are not going to use the corn right away put it in a pan and bring to a boil to eliminate any potential bacteria from the corn).  Add the egg, the melted butter and cream, then add the flours, baking powder and salt and whisk until well blended. (You may need to add more liquid so the batter is the consistency of pancake batter.)

In a cast iron platar, melt 1 tablespoon of butter. Use the melted butter to grease each of the platar cups before adding the batter . Pour the batter into the cups until they are full using the largest ice cream scoop. Cook over moderately low heat, turning once, until set, about 5 minutes or more per side. Repeat with the remaining butter and batter.

These blini were wonderful. They had an incredible and strong corn taste that was very pleasant. The texture was lovely and moist. Tasted great slathered with butter for breakfast. 

Saturday, September 14, 2024

Pesto Blini Prosciutto Cheese Sandwich ペストビリニの生ハムチーズサンド

This is a sandwich my wife came up with for lunch. We made “pesto blini” some time ago and found out when we toast the blini, because of the olive oil in the pesto, essentially it fries in the toaster oven and makes a nice crispy crust. My wife decided this would make a nice sandwich. She would have used honey ham but we did not have it and, instead, used prosciutto (which we did have). She also added a slice of cheddar cheese before toasting. Melting cheese,  prosciutto and crisp pesto flavored blini are indeed a good combination. I served it with a side of cantalope.


Ingredients:
2 pesto blinis, spilt in half horizontally
Mayo and Dijon mustard
Slices of sharp cheddar or other meting cheese
Prosciutto or honey ham

Direction.
Place slices of the cheddar on one slice of the blini and toast both slices until the cheese melts
Smear the mayo and mustard on the other slices (picture #2)


Add the prosciutto (picture #3)


The prosciutto was a bit on the salty side and this sandwich may be better with honey ham or some other meat but it was still pretty good with nice pesto/basil flavor and crispy blini.

Thursday, September 5, 2024

Pesto Blini ペストビリ二

Our window sill basil is still growing very well. Although we use cuttings for pizzas and salads etc, we still need to harvest a relatively large quantity of basil every-once-in-a-while. Although my wife made basil cake/bread, our default to use up excess basils is making pesto. But once the pesto is made, we have to use it in a reasonable time or freeze it. Once we freeze the pesto, we tend to forget about it. We used most of the last batch for pesto and red pepper sauce pizza. My wife came up with this to use up the remaining pesto.  “Pesto Blini”! This is an extension of “Roasted pepper blini”.  We had it toasted as a part of breakfast it had a nice crisp crust and the pesto flavor came through as a savory dimension. We have to enjoy this with other appropriate toppings.


Ingredients(X2.5) makes 17 blini
1/2 cup pesto
5 tbs melted butter
1/2 +1/8 cup cream
5 large eggs, beaten
1 2/3 cup all-purpose flour
3 3/4 tsp baking powder
1 1/4 tsp salt

Directions:
In a medium bowl, add the egg, the pesto, the melted butter and cream, then add the flour, baking powder and salt and whisk until well blended. (You may need to add more liquid so the batter is the consistency of pancake batter.)
Melt 1 tablespoon of butter in a pyrex dish. Use the melted butter to grease each of the platar cups of a cast iron platar before adding the batter . Pour the batter into the cups until they are 1/2 full. Cook over moderately low heat, turning once, until set, about 3 to 5 minutes per side. Repeat with the remaining butter and batter.

This makes a lovely savory crumpet like bite. It also provides a nice contrast to the usual flavors that appear for breakfast and it is a great way to use up pesto left over from pesto pizza.

Monday, January 1, 2024

Table of contents 2024


January 2024
January 1,    Happy New Year 2024 明けましておめでとう2024 
January 5,    Tomato and Egg Stir-fry with Wood Ear and Natto 納豆、トマト、木耳の卵炒め
January 22,   Goat Cheese Scallion Muffin ゴートチーズと青葱マフィン
January 25,   White "Pineberry" and Red "Koyo" Stawberries 白いイチゴと昂揚イチゴ
January 28,   Beef with Kon-nyaku and Vegetable "Kimpira" Stir Fry 牛肉と蒟蒻の金平

February 2024
February 3,     Chestnut Brown Butter, Sage Muffin 栗の粉とセイジマフィン
February 8,     Grated Lotus Root and Tofu Ball レンコン豆腐饅頭
February 11,    Sweet Onion Bread Pudding 玉ねぎのブレッドプディング
February 15,    Shad Roe from South Carolina 南カロライナからのシャドロウ
February 18,    Cranberry Camembert Cheese Bites クランベリーソース、カマンベールチーズ バイツ
February 21,    Simmered Shad Roe with Vegetables シャドロウの煮付け
February 24,    Shad Roe Pasta  シャドロウパスタ
February 27,    Pickled Cucumber キュウリの漬物

March 2024
March 1,    “Maitake” Hen of the Woods Mushroom in Brown Butter and Sage 焦がしバターとセイジ風味舞茸
March 4,    Instant Pot BBQ Baby Back Ribs バーベキューベイビーバックリブ
March 7,    Salted Oatmeal Cookie 塩味オートミールクッキー
March 10,  Lobster Salad ロブスターサラダ
March13,    “Roman” Gnocchi ローマンニョキ
March 22,   Duck Tender Cutlet and Arancini 鴨ささ身のカツレツ
March 25,   Mary Walsh’s Currant Cake マリーウオルシュのカラントケーキ
March 28,   St. Patrick’s Day Dinner, Lamb Chops and Cabbage with bacon セントパトリックのディナー

April 2024
April 6,    Pumpkin “Kabocha” salad カボチャのサラダ
April 10,    Mini Fruit Galettes ミニフルーツガッレト 
April 21,    Spinach Soufflé (easy version) ほうれん草のスフレ 
April 30,    Frangipane Rolls フランジパンロール 

May 2024
May 13,    Pickled Micro Cucumber and Daikon 小さなキュウリと大根のピクルス 
May 15,    Steamed Carrot Buns with Ginger Custard 人参蒸しパン生姜カス... 
May 18,    Braised Eggplant with Oyster Sauce 茄子と椎茸のオイスターソース炒め
May 21,    Creamed Spinach with Cauliflower Puree カリフラワーピュレのク
May 24,    Anchovy Salad アンチョビサラダ
May 27,    Daikon Steak and Two Appetizers 大根ステーキ
May 30,    Focaccia Bread Baked in Breville Pizzaiolo Indoor Pizza Oven 

June 2024
June 2,    Steak and 2004 Joseph PhelpさんInsignia ステーキディナーと2004 インシグニア
June 5,    Gyoza made with New Round Gyoza Skin 日本風の餃子の皮で作った餃子 
June 8,    Filled Wool Bread 毛糸のパン 
June 11,    Shrimp Shumai 海老焼売 
June 14,    Pumpernickel Boule ドイツ黒パン 
June 17,    Ice Breaker “Summer” Sake 玉川アイスブレイカー酒 
June 20,    Carrot Panna Cotta 搾りたて人参ジュースのパナコタ
June 23,    Miso-marinated Firefly Squid ホタルイカの味噌焼き 
June 26,    Wood Ear Mushroom and Wakame Salad 木耳とわかめの和物 
June 29,    Nine “Otoshi” Appetizers お通し九種類

July 2024
July 2,    Egg roll 春巻き
July 5,    Red and Green Udon “Pasta” with Prosciutto 生ハムのせ赤と緑のうどんパスタ
July 8,    Pizza Made in Indoor Electric “Pizzaiolo” Pizza Oven 
July 11,    Garlic Chive Dumpling ニラ頭饅 or 韮菜万頭
July 14,    Mitsuba ミツバ 
July 17,    Dassai 45 and Dassai blue comparison 獺祭45とDassai Blue 50 飲み比べ 
July 28,    Cucumber in soy sauce 胡瓜の醤油漬け
July 31,    Tofu, Egg and Garlic Chives Stir Fry 豆腐ニラ玉、木耳入り

August 2024
August 9,    Home Coffee Roasting 緑コーヒー豆の自家焙煎 
August 12,    Icelandic Pumpernickel (Rye) Bread アイスランドのライ麦パン

September 2024
September 2,    Smelt Fry シシャモフライ
September 5,    Pesto Blini ペストビリニ 
September 8,    Yakitori de le Canard 鴨ささみで焼き鳥 
September 11,    Vegetables in Cold Broth 冷製のトマトの煮浸し 
September 14,    Pesto Blini Prosciutto Cheese Sandwich ペストビリニの生ハムチーズサンド
September 17,    Chicken Tender Fry with Salted Plum Sauce and Perilla ささみの梅大葉揚げ 
September 21,    Simmered Dried Daikon Threads 切り干し大根の煮物 
September 24,    Fresh Corn Blini コーンビリニ 
September 27,    Stir-fried Eggplant and Shiitake in Oyster Sauce 茄子と椎茸のオイスターソース炒め... 
September 30,    Mashed Potato Blini マシュポテトのビリニ

October 2024
October 3,    Five appetizers お通し5品
October  10,    Hen-of-the-Woods Grilled Cheese 舞茸のチーズ焼き
October 13,    Strawberry Blini いちごビリニ 
October 16,    Enoki mushroom frittata エノキ オムレツ/フリッタータ 
October 19,    Kabocha salad カボチャサラダ 
October 22,    Matsutake (from Weee) Touban-yaki 松茸の陶盤焼き 
October 25,    Black Cod Marinated in Saikyo miso 銀鱈の西京(味噌)焼き
October 28,    Egg-wrapped Kabocha カボチャの黄金焼き 
October 31,    Almond Olive Oil Cake アーモンドオリーブオイルケーキ

November 2024
November 3,    Hiyaoroshi Sake Dewanoyuki “Sho-nai Bijin” 出羽ノ雪 冷やおろし庄内美人
November 6,    Hiyaoroshi Sake “Shichi Hon Yari” 七本槍 純米ひやおろし 
November 9,    Prosciutto-wrapped Haddock 生ハム巻きハドック (コダラ) 
November 12,    Marinated Chicken Tender Cutlet 鳥のささみのカツレツ
November 15,    Crispy Enoki Mushroom エノキのパリパリ焼き
November 18,    Bagel ベーグル 
November 21,    Chestnut Apple Soup クリとリンゴのスープ 
November 24,    Norwegian Mackerel Teriyaki 冷凍ノルウエイ鯖の照り焼き 
November 27,    “Imo-ni” Stew famous in Yamagata 芋煮庄内風 
November 30,    Matsutake and beef cooked in an Aluminum Foil Pouch 松茸と牛肉のフォイル焼き

December 2024
December 8,    Chestnut olive oil bread 栗とオリーブオイルケーキ
December 11,    Marinated Tofu and Egg Sir fry 味付け豆腐の卵炒め 
December 16,    Braised daikon with carrot, wood ear, and fried tofu 大根と人参の炒め物
December 19,    “Taco Carnitas”-ish タコ カルニタもどき
December 21,    Tofu in Warm Broth ミニ湯豆腐

Thursday, July 20, 2023

Roasted pepper blini ローストパプリカビリニ

We recently got a bag of assorted bell peppers from Whole Food. This time, the bag contained 2 red, 2 yellow and 1 orange peppers. As before, I roasted/baked them in our toaster oven (450F for 30 minutes turning occasionally and then placed them in a Ziploc bag for 20-30 minutes or until cool enough to handle). I removed the stem ends, skin, seeds and ribs. We were pondering how to use this when my wife found an interesting “blini” recipe using roasted pepper. (The original recipe calls for red peppers in a jar while we were using fresh peppers.) We had both yellow-orange and red peppers but we decided to use the yellow. The flavors appear to be the same regardless of the color. The resulting blini has a nice roasted pepper smell. We ate this for breakfast, and it does have a distinctive roasted pepper flavor.


For the evening, we used the roasted pepper blini with onion and chive cream cheese spread, smoked salmon and ikura salmon roe garnished with dill. We did not taste much of the roasted pepper flavors since the other items have such strong flavors. For the smoked salmon and salmon roe combination, in the future we will use our regular buck-wheat blini.


I asked my wife to take over as ususal.

Ingredients: (makes 7 blini)
4 oz. roasted yellow (or red) bell pepper, stem end, seeds, ribs and skin removed
2 tbs melted butter
1/4 cup cream
2 large eggs, beaten
2/3 cup all-purpose flour
1 1/2 teaspoon baking powder
1/2 teaspoon kosher salt

Ingredients (X2) makes 14 blini
8 oz. roasted yellow (or red) bell pepper, stem end, seeds, ribs and skin removed
4 tbs melted butter
1/2 cup cream
4 large eggs, beaten
1 1/3 cup all-purpose flour
1 Tbs baking powder
1 tsp salt

Ingredients(X2.5) makes 17 blini
10 oz. roasted yellow (or red) bell pepper, stem end, seeds, ribs and skin removed
5 tbs melted butter
1/2 +1/8 cup cream
5 large eggs, beaten
1 2/3 cup all-purpose flour
3 3/4 tsp baking powder
1 1/4  tsp salt

Ingredients(X3) makes 21 blini
12 oz. 1 1/3 cup roasted yellow (or red) bell pepper, stem end, seeds, ribs and skin removed
6 tbs melted butter
3/4 cup cream
6 large eggs, beaten
2 cups all-purpose flour
1 Tbs + 1 1/2 tsp. Baking powder
1 1/2 tsp salt

Directions:
In a food processor, puree the bell pepper until smooth; scrape into a medium bowl. Add the egg, the melted butter and cream, then add the flour, baking powder and salt and whisk until well blended. (You may need to add more liquid so the batter is the consistency of pancake batter.)

In a cast iron platar, melt 1 tablespoon of butter. Use the melted butter to grease each of the platar cups before adding the batter . Pour the batter into the cups until they are 1/2 full. Cook over moderately low heat, turning once, until set, about 3 minutes per side. Repeat with the remaining butter and batter.


This is a good blini but we like it best for breakfast as though it is crumpet.

Tuesday, November 29, 2022

Ikura and smoke salmon appetizer イクラと冷製スモークサーモン前菜

 We have been getting keta-slamon roe “Ikura” from Vital Choice. The available packages vary in size; sometimes only a tray of one kilograms is available and other time 6oz jars. In any case, we like keta-salmon roe the best among other trout and salmon roes. Our most common way to serve ikura is on blini with cream cheese and smoked salmon. This time, only small amount of ikura was left, so we made cream cheese wrapped with smoked salmon topped with ikura placed on a slice of cucumber.


This had most of the flavor and mouth feel of the blini. (Can’t beat the lovely salty burst of the salmon roe). But the cucumber was much less filling than one with blini.


Tuesday, September 20, 2022

Philadelphia (Philly) rolls "Hosomaki" 細巻きフィラデルフィアロール

Although I have posted  Philadelphia rolls (or Philly rolls) 6 years ago, it was a medium sized (chumaki 中巻) and the nori outside (omotemaki 表巻き). I also said in that post that this could be a thin roll with the rice outside (Hosomaki 細巻き and Uramaki 裏巻き) like California rolls. So this is exactly that version. The reason I made Philly rolls is that the type of smoked salmon we got from Vital Choice which was called "wild salmon lox" was sliced a bit too thick and did not have much of a smoked flavor so it didn’t work well with our usual smoked salmon dishes such as blini, smoked salmon and ikura dish. I made sandwiches using this lox with avocado and cucumber on croissants smeared with cream cheese one side and mayo on the other which was quite good. A few days later I made these Philly rolls for an ending "shime" 〆 dish in the evening. 


I made two rolls. The first one (upper row) came out better. For this, we made fresh rice and made the sushi rice using a Japanese cedar "hinoki" 檜 vessel  called "Hangiri" 飯切りor sushi-oke 寿司桶. We brought this so many years ago when we visited Kiso 木曽 but amazingly it still smells of Hinoki wood. In any case, this Philly roll was made exactly like California rolls but instead of crab meat and avocado, I used lox, cream cheese and cucumber. I also sprinkled the outside layer with white sesame as in California rolls. In this preparation, the lox from Vital Choice tasted great.


As a small side dish I served simmered tender octopus leg 蛸の軟らか煮 (shown below).


I also served cucumber asazuke 胡瓜の浅漬け with salt broth soaked sugar snap スナップ豌豆の塩びたし.


This was a rather large shime dish for us but it was very good and both of us managed to finish it. (Such a hardship…not!)

Tuesday, August 9, 2022

Watari bune Daiginjo 渡船純米大吟醸

This sake “Watari bune, junmai daiginjo” 渡船純米大吟醸 was a gift from a friend for a recent occasion. This is a really great sake with a slightly effervescent feel and fruity, crisp but very complex flavors. This should definitely be drunk cold. This sake is brewed by “Fuchu-homare” 府中誉 which is located in Ibaragi prefecture 茨城県. The sake rice or “sakamai”  酒米 used for this sake is also called “Watari bune” which is supposedly a very rare near-extinct sake rice which relatively recently has been revived. The famous and most popular sake rice “Yamada nishiki” 山田錦 is reportedly a descendant of this rice. Also the name “Watari bune”  渡船, which means a  “ferry” or “ferryboat”, is very fitting for sake from Ibaragi which is known for Tone river 利根川 and its estuaries criss crossing the flat delta before pouring into the Pacific ocean.This area also contains large lakes. (Such areas rich in water ways and lakes are called “Suigou”  水郷). Such topography would require use of ferries i.e. “Watari bune” to navigate the water ways.


In any case, a great sake calls for great “Tsumami” ツマミ or small sake snacks. We were lucky to get fresh unprocessed fresh “uni” sea urchin in salted water from Maruhide 丸秀 called “Ensui uni” 塩水ウニ. We also recently got frozen blocks of Bluefin tuna from Great-Alaska-Seafood. We served these items on recently acquired Japanese plates. The soy sauce in the small round plate is also a special “sashimi” soy sauce.   


I made the tuna three ways (two shown directly below. One came later). The first was straight sashimi (upper left in picture). The second was “Negi-toro” ネギトロ with slices of cucumber (lower left in picture). We enjoyed this negi-toro as a kind-of hand roll on a small sheet of nori (not shown) with the cucumber slices (shown).


This uni from Maruhide (shown upper right in the picture) is not processed with the usual “alum” and only soaked in salt water with salinity consistent with seawater. As far as I can tell, Maruhide is only source in the U.S. where we can get this. As an aside: my wife can sometimes taste the alum on uni. She immediately passes her portion to me when this happens. Not exactly a hardship for me, since I can’t taste alum. (She can also detect the alum used in some brands of baking powder).  The consistency of the uni in salt water is slightly softer than alum processed ones but it is absolute pure fresh uni. With just a little bit of wasabi and soy sauce and a sip of the sake, you cannot get anything better.


We needed a few more “Tsumami” to go with this sake. We had more tuna, this time “zuke” tuna 漬けマグロ, in which tuna slices are marinated in x4 concentrated Japanese noodle sauce for few hours so.  I served it with wakame and cucumber dressed in sumiso sauce 胡瓜とわかめの酢味噌あえ (left). Since my wife made blini a few days ago and we had Keta salmon ikura roe thawed, we made our usual “blini topped with cream cheese, smoked salmon and ikura” (right).


All these items are again perfect accompaniment for this wonderful sake.

Wednesday, August 3, 2022

Ikura from Vital Choice バイタルチョイスからのイクラ

 I am always looking out for alternative sources of sashimi items such as "ikura" salmon roe. Depending on the source, the quality and price vary a lot. Our Japanese grocery store almost always has it but the per ounce price is very high. Other sources often have Ikura but the roe are a smaller size with a smaller diameter.  We like salmon roe with a 5 mm diameter rather than the smaller ones. Sometimes the roe are identified as trout roe, but often the type is not specified so it is very difficult to know exactly what type of salmon roe we are getting. We learned "keta" or "chum" salmon roe fits our preferences best. Recently we have gotten frozen keta salmon roe from Vital Choice. It came as a package of three, 7 oz. glass jars. The price was about average, and the quality was quite good. The 7 oz jar size was also a good size for us because we could generally finish it in 5 days. We have prolonged the shelf life of ikura by adding a marinade. (I use a mixture of x4 concentrated 'mentsuyu" Japanese noodle sauce and sake). Since we used up three of the jars, I went back to order the same but the only choice at that time was a 2 lb. (almost 1 kg) tray. I thought that would be way too much for us to use up before it went bad unless we could somehow divide up the quantity into smaller portions. But the offer was too good to pass up so I took a chance and ordered it. Turned out the pack could be subdivided (see discussion below).

 Ikura can be used many different ways. The below is an appetizer of home-made blini, cream cheese, smoked salmon, ikura and chopped chives.


Another way we like it is as a topping for cold "chawan-mushi" Japanese savory egg custard.


The picture below shows how we received the package (#1). It was packed with dry ice and solidly frozen. Once I opened the lid, I saw the package was divided into 4 compartments. Each compartment was about 1/2 lb. or 8 oz). Fortunately for us, using a small plastic spatula, ikura in one compartment could easily be removed (#3). I vacuum packed three blocks (#4) and placed them in the freezer. I let the remaining block, thaw in the refrigerator for a few hours (#5).  Although the center was still solidly frozen, the peripheral portion started thawing and crumbling away from the still frozen section. I placed the crumbled portion into a separate plastic container with an airtight lid and put it back in the freezer. 


I left the remaining ikura in the refrigerator to thaw. The amount was about 1/4 lb (or 4 oz). It was just the perfect amount for us to use up in a few days. I refroze the portion which was semi-thawed (#6). Later I thawed this and it looked and tasted fine. So, buying 2 lbs of Ikura is very feasible…it was quite good, I might add. 

Monday, March 21, 2022

Bluefin tuna chunks 黒鮪チャンク

Recently while browsing online purveyors of sashimi-grade tuna I noticed advertisements for bluefin sashimi tuna "imperfect cuts" or " chunks". I surmise this may be something to do with increased popularity of "poke" which, unlike Japanese sashimi, does not require uniform sized blocks of fish. Since I myself make dishes such as "imitation negitoro" 擬制ネギトロ, and "namerou", which do not require perfect cuts, I decided to try it. This one came from our old, tried and true Catalina Offshore products. As you can see in the picture below, there are several chunks of frozen bluefin tuna. The majority is “akami” red  meat and some are “chu-toro” medium fatty. I divided the shipment into three portions. I thawed one in the refrigerator and vacuum packed the other two and put them in the freezer. Since they are chunks, it is very easy to apportion whatever amount I would like to thaw and prepare.


I decided to taste the tuna as sashimi first. I sliced one chunk which looked like chu-toro 中トロ and another which looked like akami 赤身. Since the shipment also included Ikura salmon roe いくら and my wife made blini a few days ago, we served a blini topped with cream cheese (home made), smoked salmon, ikura and chopped chives.


Both the toro and akami were very good. For us, this is just perfect, just a little bit of tastes.


This blini with ikura is one of our favorite appetizers. We tried caviar but we like ikura better. This ikura (came frozen) also from Catalina tasted very good and fresh.
  

This combination of appetizers can go well with both red wine or sake but on this occasion, we had cold sake. After this, we had imitation negitro made from akami chunks with cucumber slices and nori. I also served our usual “yamakake” after marinading the akami cubes for 30 minutes. The yamakake was quite filling. 

So our assessment of the bluefin sashimi-grade tuna chunks is very positive. They are very reasonably priced and tasted good. They can be served as sashimi. Even though the slices are not perfect, they tasted perfect.


One of the cherry trees in our backyard bloomed almost overnight. This particular cherry tree has really grown since we removed the enormous ash tree that over shadowed it. We had to remove the ash because it succumbed to the "emerald borer". This cherry tree always blooms first (we have three cherry trees including the replacement for our old tree which was destroyed during the Nor'Easter storm in 2018). As the "first bloomer", it is in step with the cherry trees at the tidal basin; blooming at about the same time. The remaining trees in our yard are more leisurely in their approach; blooming about 1 week later. These blossoms are really a treat. Finally Spring has sprung.

Friday, June 18, 2021

Crumpet version 2 クランペット 第二弾

After we made blini using a newly rediscovered cast iron pan (supposedly called a "platar"), we challenged ourselves to use it to make crumpets. The last attempt at crumpets was less than successful; those crumpets did not develop the "hole-y" characteristic which makes a crumpet crumpet. This time with a new recipe and the newly rediscovered cast iron pan, we succeeded in making perfect crumpets. We served them with melted butter and a small amount of honey.


The batter is rather runny almost the consistency of pancake batter. In our previous version we used English muffin rings, as recommended in the recipe we were using, but the batter seeped out at the bottom of the ring. We had no such problem with our cast iron pan.


The new recipe had instructions as to how to control the heat to develop multiple holes as shown in the second and third pictures. You can see that while cooking, bubbles developed and then popped creating nice holes.


Ingredients:

1 times the recipe (about 14 crumpets)
300 g. (2 cups) AP flour
400 ml. (1 1/2 cups) warm water
1 tsp. Salt
1 tsp. Sugar
2 tsp. Baking powder (The recipe said baking soda doesn’t work as well)
2 tsp yeast
2 tbs. warm water

1 1/2 times the recipe (about 21 crumpets)
3 cups AP flour (2 cups AP and 1 Cup +2 Tbs. Cake flour) 
600 ml. warm water
1 1/2 tsp. Salt
2 tsp. Sugar
3 tsp. Baking powder (The recipe said baking soda doesn’t work as well) 
3 tsp yeast
3 tbs. warm water

2 times the recipe (this is the recipe I’ve been using) 
600 g. (4 cups) AP flour (or 2 cups AP and 2 cups + 1/4 cup  Cake flour) 
800 ml. (3 cups) warm water (or buttermilk or regular milk)
2 tsp. Salt
2 tsp. Sugar
4 tsp. Baking powder (The recipe said baking soda doesn’t work as well) 
4 tsp yeast
4 tbs. warm water (1/4 cup)

(Use second to largest scoop not completely filled)

Directions:
Bloom the yeast in the warm water. Put the flour, water and salt in the bowl of an electric mixer and beat on speed 5 for 1 minute until smooth paste forms. Add the yeast mixture, sugar and baking powder and mix on speed 5 for another 30 seconds. Cover with cling wrap and put in a warm place for 15 to 30 minutes. The surface should get foamy but it will only increase in volume by 10 to 15 %.

Pre-heat the platar and coat the cups with melted butter. Using a small ladle scoop the batter into the cups. Heat control is key to crumpet success. Stronger heat is needed to begin with to get the holes bubbling. Cook on the higher heat for about 1 1/2 minutes until bubbles start appearing. Then lower the heat so the crumpet cooks through without burning the base, but strong enough to make the bubbles pop. Cook on the lower heat for about 1 minute until the bubbles start popping. Bubbles will start to pop around the edges first then in the center. Finally, lower the heat further and continue cooking for 2 1/2 to 4 minutes until the surface is set and it is clear no more bubbles will be popping. (According to the recipe, at this stage the final bubbles could be popped with the help of a skewer.)  Some wisps of smoke from the butter around the rings may appear. If there is a lot of smoke it means the skillet is too hot. Flip them over to cook the other side for 20 to 30 seconds to give it a blush of color. Cool on a wire rack. 

These crumpets were much better than the first batch we made. They got even better after the second day. We tasted them just out of the pan and the outside was crunchy but the inside was kind of wet and doughy. We initially thought they may not have been cooked through. But by the next day the insides had firmed up and were nicely chewy. The flavor was nicely accented with the taste of browned butter. We toasted them in the toaster oven and served them with melted butter and some honey. Mighty fine! 

Sunday, June 6, 2021

Raised Buckwheat Blini cooked in a “platar”

After making the blueberry buttermilk pancakes, my wife was leafing through the pancake section of the newer (1997 version) “Joy of Cooking” (JOC) cookbook when she found a reference to something called a “platar”. It was accompanied by a drawing of the device and the description; “a platar is a cast iron flat pan with seven round indentations each about 3 inches wide and 1/2 inch deep especially for making blini or other small pancakes”. A bell went off in her head. She immediately recognized the platar as the cast iron pan that has been floating around with our other cast iron griddles and frying pans for years. (Shown in the picture below.) 


We have had it for so long we are not sure how we acquired it and had no idea how it should be used. We vaguely thought it could be used to make biscuits but after some experimentation years ago we discovered that didn’t work. So it resided, taking up room, at the bottom of the stack of various sized cast iron frying pans in a drawer under the stove. She was absolutely delighted to finally find the purpose of the pan as well as the blini recipe on the next page of the cookbook. So this was our project one weekend.


Digression alert: At one time, we were into caviar and we made blini many times. We already had our platar at that time but obviously we did not know its purpose so we made the blini in a frying pan. By-the-way, we looked up (=Googled) the word “platar” and the only reference we could find was a listing in a forum where somebody who, like us, had read the section about platar in JOC asked what it was. The answers appear to suggest nobody knew. Although we could not find anything with the word “platar”, we did find a cast iron skillet that lookedexactly like our platar at Amazon.It was called “SIMLAY CO. Cast Iron Baking Pan”. The advertisement said it could be used to make many things; muffins, biscuits, eggs. Spoiler alert: We tried that years ago...somewhat less than successful. 

We did not have caviar the weekend we used the platar, but we did have "Ikura" salmon roe so we used that to top the blini. (We do not stock caviar but we do try to keep a supply of "Ikura' in the freezer).  The second picture shows the final (blini, sourcream, egg, ikura) dish with a garnish of chopped chives and marinated strawberries that we served that day for lunch. 


We had this with our usual second cup of coffee for the day; "macchiato". (The first cup was cappcino or more like cafe latte). 


I am sure there must be many interpretations of macchiato but our interpretaion is a single shot of espresso topped with 1 tsp. of frothed cream.


As usual my wife made the batter for the pancake and I cooked it. Since I have never used a platar, it was a learning experience. The blini came out better in the later batches. I ask my wife to provide the recipe.


Ingredients:
For Blini (makes about 21 blini)
1 1/2 cup milk
4 Tbs. (1/2 stick) butter
2 tsp. yeast
2/3 cup AP flour
2/3 cup buckwheat flour
2 Tbs. sugar
1 tsp. salt
3 large eggs, lightly beaten

For Blini (recipe X2) (mix in the 6 cup pyrex mixing cup so the batter can be poured rather than scooped into the cooking cups.) 
3 cup milk
8 Tbs. (1 stick) butter
4 tsp. yeast
1 1/3 cup AP flour
1 1/3 cup buckwheat flour
4 Tbs. sugar
2 tsp. salt
6 large eggs, lightly beaten

For topping (everything is to taste and depends on the number of pancakes being served. Also anything can be used. This is just what we came up with.)
sour cream (to taste)
2 eggs, scrambled
1 Tbs. Ikura (salmon eggs) or caviar
Chives finely chopped

Note: Use smallest ladle, Don’t make them too thick.  (Or conversely make them thick enough that they can be cut in half horizontally. That will shorten the cooking time).


Directions:
For the Blini: Melt the butter in the milk. Let it cool to about 105 to 115 degrees. Mix the dry ingredients (yeast through salt) in another bowl. Pour the cooled milk mixture over the dry ingredients mixing until just combined. Cover the bowl with plastic wrap and let it rise in a warm place until doubled in volume (about 1 hour) (#1 in the 3rd group of pictures). Once it has risen either make the pancakes immediately or refridgerate covered for up to 24 hours. (We made the batter after dinner and refridgerated it over night). If refridgerated let it stand at room temperature for 20 minutes (#2). Then deflate the batter and whisk in the  eggs lightly beaten.

Now, I am providing the details of how I cooked blini in the platar. This is for our future reference because this requires some finesse. First, I took out the planar and washed it with hot water (no soap), dried it by heating it on the stove and coated each of the 7 wells with olive oil using a paper towel (#3). I preheated the pan on low flame for 5 minutes then used a small ladle (second smallest ice cream scoop) add the batter, half filling the wells (#4). I continued to cook until the surface of the pancake showed bubbles and looked dry (5-7 minutes). Then came the challenge of flipping them. According to my wife,  the directions in the JOC said flip the pancakes over using a skewer. But that proved entirely too simplistic. After some experimentation I came up with a method of loosening the blini by running the tip of a dinner knife around the perimeter of the well, then inserting the knife tip under the bottom of the blini to pry it loose. Then with the knife under the blini and a bamboo skewer inserted into the top I flipped it (#5). As I repeated the process I got better and could flip the pancake without damaging the side. But I noticed that the 6 wells surrounding the center well had uneven heat and only the outer half got browned (#5). So with the next batch, I released the blini before they were ready to flip and turned them180 degrees in the well then cooked them for a few more minutes before flipping them over. In the next batch, the first side was more evenly browned (#6).  In any case, when all was said and done, we had at least a few perfect blinis (#7= top and #8=bottom).


I topped one of the “perfect” blini (#1) in the 6th set of pictures, with sour cream (#2), scrambled eggs (#3), "Ikura" salmon roe and finely chopped chives harvested from our herb garden (#4). 
 

This is the height of decadence. The blini had a soft thick texture and a very pleasing robust rustic flavor from the combination of buckwheat flour and yeast. The sour cream, eggs and salmon caviar were an excellent combination with complementary creamy texture. The burst of saltiness from the ikura at the end of the bite was a perfect finale. This is how we will be making blini in the future. Next stop crumpets in the platar. 

Saturday, August 16, 2014

Kelp caviar 昆布キャビア

Many years ago, we came across a "vegetarian" caviar. This was produced by a now-defunct company in the Los Angeles area and, If I remember correctly, was invented by a cardiologist. I am not sure what it was made of (probably seaweed like the current version we are showing here). We were rather impressed with the similarity in appearance and texture to real caviar. When we ordered caviar last time (from finecaviar.com), I noticed they also had "Kelp" caviar and ordered some along with other items. We served the kelp caviar on homemade blini, with homemade creme fraiche garnished with the green part of scallion (we did not have any chives).


This kelp caviar came in a 3.5 oz glass jar. This is said to emulate the appearance and taste of sturgeon caviar.


When I opened it, I noticed it had more liquid than real caviar or the previous vegetarian caviar we had.


I drained the kelp caviar in a fine meshed strainer as seen below. After which it looked more like sturgeon caviar. By itself, it tasted like kelp (of course this is made of kelp) and lacked the good "pop" mouth feel of real caviar.


However, when this was placed on top of the blini with creme fraiche (see the first picture), the kelp caviar tasted more like real caviar. This was certainly not bad for fake caviar and will be very handy if you have vegetarian guests. Apparently other vegetarian caviar products are also available. Although we must say we prefer real fish eggs and caviar, these vegetarian caviars are cheaper, available year round, keep longer, and taste better than you think. I got the idea for a future dish; serving salted kelp 塩昆布 on blini and creme fraiche which may taste similar to caviar although the texture maybe off.

Tuesday, May 6, 2014

Decadent breakfast with caviar, scrambled egg and creme fraiche キャビアと卵の豪華版朝食

Caviar is  not an "Izakaya" item but we tend to get carried away sometimes. Since the last time we had real Beluga caviar was ions ago, we decided to get both American Sturgeon as well as Beluga for a taste comparison and to refresh our memories. As before we got these from Fine Caviar.

This is American sturgeon. According to the fine caviar web site;

"Hackleback Sturgeon - (Scaphiryhnchus platoryhnchus) is indigenous to the Missouri and Mississippi River systems"


So this one is from wild-caught sturgeon. As you can see the grain of the caviar is fine and the color is black. The flavor is very subtle but not fishy with a nice salinity. The crunch and pop are great.

This is imported Beluga caviar which appears to come from "farm raised" sturgeons in "Eastern Asia" (which ever country that may be). Again quoting form the website;

"The eggs of the Huso Dauricus Sturgeon are raised in advanced farms located in Eastern Asia."


As you can see the grain of the caviar is much larger and the color is gray. In terms of the flavor, the difference is very subtle. We are not sophisticated enough to say one is better than the other or Beluga is worth the extra expense.


In any case, here is Beluga caviar on blini, with homemade creme fraishe and chives, which was wonderful.


Next morning, we decided to go past just a scrambled egg breakfast. So we put the eggs on blini and added American Sturgeon caviar.


Fish eggs for breakfast may not be everybody's idea of a good breakfast but this combination was quite good and luxurious, at least, to us.

I think we had enough caviar to last us for a while.

Wednesday, March 19, 2014

Blini with sour cream and scrambled eggs

This is continuation of the blini-caviar saga. What is blini but a humble buckwheat pancake? What is caviar but a form of egg? When are pancakes eaten but for breakfast? Hence we came up with the scrambled egg, sour cream breakfast blini. In retrospect, we could have added crumbled crispy bacon to add a bit more saltiness but that would probably have made it too deadly.
IMG_1485
We just layered the blinis with sour cream and then soft scrambled egg, sprinkled some salt and garnished with young shoots of Italian parsley we are growing on the window sill.
With scrambled eggs, the flavor combination is quite different. It is, nonetheless, a perfect breakfast which goes well with our first cup of cappuccino made with our home expresso machine (We do also roast green coffee beans at home).